
How to install surveillance cameras and view them online
 Protecting our houses from burglars should be on top of our to-do list. Nowadays, with increasing crimes, we tend to have a lot of problems with strangers. Learn how to install surveillance cameras and view them live all the time from a distance with this small guide.
Apart from alarm systems (which are the most efficient, to be precise) technology has an alternative option; surveillance cameras. I’m sure most of you know that cameras allow the house/company owner to view live or playback every movement through them.
Technology advances every day, offering us the best security options. Almost every security product provides a variety of choices. Network abilities, Playback, Motion sensors, HD to FullHD, 80-90° field of view fixed cameras (or 360°rotative), intrusion detection and much more.
– Also learn: How can a residential locksmith help.
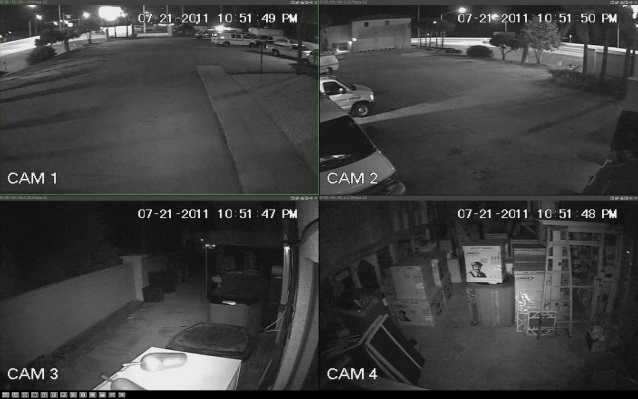
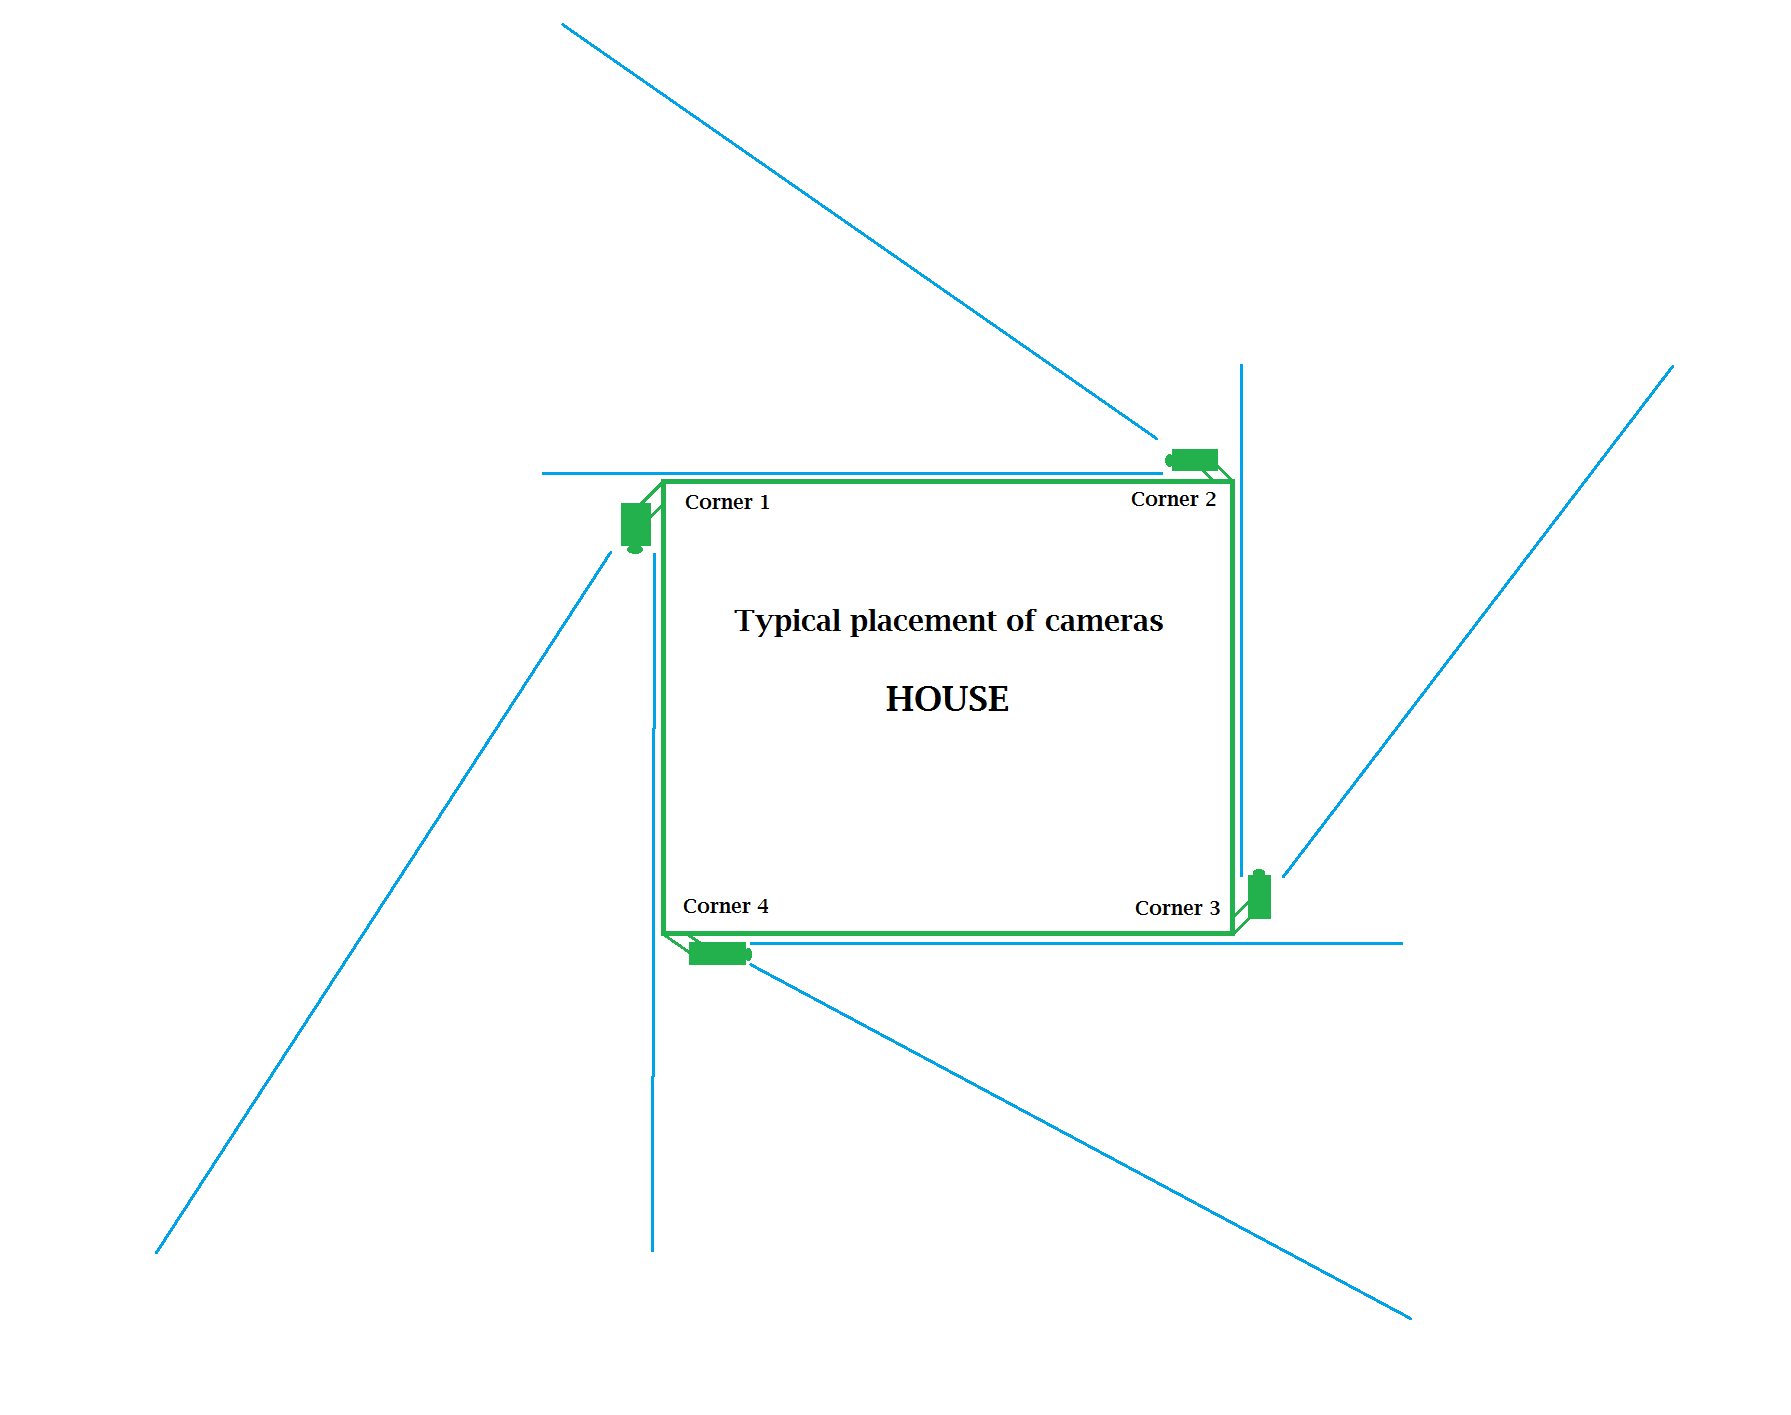
Usually, a house that has a square form requires four cameras. That way, you will cover every side of your house.
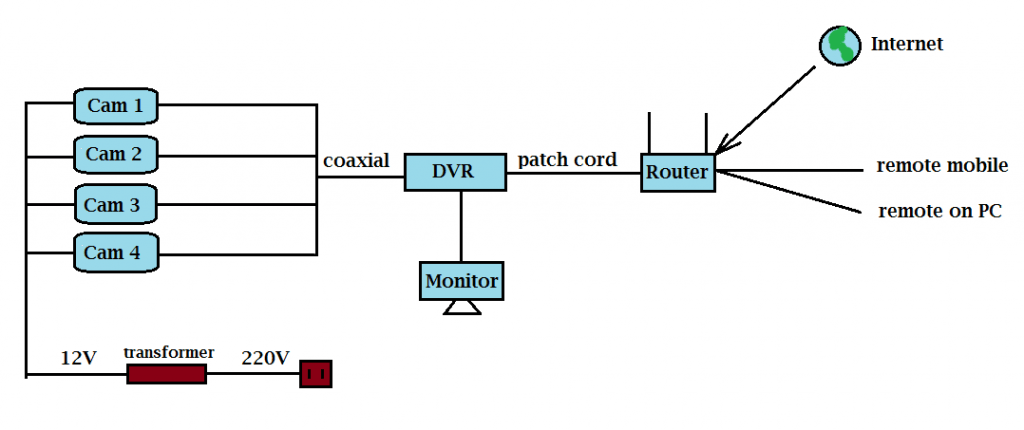 Installing cameras is not hard, but it does need some tools, cable, coaxial connectors, etc. Most camera packages include the following pieces of equipment:

- A DVR – It does everything. It’s the brain that shows you images, do all the settings for network, mount an HDD for it to record everything, it’s where all the other ends of coaxial cables and connectors get to.
- Coaxial cables – Some might come already come with connectors, and some might not. Some cables come with extra wires to power up cameras, and some might not. If they don’t you need a standard cable 2 x 1.5 (+ and -) or thicker and special connectors (dad type) that connect with the cameras – The end of the cable connects to the transformer.
- Cameras (indoor or outdoor type – must choose accordingly) – Most cameras have a power consumption less than 10W. It’s required a power transformer that can relay the input of 220V to an output of 12V (or 24V for Speed Domes – the rotative cameras). An Older Version of cameras used 220V into their circuit. They also have an HD or FullHD quality (depending on the company that sells them – The cheaper the package is, the lower the resolution of the cameras). We recommend HD or FullHD for best results.

Sometimes, people want to supervise their children so they can feel safe. For that, I recommend wireless cameras that use a microphone and wireless capabilities. That means the parent can supervise his/her children remotely.
Before you mount the cameras on a surface, make sure they work the way you want them to. Set up the equipment and test it thoroughly before installing.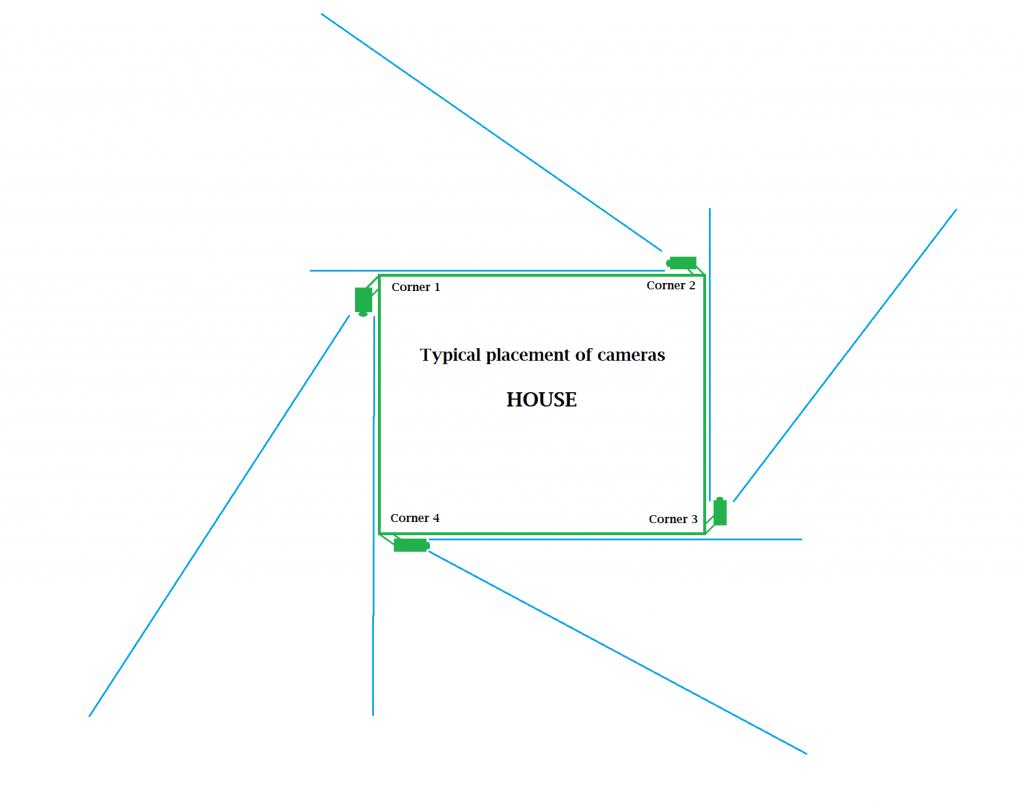
Surveillance packages include a manual with information about camera installation. Follow those steps, and it should be okay.
Without further ado, let’s get to the online explaining part. Every surveillance system, if at least six years old and not more, offers the standard ways to connect it to view online.
Setting it online is not hard at all. I will tell you how to do it.
The simplest form is like the following:
- Access your router first by typing its local gateway IP into a browser. This should be either 192.168.0.1 or 192.168.1.1. Once connected to the interface, remember the gateway IP number and proceed to the next step;
- Power up your DVR and plug in a PC monitor through VGA or HDMI cable connectors. Also, connect a network patch from DVR to a router;
- Use your mouse to navigate through the wizard at first start-up;
- Set the password (crucial). This is to protect yourself against hackers and unknown guests;
- Enter the menu of the DVR, navigate to Network settings (it should appear obvious somewhere);
- Make sure of the following parameters (we will take an example of router’s gateway being 192.168.0.1):
- DHCP – deactivated;
- Local Ipv4 as 192.168.0.50 (an example, doesn’t have to be 50, choose from 192.168.0.2 to 192.168.0.255);
- Gateway – as 192.168.0.1;
- Subnet mask – 255.255.255.0;
- First DNS is 8.8.8.8;
- Second DNS is 8.8.4.4;
- UPNP set to active;
- Change the ports if required. Practically there are three types of ports. Http, Media, and RTSP. I would change all three categories to Http being 81, Media being 8000 or the closest of the default given by the DVR, RTSP being 554.
- Remember all the settings;
- Get back to the router’s interface by accessing 192.168.0.1;
- Proceed to Port forwarding;
- Add all three ports to 192.168.0.50. Internal and External port of HTTP should be 82, 554 and 8000.
| Name of the service | External port | Internal port | Ip address | External address |
| DvrHTTP | 81 | 81 | 192.168.0.50 | EMPTY FIELD |
| DvrMediaPort | 8000 | 8000 | 192.168.0.50 | EMPTY FIELD |
| DvrRTSP | 554 | 554 | 192.168.0.50 | EMPTY FIELD |
After you apply the settings, try accessing the DVR through the local IP.
Type in the browser the following address: http://192.168.0.50:81
For Remote access, find what’s the IP given by your network provider. If the ISP provided a static IP, input it on any device that is external. For example, http://73.67.126.73:81 .
To find out what static IP the ISP gave, either check it in the router WAN section or by typing in a browser “What’s my IP” and click on the first result.
Verify if there is an android application for the DVR you have purchased and use the Media Port as the main port for that application.
Don’t forget to choose cameras with good IR (infra-red light). Required at least of 20 meters during night-time.
NVR surveillance systems (with PoE) work a little bit differently. It has an internal DHCP for IP cameras to be added through PoE ports. Not only do they receive 12V, but also connects them to the internal address range of the NVR. The networking settings are the same as the DVR’s to connect online.
-To learn more about how to install a surveillance system properly for your home, read my other post, DIY Learn How to Install Home Security Cameras which is a sequel to this post.
-To learn more about how to use the IVMS-4200 (that is similar to other software for security systems) check my other post called Guide for Hikvision IVMS 4200 client software from A to Z
Voice of the people