Installing NSD DNS server on your VPS or Dedicated server

When it comes to installing DNS server on your linux environment, the most popular and recommended DNS server is BIND DNS server. It does a pretty decent job and statistically speaking, it is installed on quite a majority of systems around the world. The most used may not always be the best in every situation. BIND has a huge variety of customizing options but you may not always need it. We have already looked at how to point your domain to your VPS using BIND and now we will look at an alternative to BIND DNS server.
Another thing I learnt through my experience is that BIND DNS server takes approximately 100 MB of your RAM. If you are running a low end VPS, then it is definitely going to hamper performance in peak traffic time. Using a low end VPS also implies that you may not be doing great tasks on it. In this case you can settle for a simpler options.
NSD uses zone files which are exactly similar to BIND. In certain cases you can even use the same zone files from BIND and make your NSD server work. NSD compiles the zone files via “zonec” and creates binary database files with .db extension. This enables fast start up of NSD daemon.
At the time of compiling these zone files, compiler outputs errors which might be causing errors. NSD compiler does not allow the errors to be forwarded to NSD daemon but output them on the console for the user to fix them.
Let us go through the installation steps and get NSD running immediately:
I will be installing NSD on CentOS 6.5. You can install it on any other linux distribution using equivalent commands, the steps remain the same.
|
1 |
yum install nsd |
After installation, we need to configure the files. All the configuration files are stored in /etc/nsd/ folder in CentOS, whereas they are stored in /etc/nsd3/ in Ubuntu an Debian.
|
1 |
vi /etc/nsd/nsd.conf |
Open the configuration file to add in zone files required to be included at the time of execution.
All you have to do is add a couple of lines at the end of the file.
|
1 2 3 4 5 6 |
zone: name: nuclearrambo.com zonefile: /etc/nsd/nuclearrambo.com.db zone: name: second-domain.com zonefile: /etc/nsd/second-domain.com.db |
Now that you have included reference to the .db files, you need to create those files which would contain all the zone information. Do not worry, it is pretty simple!
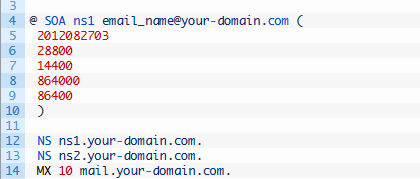
Here is an example template for the zone file.
|
1 2 3 4 5 6 7 8 9 10 11 12 13 14 15 16 17 18 19 20 21 |
$ORIGIN your-domain.com. $TTL 86400 @ SOA ns1 email_name@your-domain.com ( 2012082703 28800 14400 864000 86400 ) NS ns1.your-domain.com. NS ns2.your-domain.com. MX 10 mail.your-domain.com. awstats.your-domain.com 86400 IN A 199.168.136.77 mail IN A 199.168.136.77 www IN A 199.168.136.77 ns1 IN A 199.168.136.77 ns2 IN A 199.168.136.77 * IN A 199.168.136.77 @ IN A 199.168.136.77 |
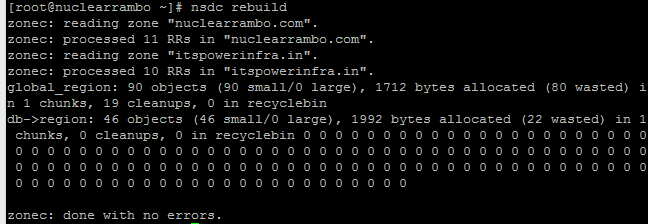
Once you have created your zone files, you must compile them using a command and see if it outputs any error,
|
1 |
nsdc rebuild |
You should get no errors.

NSD rebuild with no errors!
Now you are done installing NSD DNS server!
|
1 2 |
service nsd restart chkconfig nsd on |
This will start NSD daemon and make sure it starts at time of boot.


Can you please send me the kms activator?