How to point your domain to VPS
A major hurdle that people come across when they buy a VPS, is that how do I point the domain to VPS?
Most of us who own websites have started with cheap free hosting. The hosting provider provides us with his own DNS address so that we can use it and point our domain to the server where our website is hosted. But as the traffic increases we move on to VPS and then we realise there is no DNS address, its just an IP. This tutorial will teach you in depth how to point your domain to your VPS IP address.
Requirements:
- A VPS with a dedicated IP address.
- Linux installation (Preferrably CentOS)
- Webmin Control Panel
- A domain (In this tutorial I am using Godaddy.com as my domain registrar)
- Brain and presence of mind
Step1: Assuming that you already have registered domain, go to the Godaddy.com’s domain management panel.
Click on the domain that you want to use.
After you click on the domain, you will get this page, scroll down and you will find a box “Hosts Summary”.
Godaddy Hosts Summary
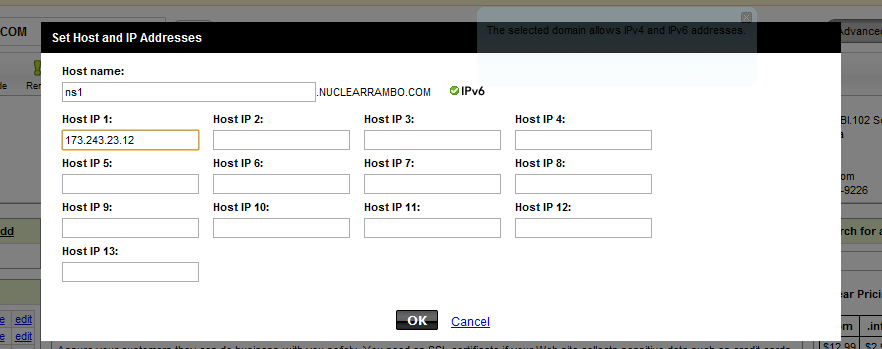
Add NS1 in the host name and add your VPS IP address in the HOST IP1 box.
Save it and AGAIN click ADD hosts, you will get the same box, add NS2 in the host name and then again add the same VPS IP address in the box.
Save the changes.
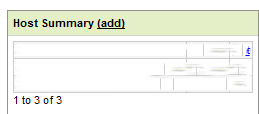
Now, after saving refresh the domain page and you will get the hosts summary box which shows something like this.
Now, whatever you did is called as “Setting the A records of your domain”. The address, NS1. yourdomain.com and NS2.yourdomain.com will now point to your VPS IP address.
Step 3: We have successfully configured the domain registrar’s DNS servers to point the domain to our VPS, but we need to make changes on our server side, so that any requests coming through nuclearrambo.com should be processed correctly by server. For this, we set up DNS zones.
For this step, we need to use webmin control panel. I assume you have already installed webmin control panel, if not I recommend you to do so. Things will become a bit easier to install.
Step 4: Go to your webmin control panel and on the right sidebar click on Servers -> BIND DNS server ->
Step 5: You will see a bunch of icons and below that there is the “Existing DNS Zones”. Right above it, there is “Create Master Zone”.
Click on Create Master Zone.
You will get a box as shown below:
Fill in the “Domain name” , “Master Server” and the “Email address” fields.
Master server: In your VPS control panel, no matter which, you will always have an option to setup a hostname for your server. In my case, I have set the hostname for my VPS as server.nuclearrambo.com. Remember, this has to be done on the VPS control panel provided by the company.
NOTE: Ask your VPS provider to setup Reverse DNS for you. In my case, the company was happy to set me up with the Reverse DNS (rDNS). This will convert the IP address to domain name. e.g. 173.53.23.12 will translate to server.nuclearrambo.com or whatever may be the domain. This is very important.
Step 6: After creating a Master DNS zone, you will be presented with a screen “Edit Master Zone”
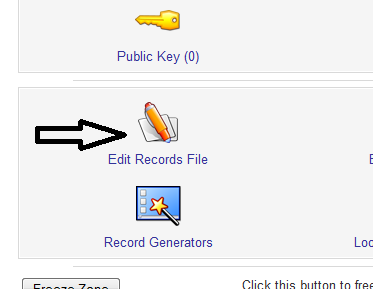
Click on the Edit Records File:
You will be presented with a records file to edit, all you got to do is to copy and paste the code below:
$ttl 38400
yourdomain.com. IN SOA ns1.yourdomain.com. <email_login>.yourdomain. (
1338056881
10800
3600
604800
38400 )
yourdomain.com. IN NS ns1.yourdomain.com.
yourdomain.com. IN NS ns2.yourdomain.com.
yourdomain.com. IN A <YOUR IP>
ns1.yourdomain.com. IN A <YOUR IP>
ns2.yourdomain.com. IN A <YOUR IP>
www.yourdomain.com. IN CNAME yourdomain.com.
mail.yourdomain.com. IN CNAME yourdomain.com.
Replace yourdomai.com with your domain name and email_login with your email you selected. If you selected 1234@yourdomain.com then in email_login you must only write 1234.
After you have set this up, Save this file.
Step 7: Click on the side bar, Servers -> Apache Server ->
Add virtual hosts. Now this step is only necessary if you have multiple domains. Adding multiple domains is pretty much the same method, except for the additional part of adding virtual host in apache server and also creating a new master zone for the other domain. This subject will be covered in another post in future.
Like this post if it helped you. If you need any help regarding this, leave a comment below and I will try to answer you as soon as possible.
So this is how you point a domain to your VPS !
NOTE: It takes about 12 to 24 hours for the domain to start working. It wont work immediately, you must wait for atleast 2 to 24 hours.


Excellent site. Lots of useful info here. I’m sending it to some buddies ans additionally sharing in delicious. And certainly, thanks on your sweat!
hi
what do i need to do to the old name servers i have set in the goddady.com “NameServers” section ? should i delete them ?
FYI, That old name servers were given by the previous hosting provider (before i got my own VPS) which is his own DNS address so that I can use it and point my domain to the server where my website is hosted
Yes you need to delete the old name servers and add NS1..com and NS2. .com
Let me know if you get it working. I will be happy to help you anytime.
Hi
I followed your steps but it is still not working :-(, my domain still does not point to my VPS. Can you please drop me an email (dummies at gmail dot com) so I can show you the steps I used ?
thanks
Hello,
I sent you an email. I will try my best to help you out.