
NEJE DK-BL 1500 laser engraving tool review
Laser engraving can be a fun pass time. If you often create art, a laser engraving machine can help you put that design onto a piece of wood or cardboard. Burning your artwork on a piece of wood gives a very special kind of appeal to it. With two axis motor assemblies coming at affordable costs, attaching a laser to it is no big deal. We all know how 3D printers work. They lay down molten plastic layer by layer and build something out of it. In contrast, the laser engraver burns out material and in turn imprints your design on to a surface.
In the past, owning an engraver or even a 3D printer wasn’t much affordable. Fortunately, the technology progresses and becomes less expensive. NEJE DK-BL 1500 laser engraving machine is a result of technology becoming cheaper.
Construction
The NEJE DK-BL 1500 comes with a moving 1.5W laser head. It moves along the X-axis. The Y-axis movement comes from the base plate. As a result, we get two axis movement from the entire assembly. The laser head has a focus ring that helps in obtaining a fine laser point on the surface. Correspondingly, the focus adjustment should be done depending on the height of the surface being engraved.
The entire moving assembly consists of metal construction. You will find two small stepper motors for controlling the X and Y direction movements. All of this is attached to the body with four large Allen head bolts.
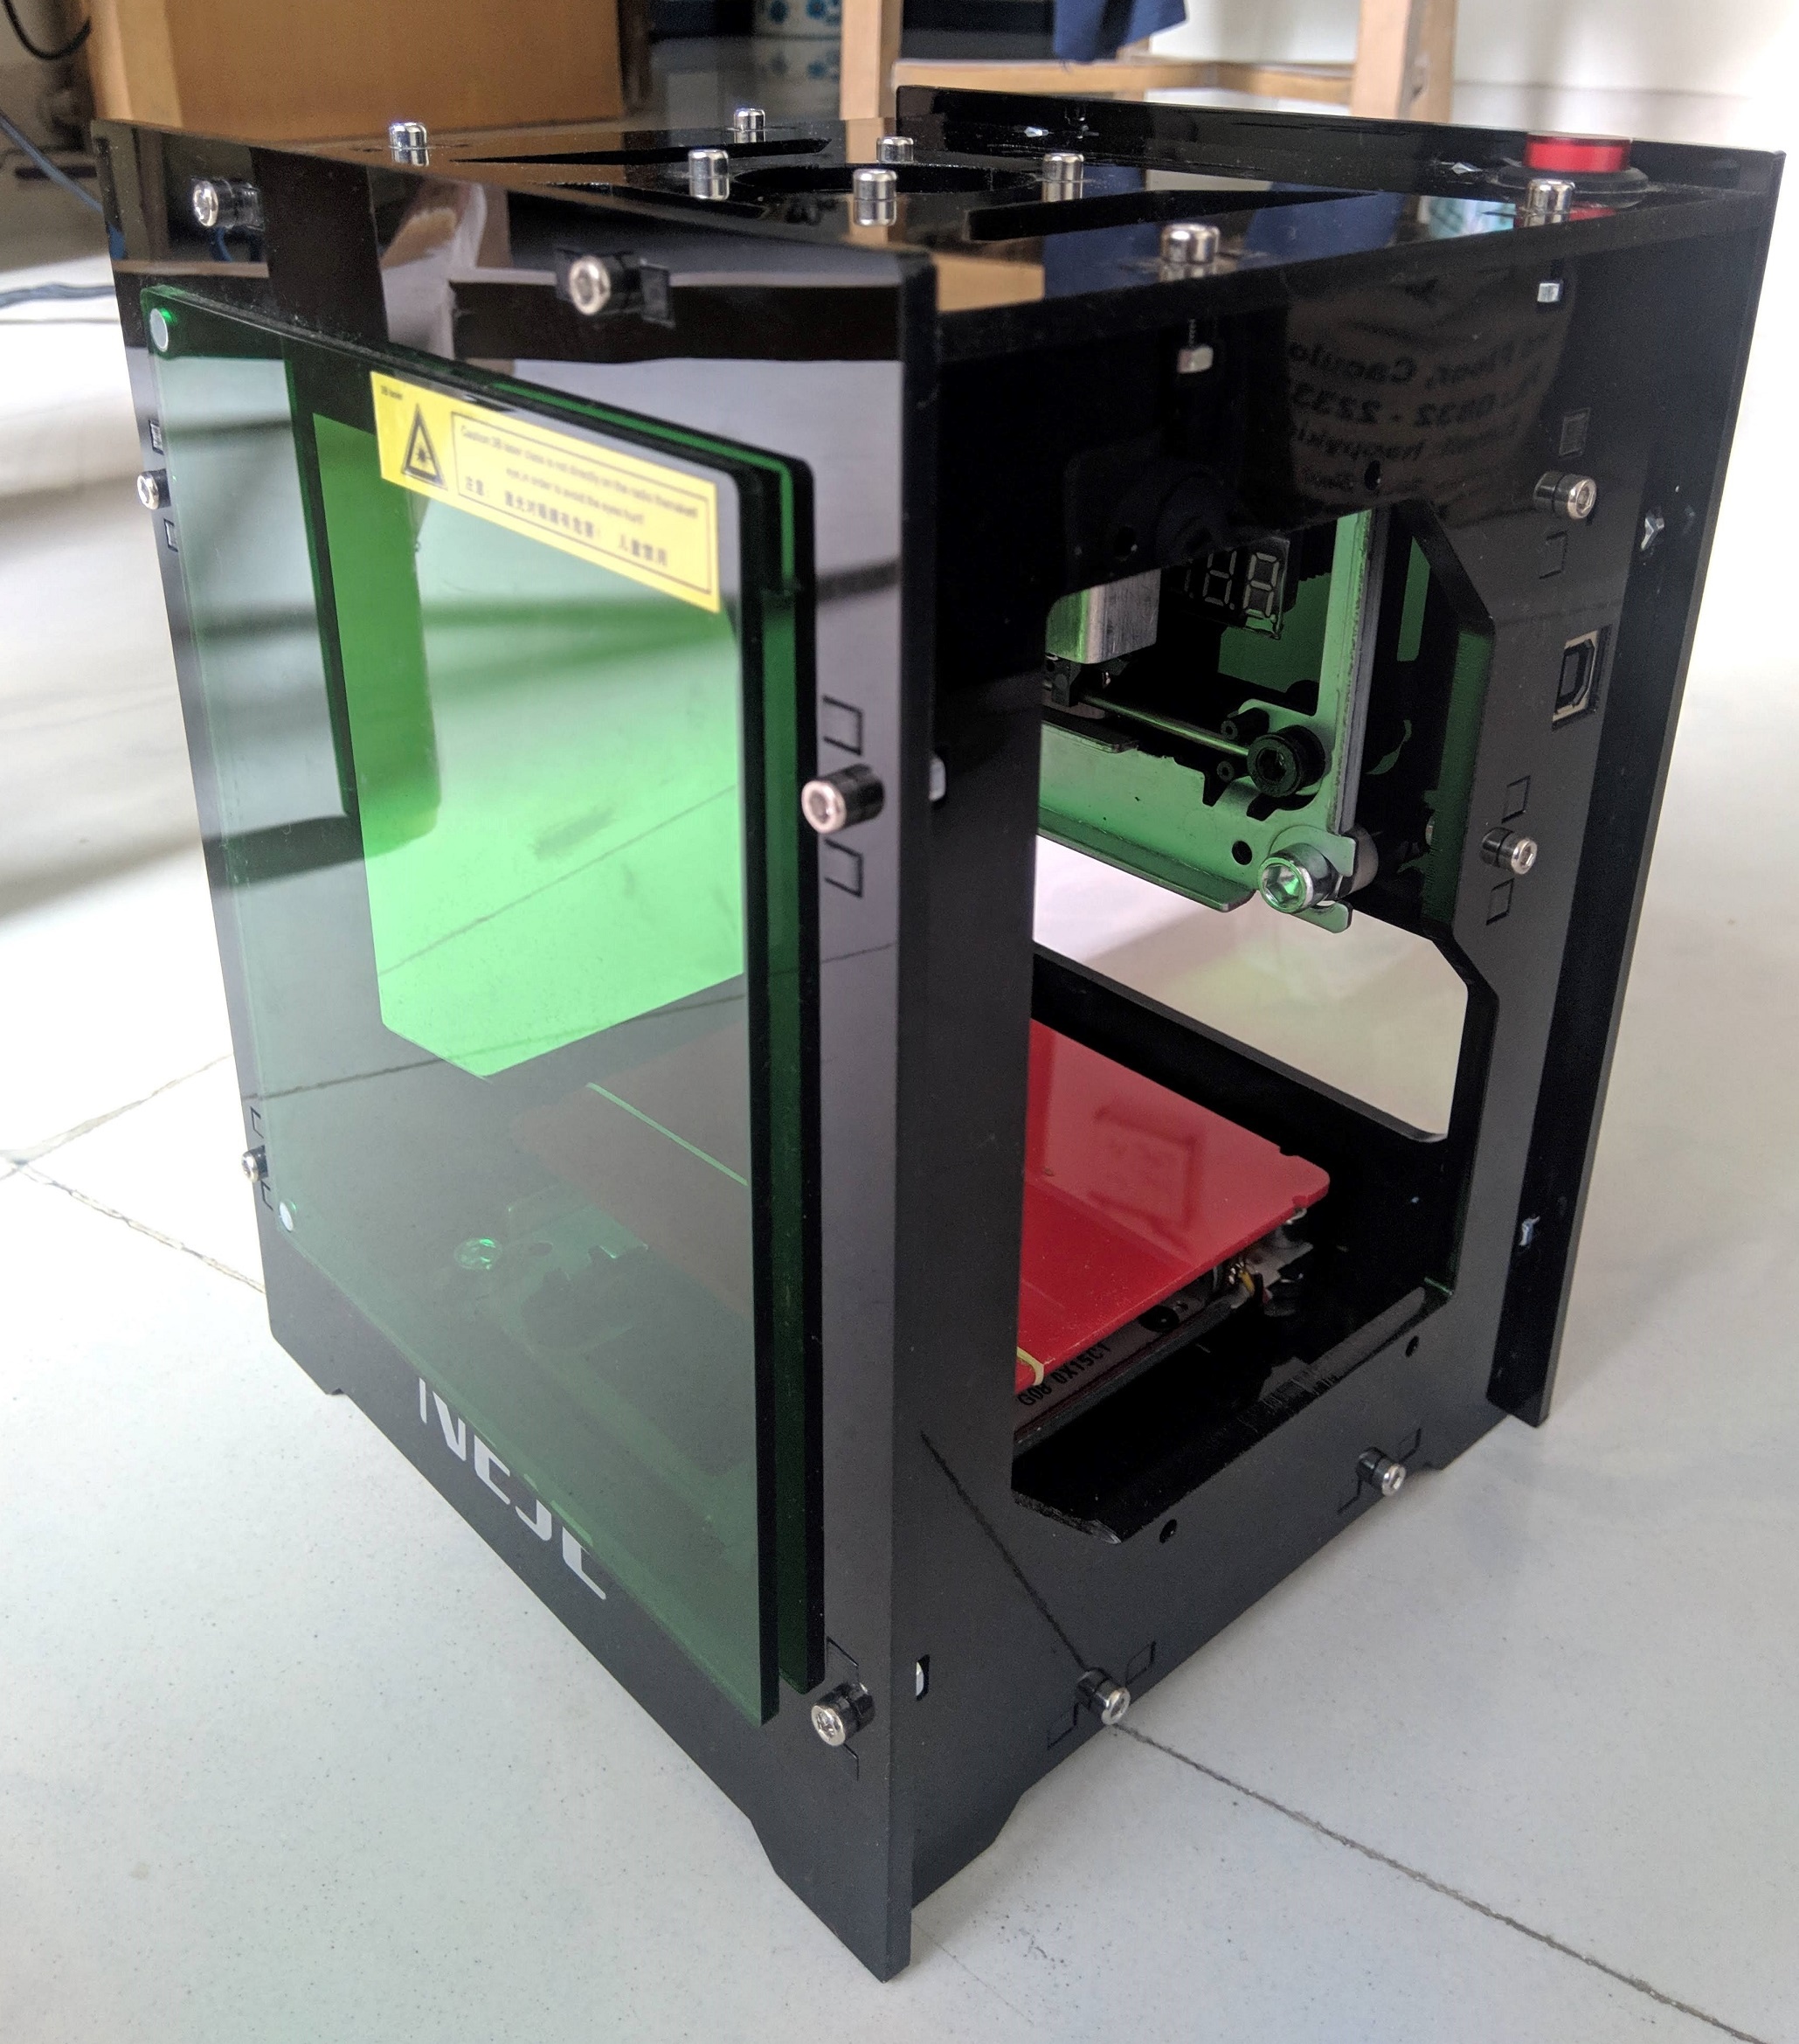
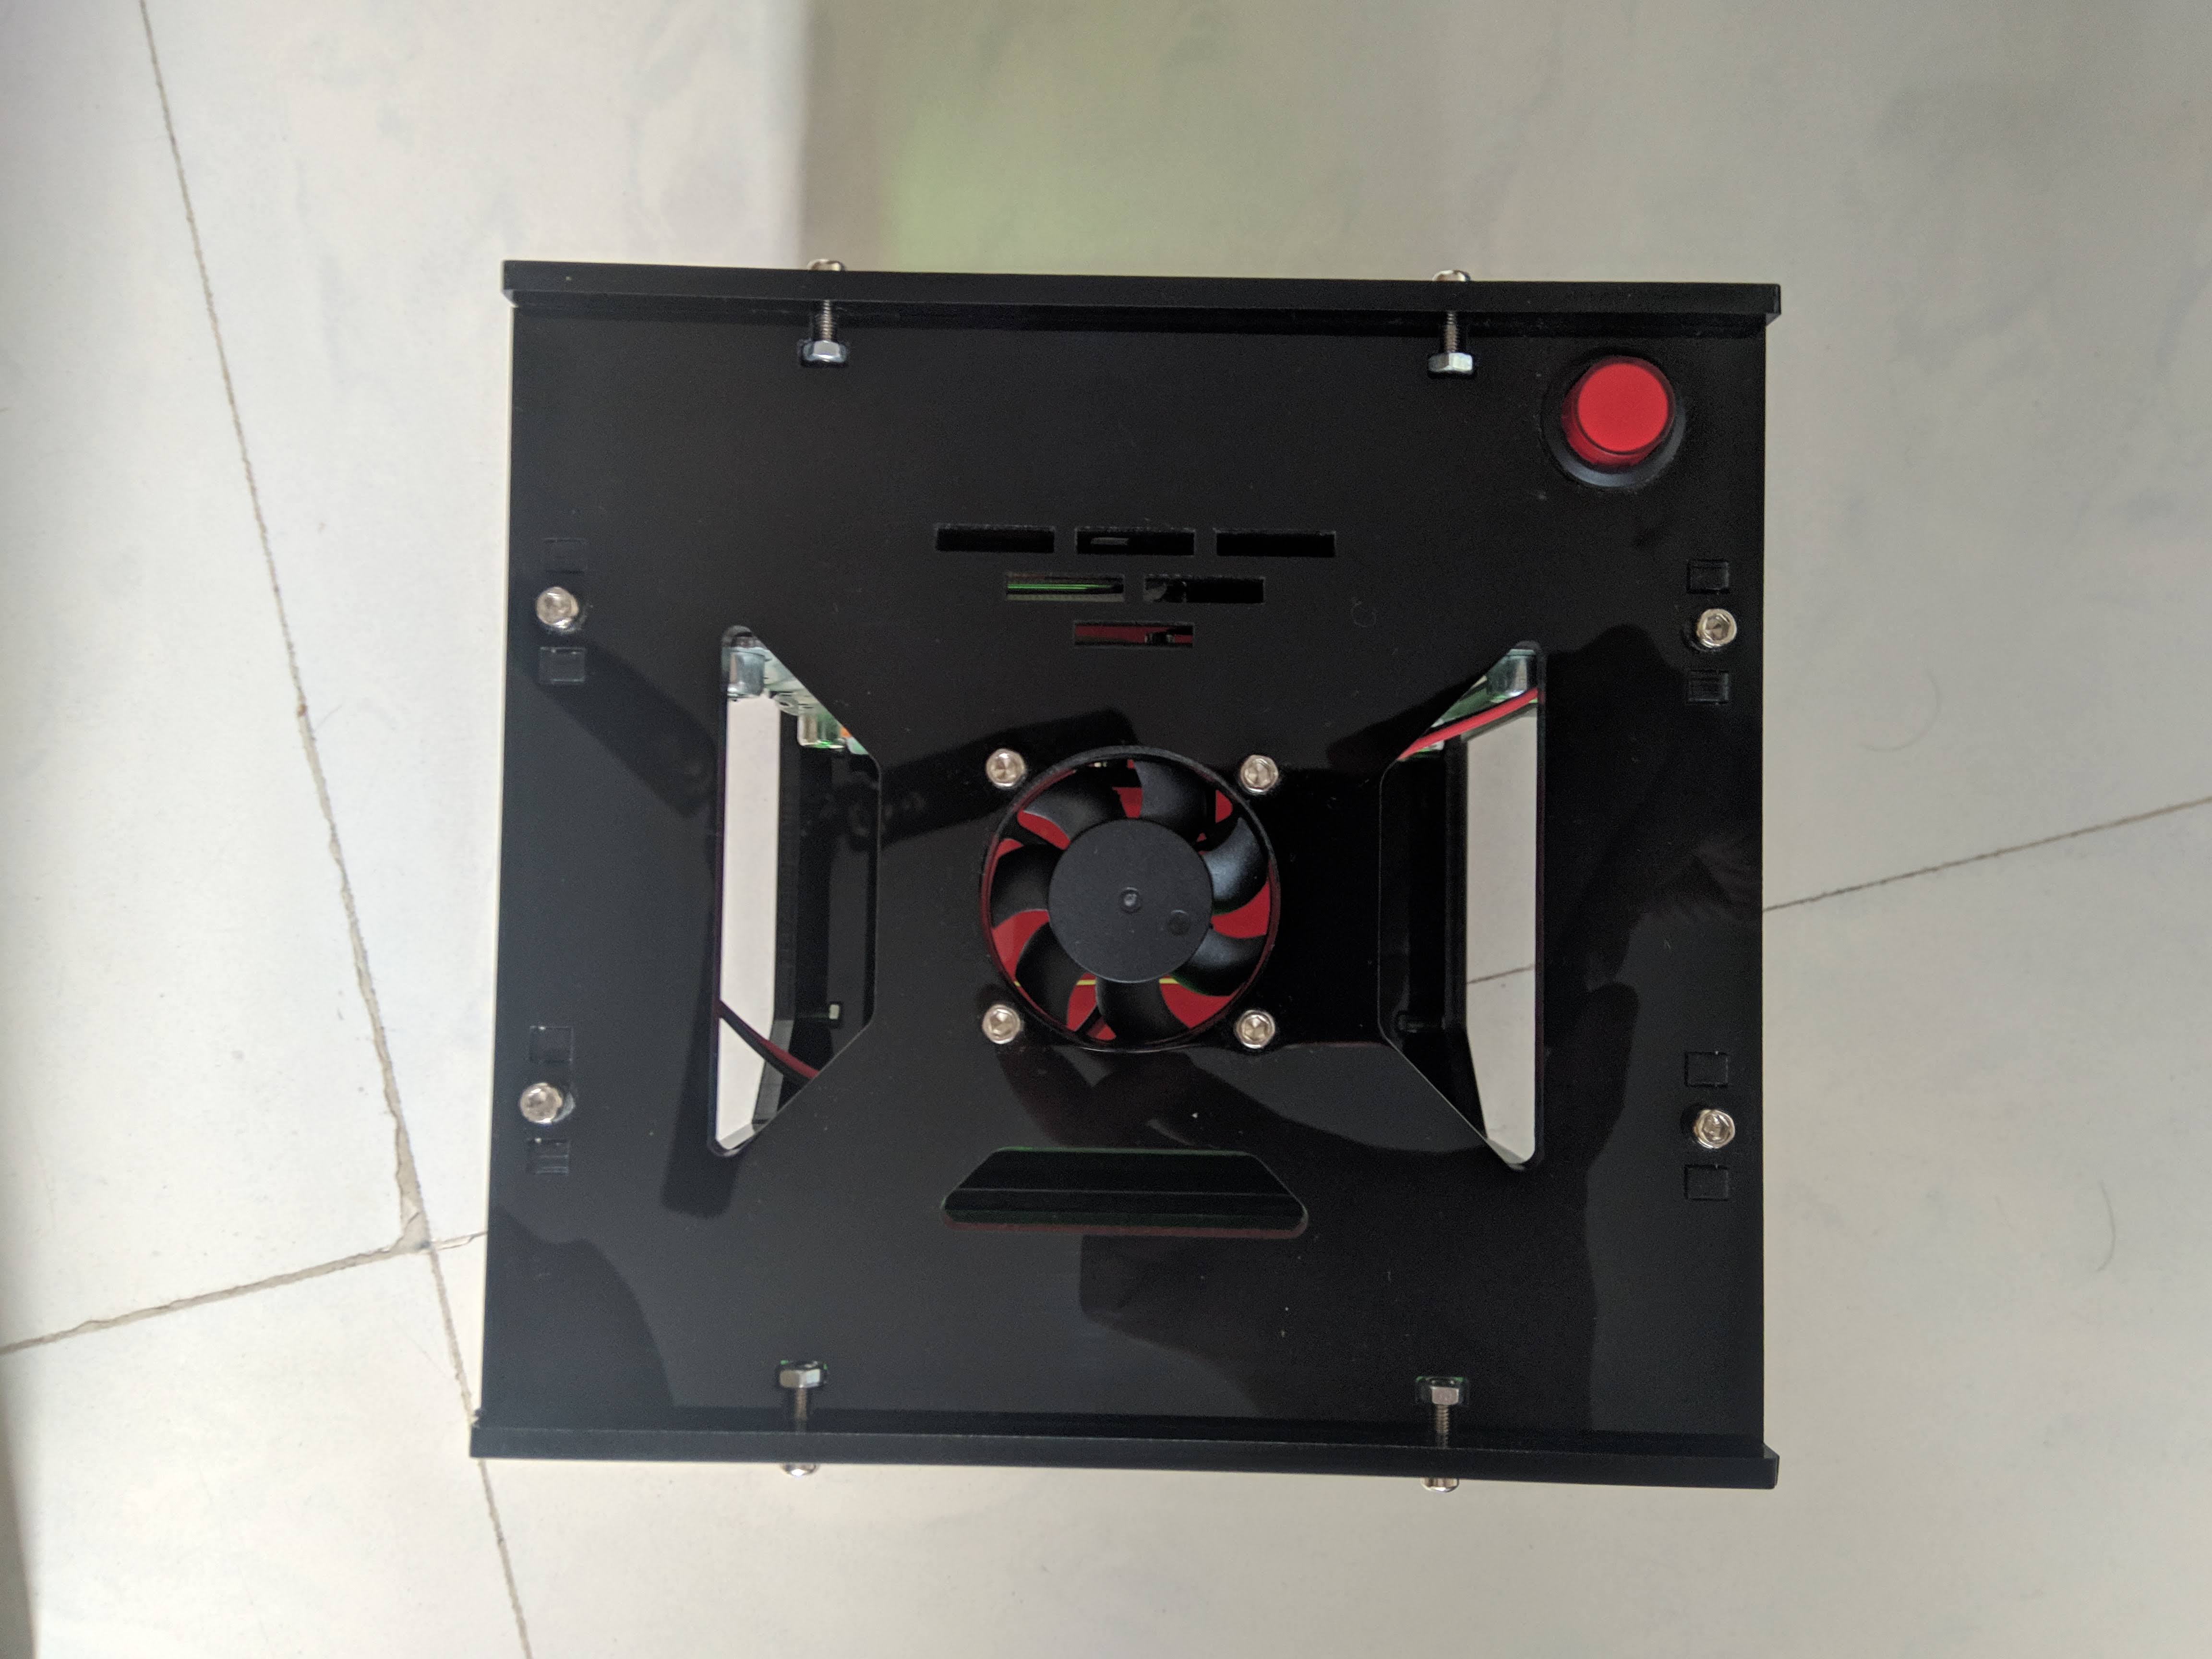
Entire body is constructed out of black acrylic sheet material with cut outs at the right locations. On the edges, the cut outs interlock with adjacent panels. Allen head screws firmly secure all the side panels of the body. Opening up the back panel reveals all the circuitry and the battery pack.
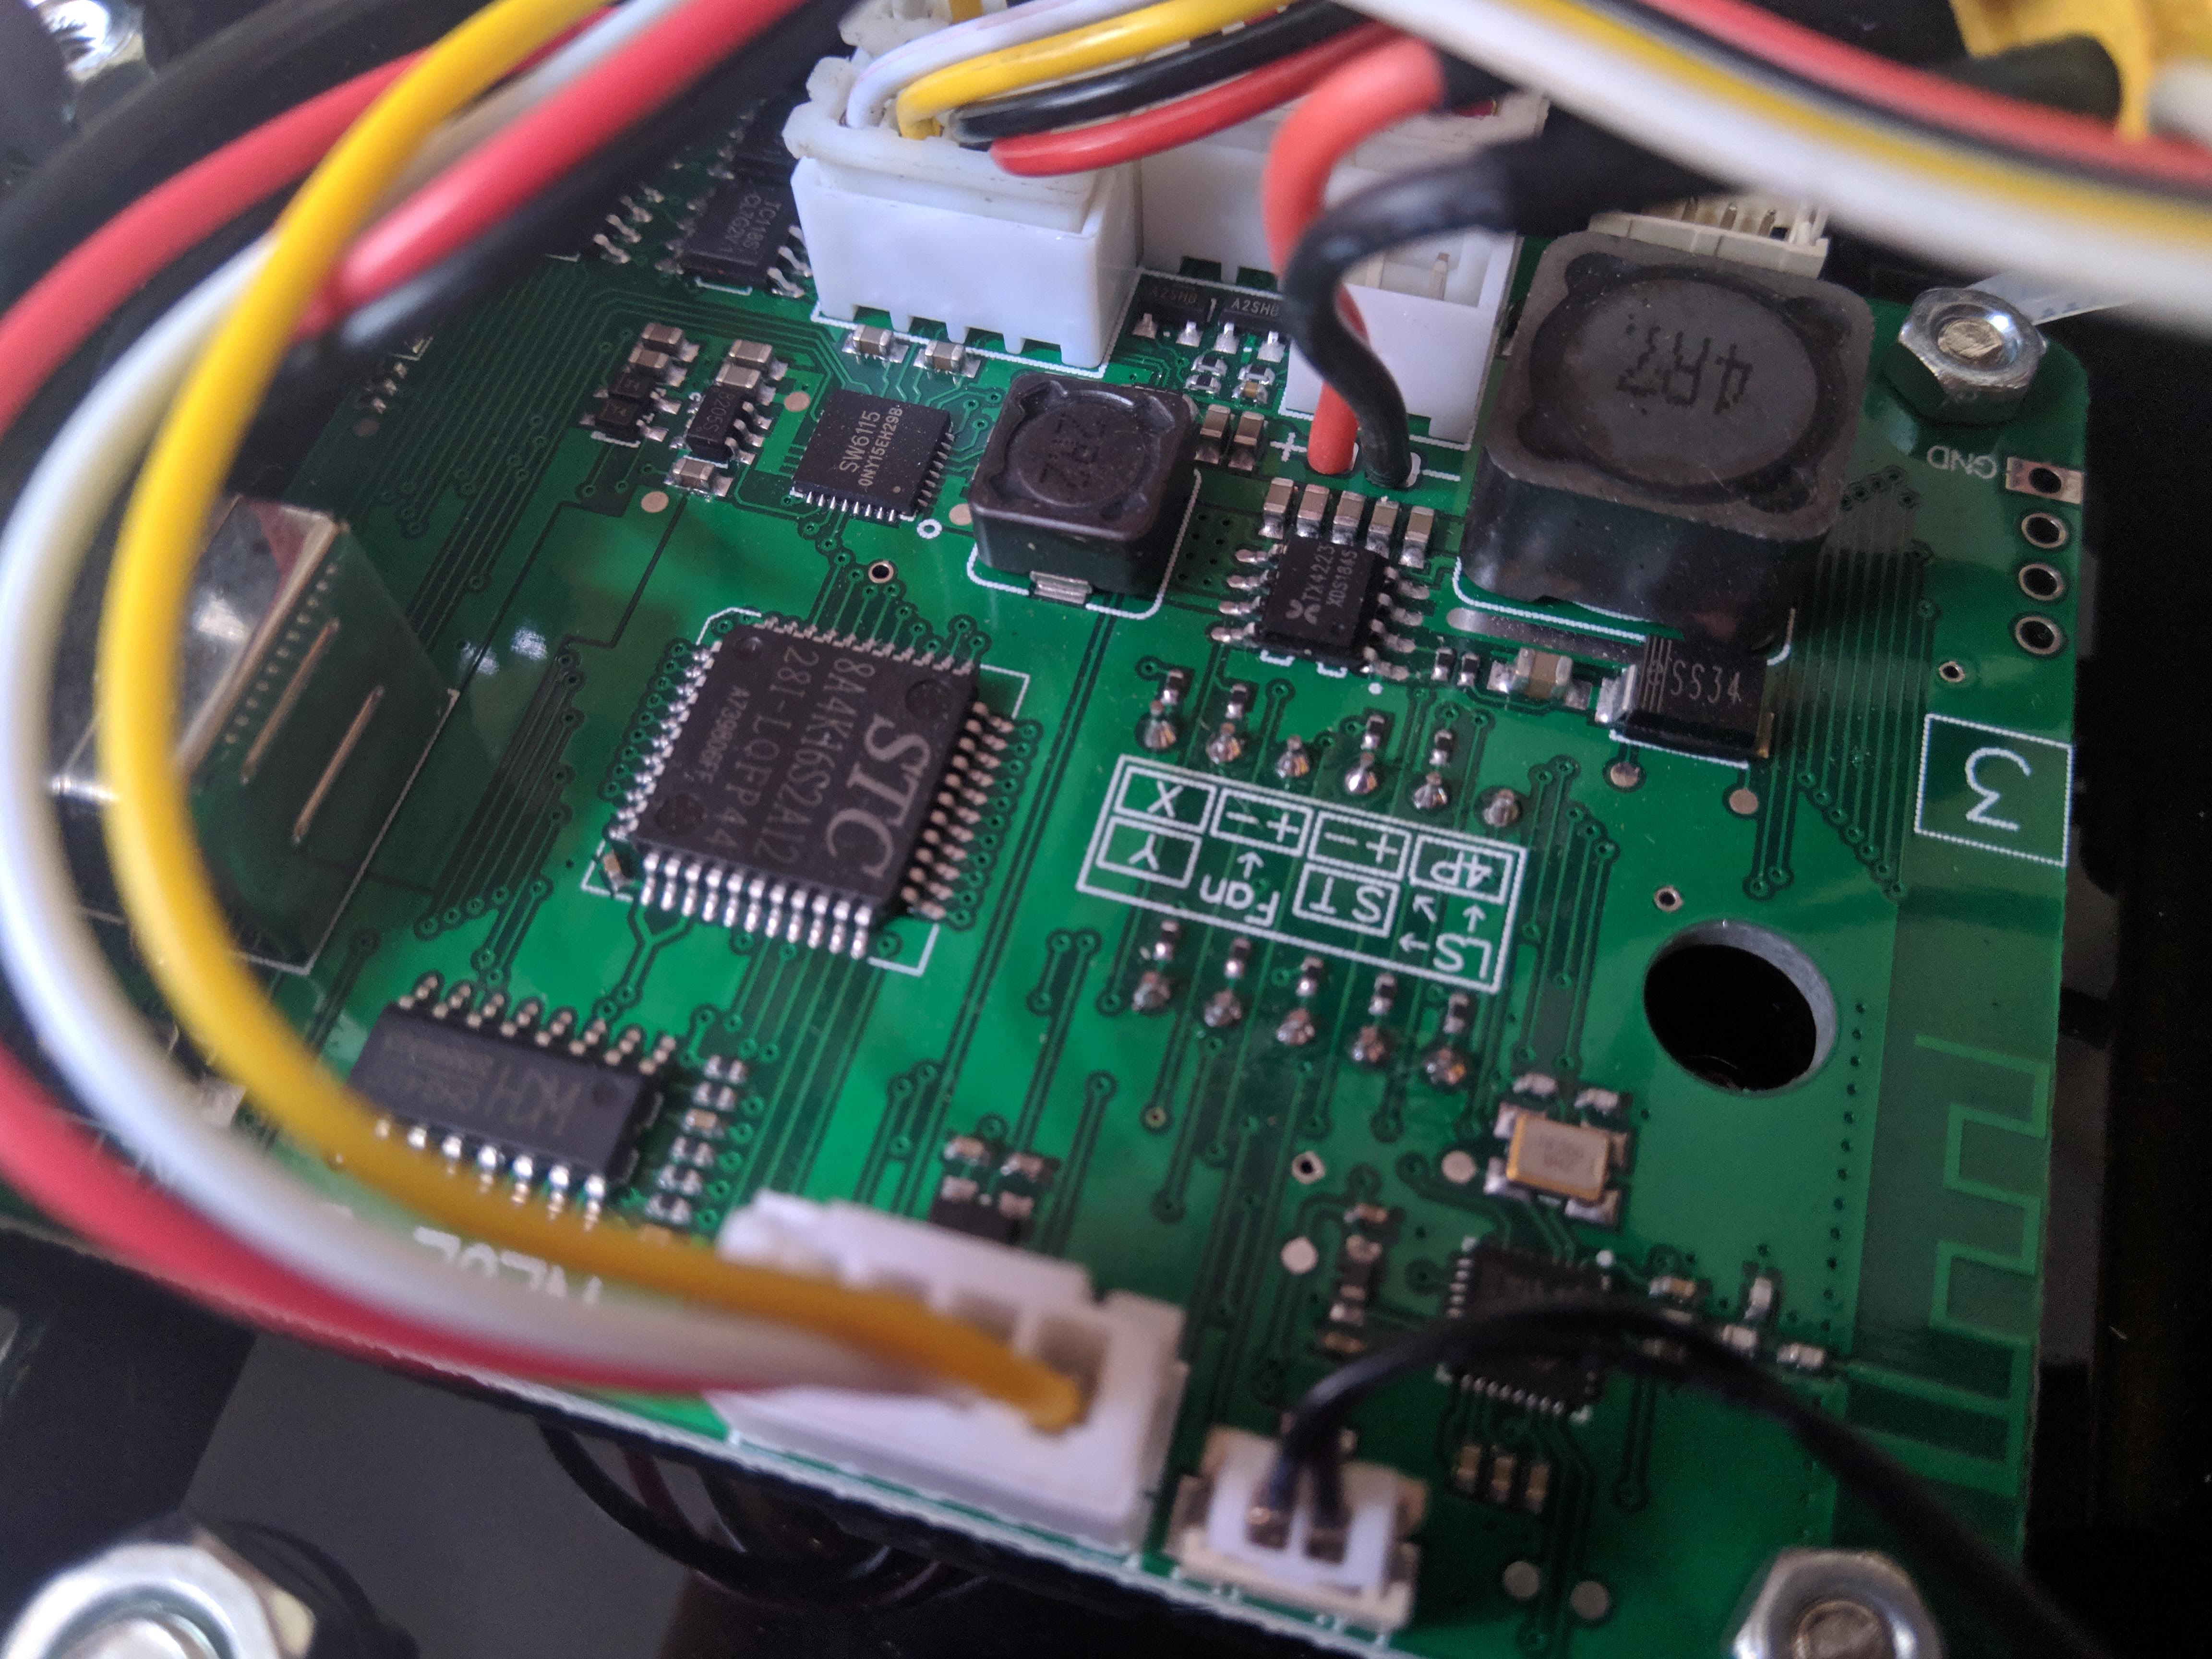
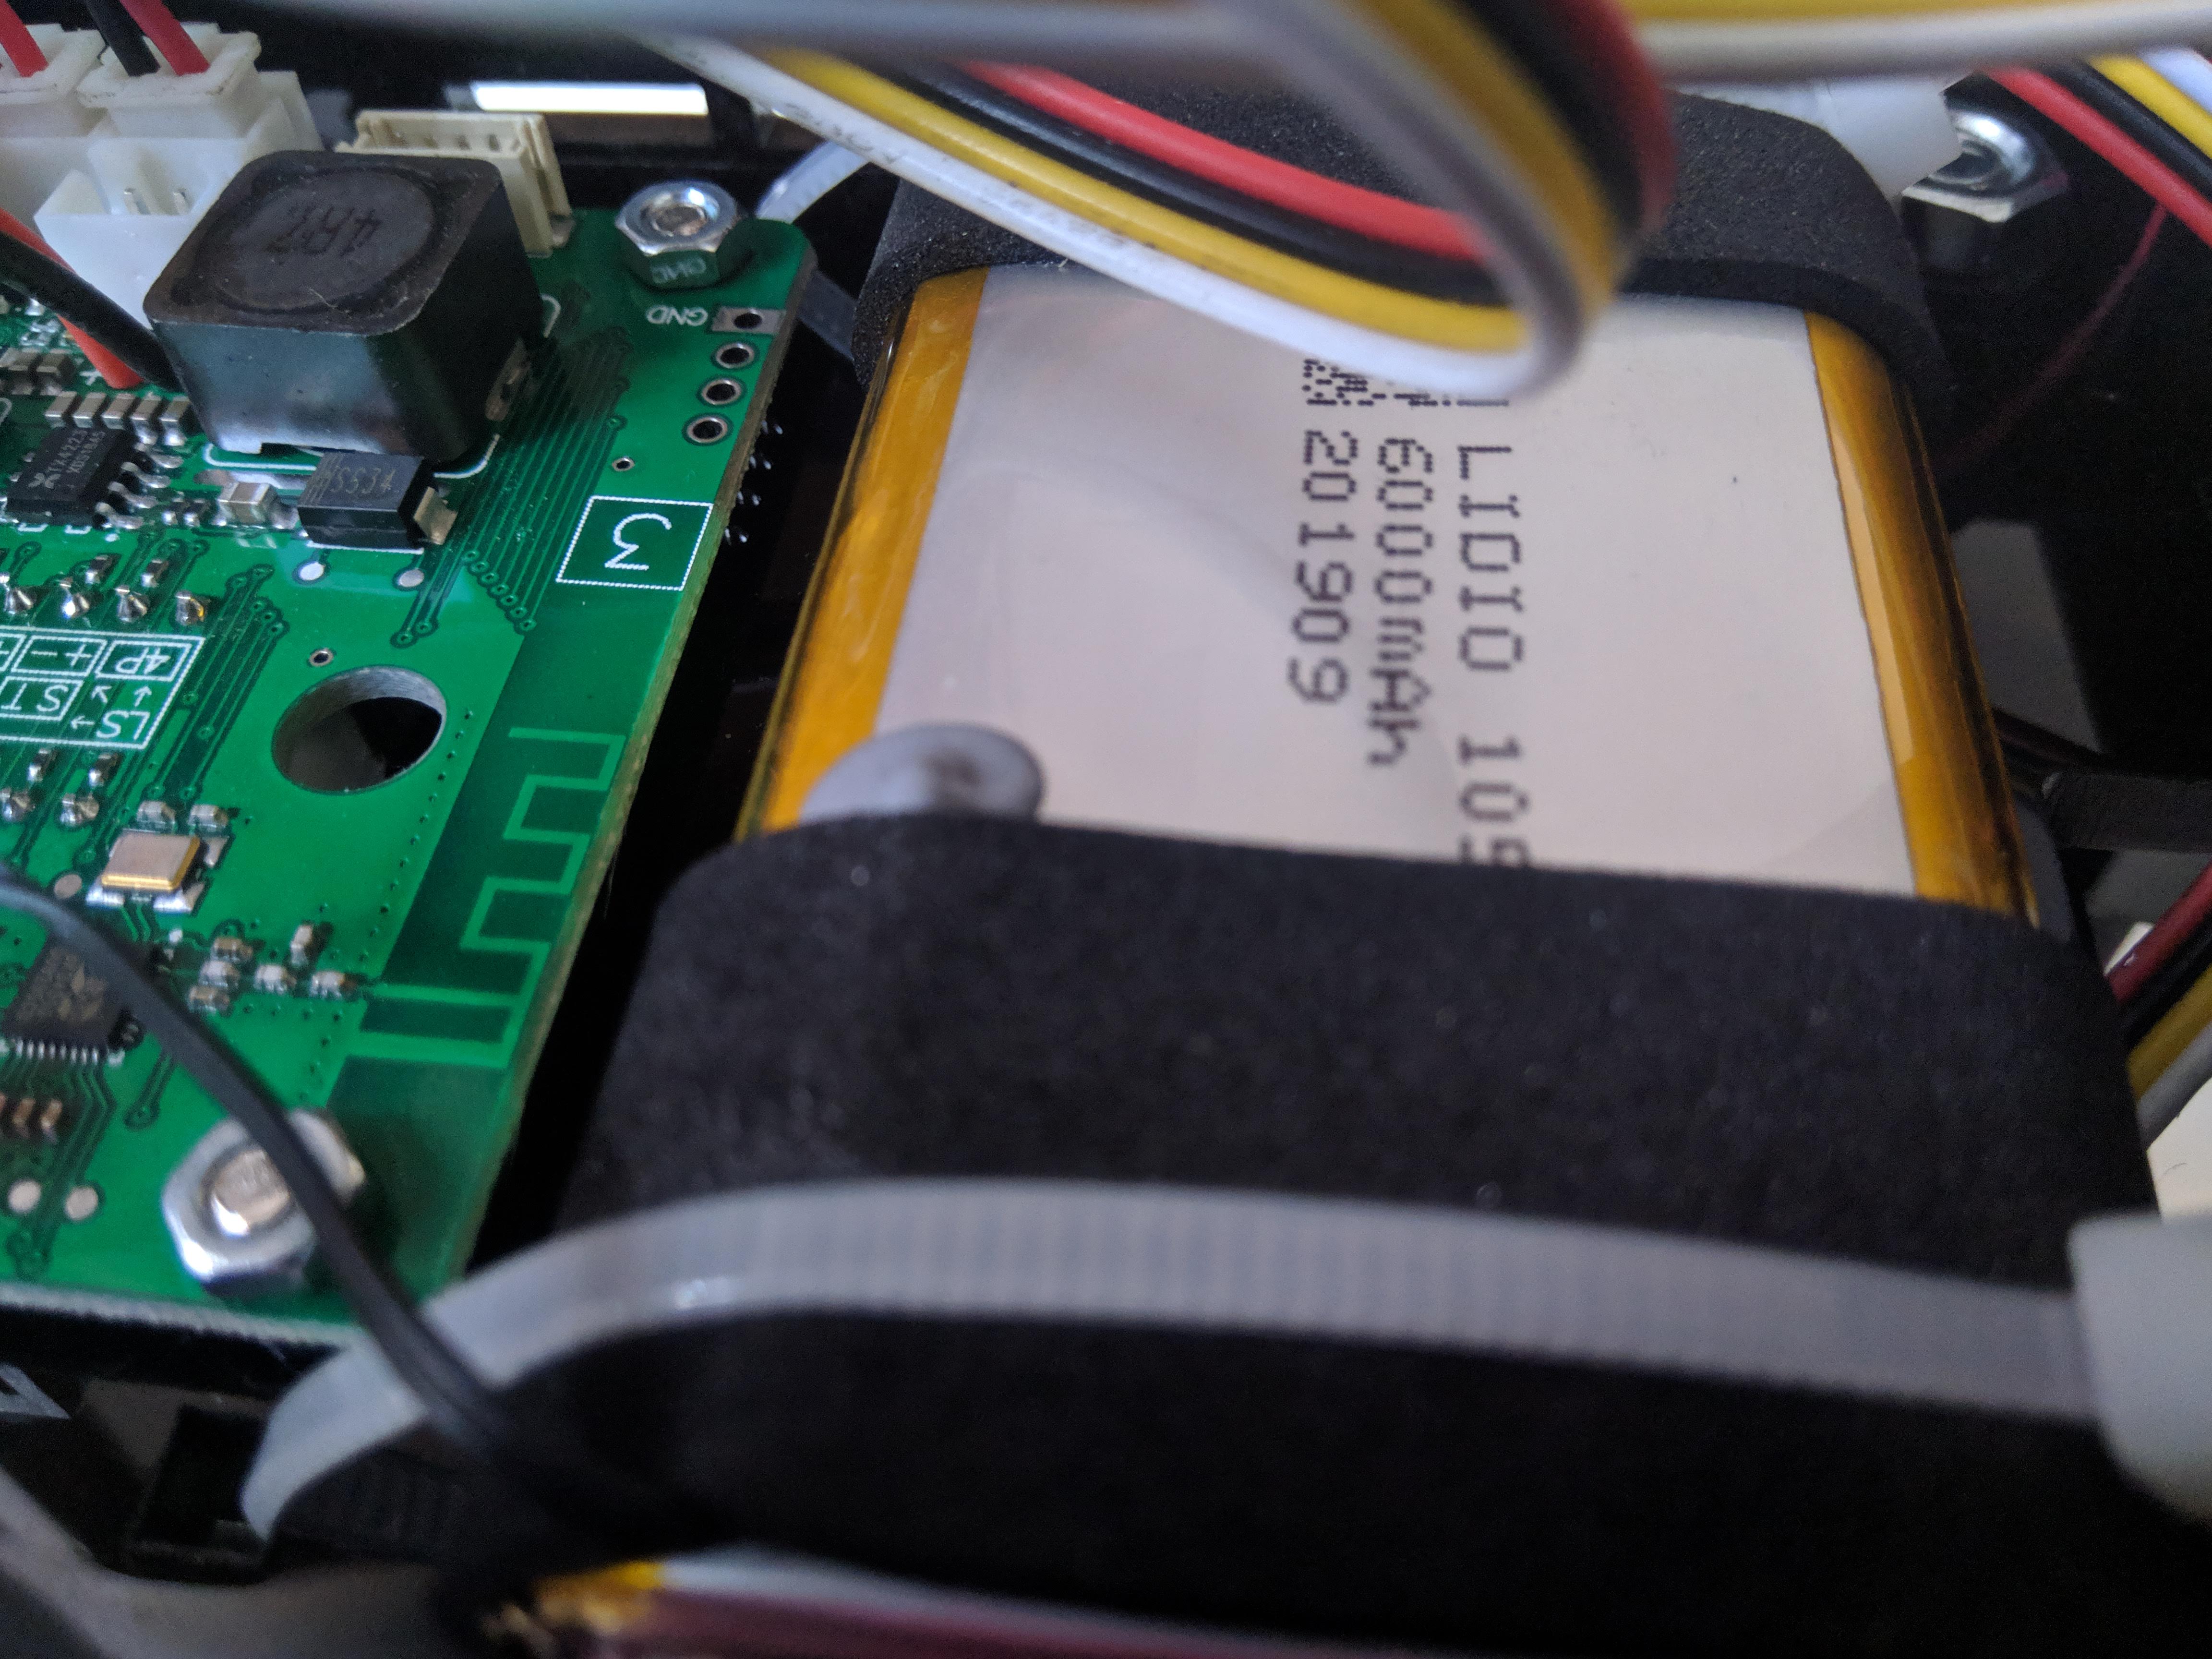
The 6000mAh battery charges over USB power and takes quite a while to get charged. Looking at the images, we can see a buck converter that draws power from the battery and provides a regulated DC supply to all the components such as the micro-controller and the Bluetooth chip set. We won’t dive deep into the circuitry instead, let us try engraving something.
Software
There are two ways to upload artwork to the engraver. One method is to connect a USB cable to PC and use the PC software. On the other hand, the second method lets you use a mobile phone app that connects over Bluetooth.
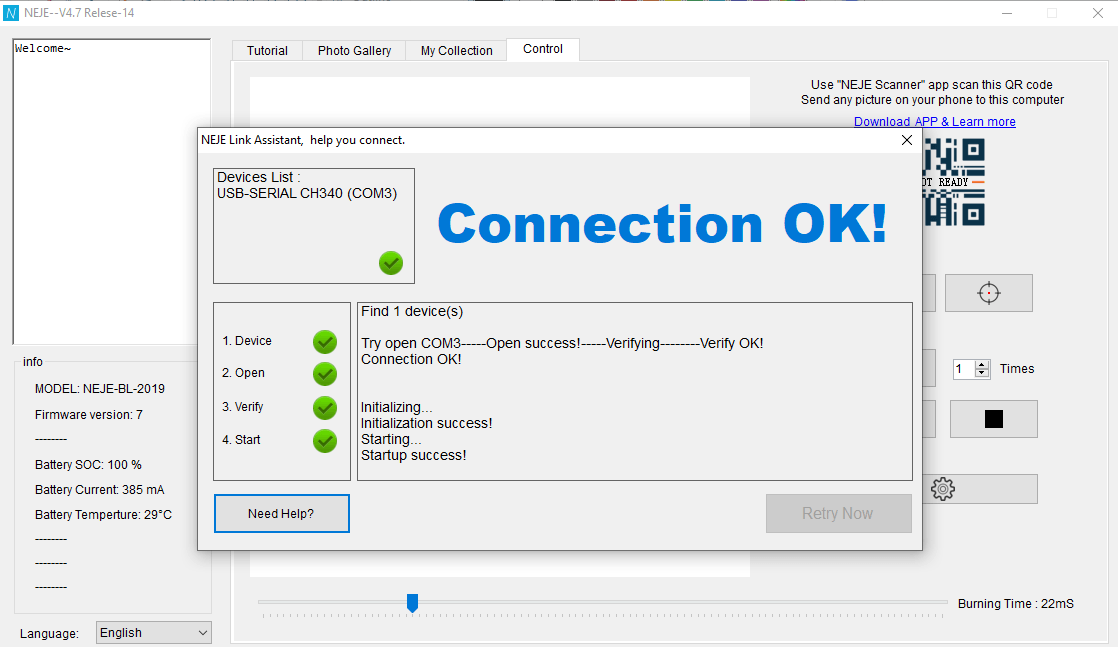
Download the PC software and the app from the official website. Finally, install the software and you should be at this screen. The software connects to your laser machine over COM3 port. If your drivers are installed perfectly, it should say OK. In case that does happen, simply turn off and turn on your engraver using the red power button at the top. Also, if you happen to connect your Android or iOS app to the machine, it is likely you will have problems connecting using PC. Use either one of the connections at a given time.
Trying out some art
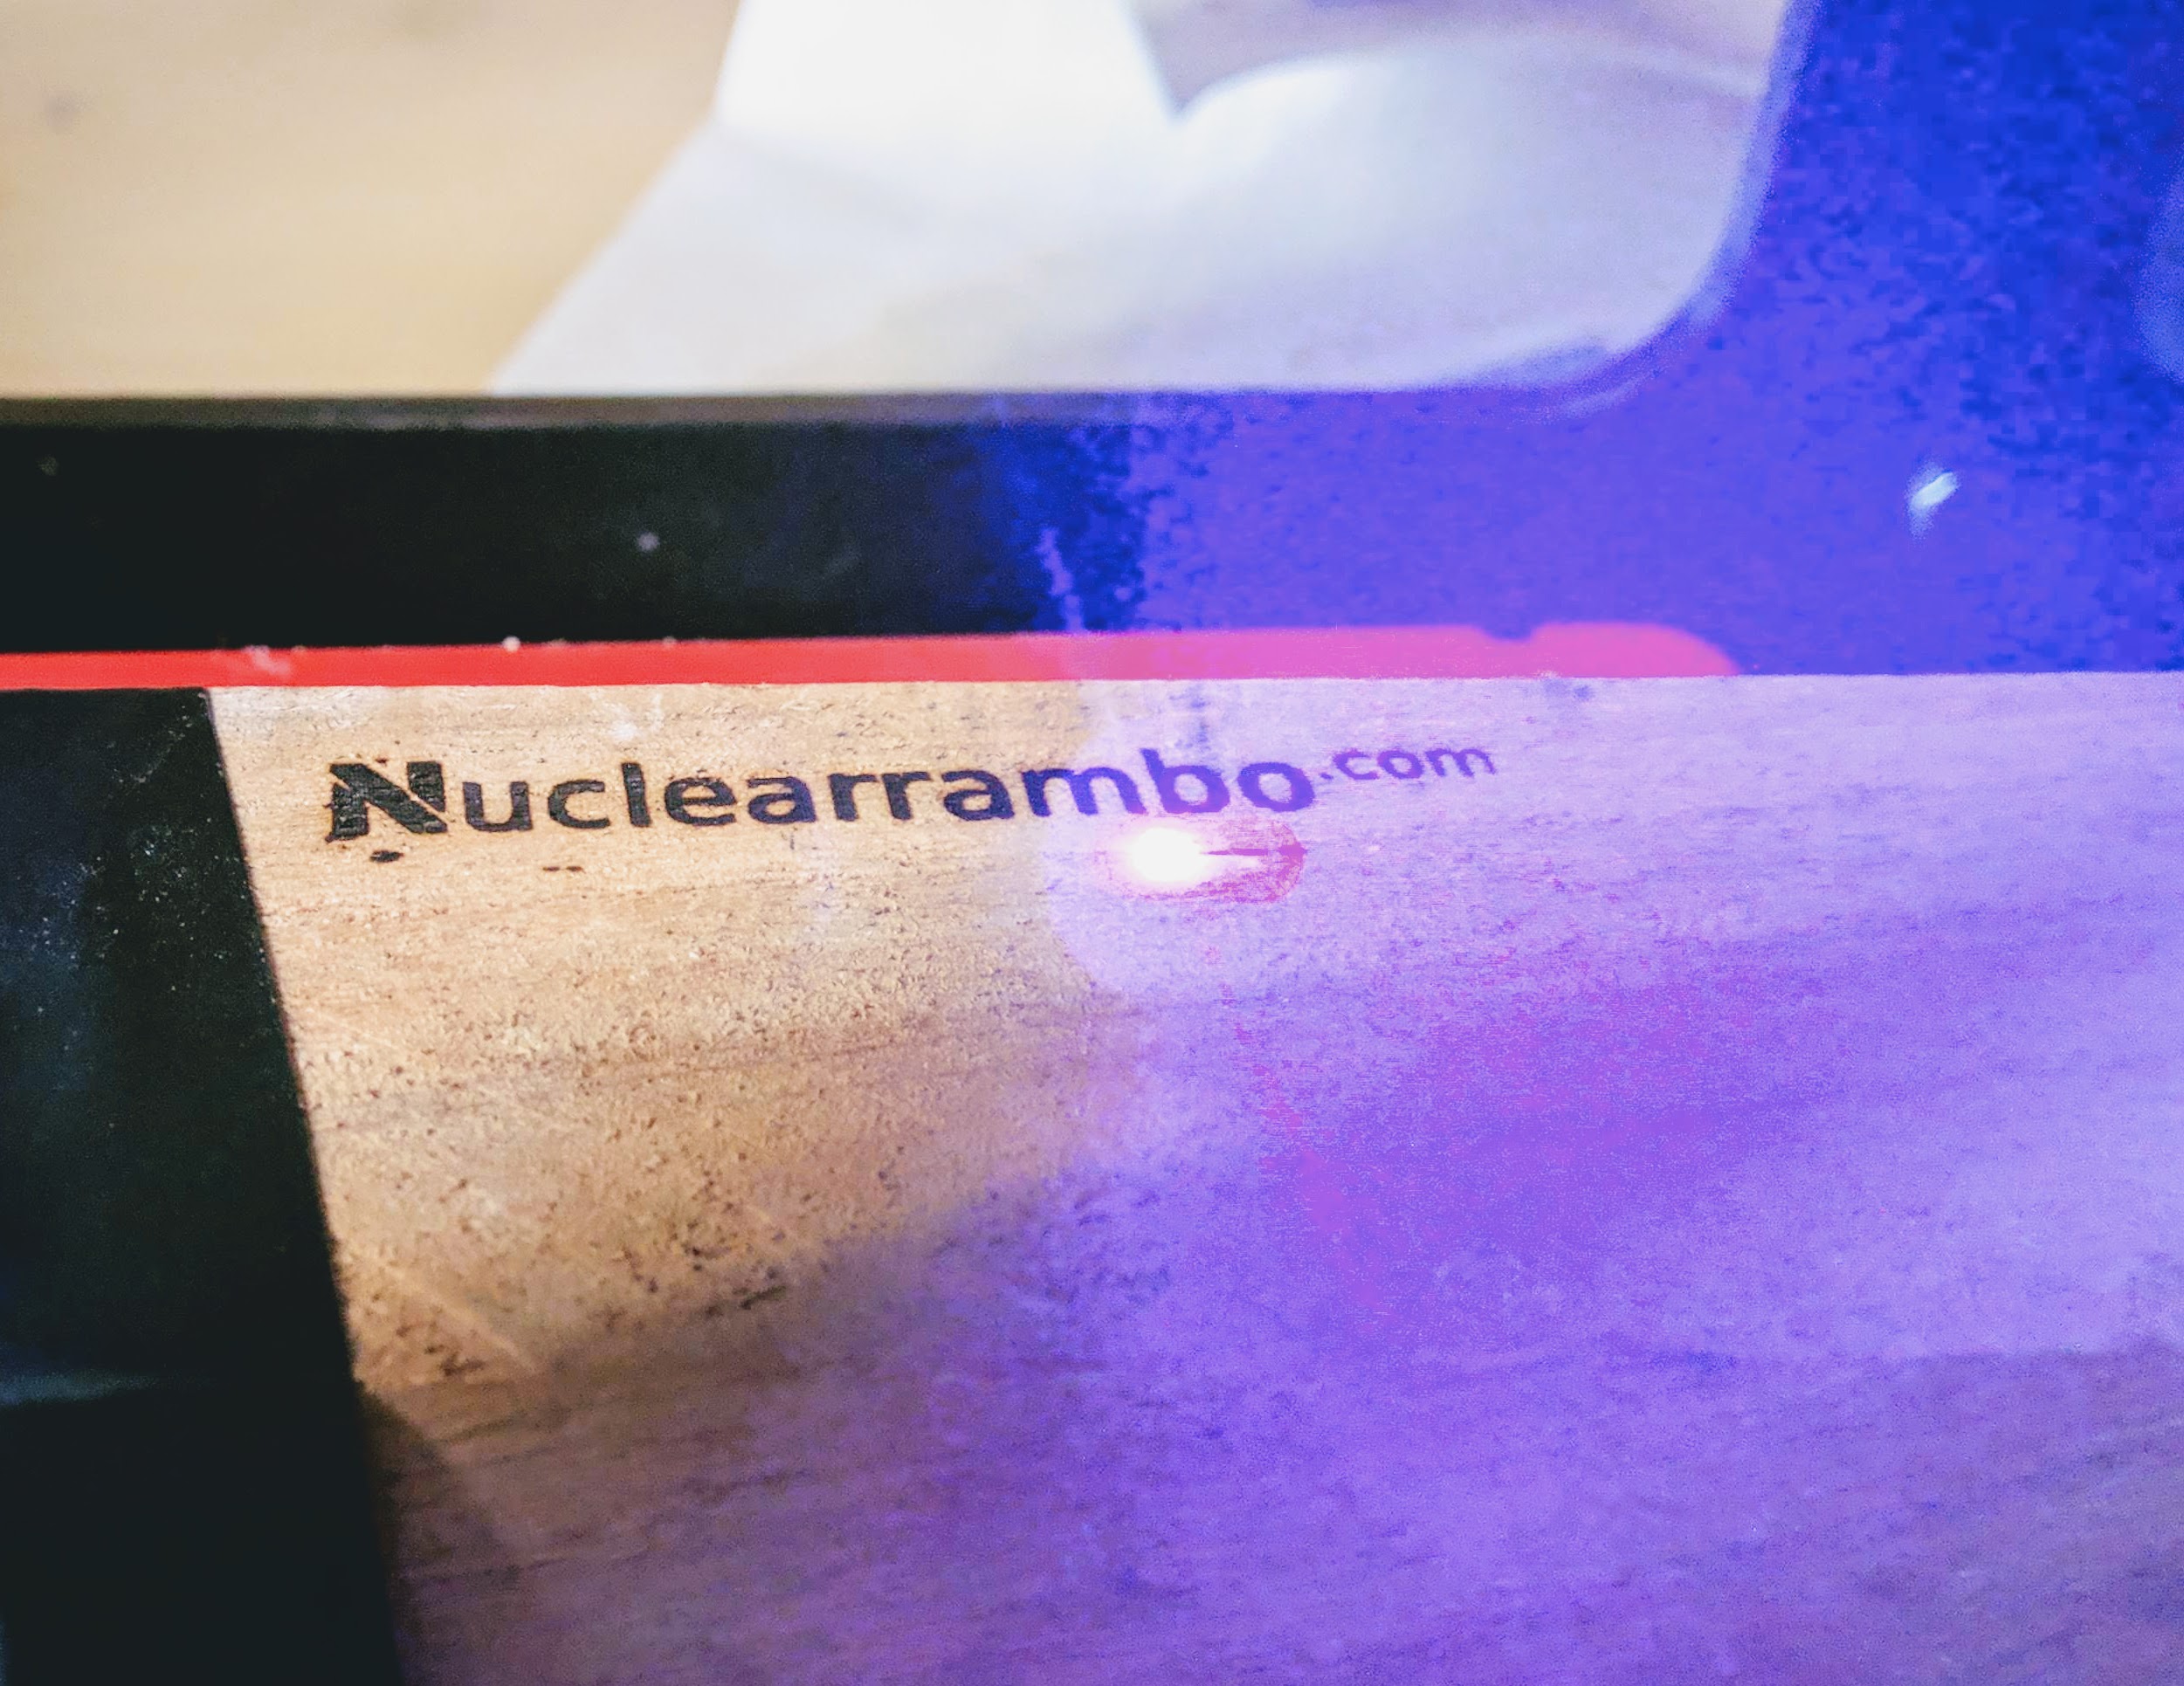
Once the software is ready, we arrive at the screen where its our job to upload pictures to engrave. Doing so is very simple. All you have to do it drag and drop the artwork in .bmp or .jpg format into the software window. For example, I will be dropping in our website logo to engrave.
Now, it will automatically present you different versions of the same image. The only difference in each of them would be the amount of detail. The higher the detail, more time it would take to engrave. You will need to do a trade-off between amount of detail and the time consumed engraving. A slightly lower amount of detail also turns out good. Having too much detail in your image might result in a fuzzy and black image.
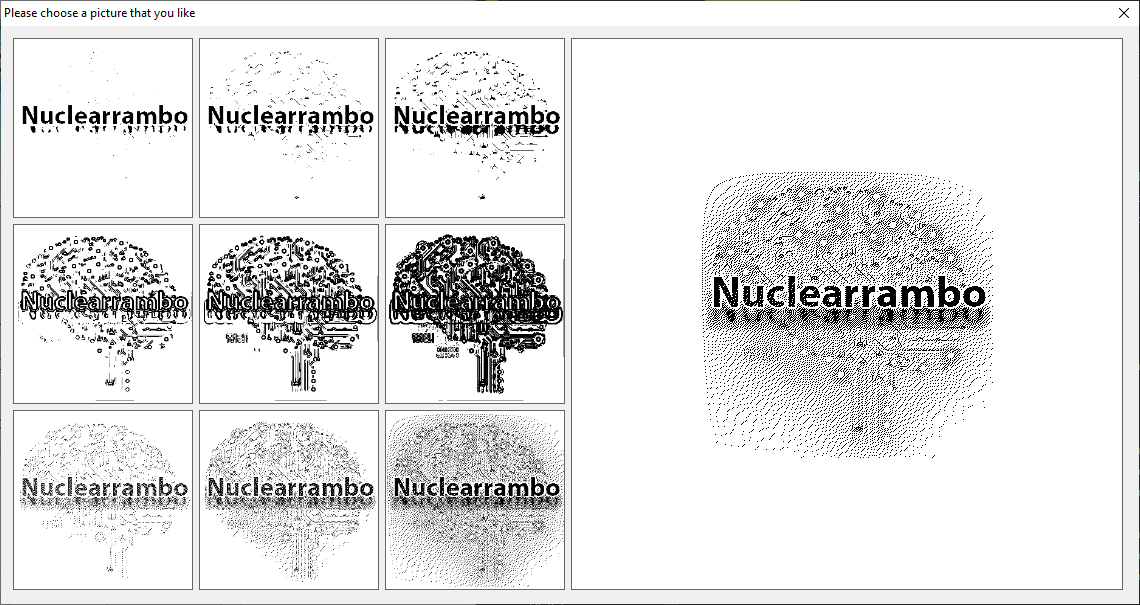
I shall select one on the left bottom to proceed.
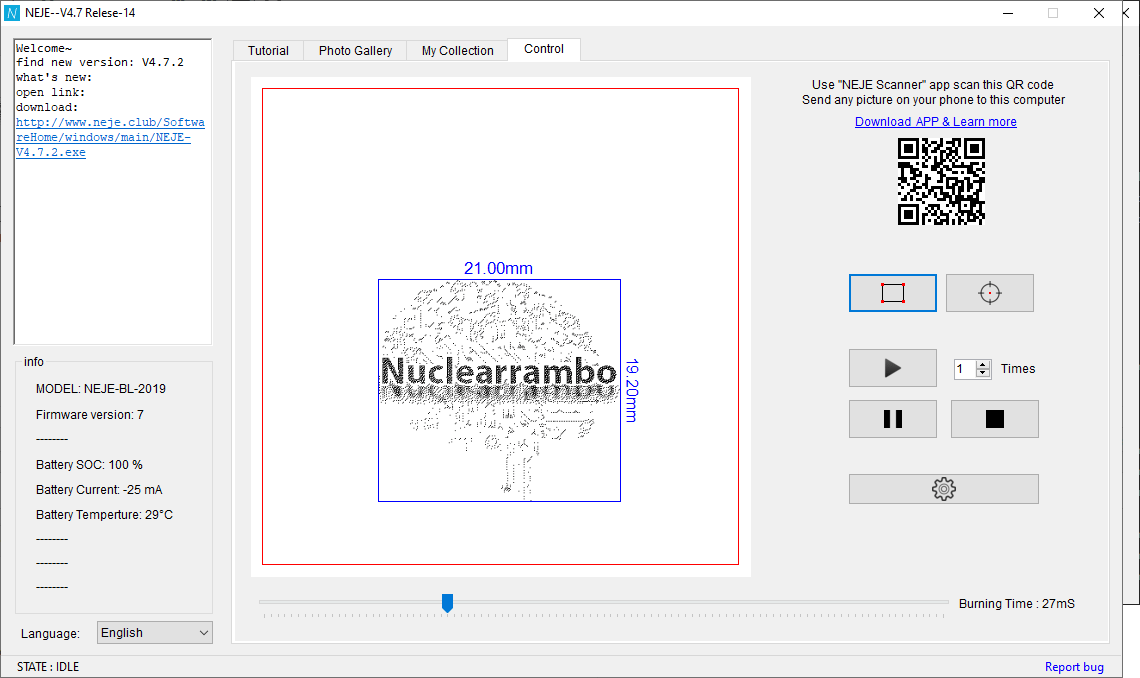
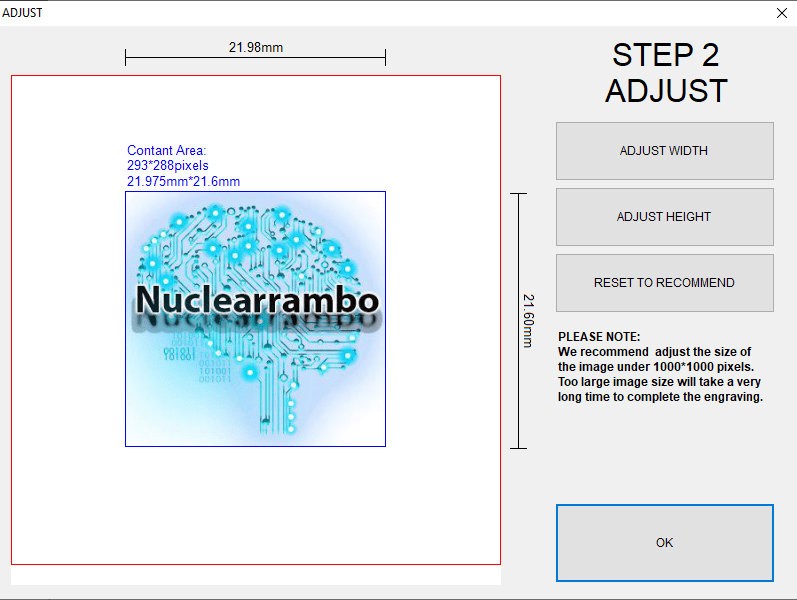
The rectangle icon on the software commands the machine to display the physical dimension of the image that would appear. Similarly, the cross hair icon on the right side indicates the center of the image. Check out the following gif to see what I mean.
Finally, you will need to adjust the burning time. Too much burning time will result in fuzzy edges. Too less of a burn time will result in brownish markings. With practice and trials you will find a sweet burning time that works for a given surface material.
Now, we are all set. Let us begin engraving.
I also happen to engrave another image onto the same block of wood.
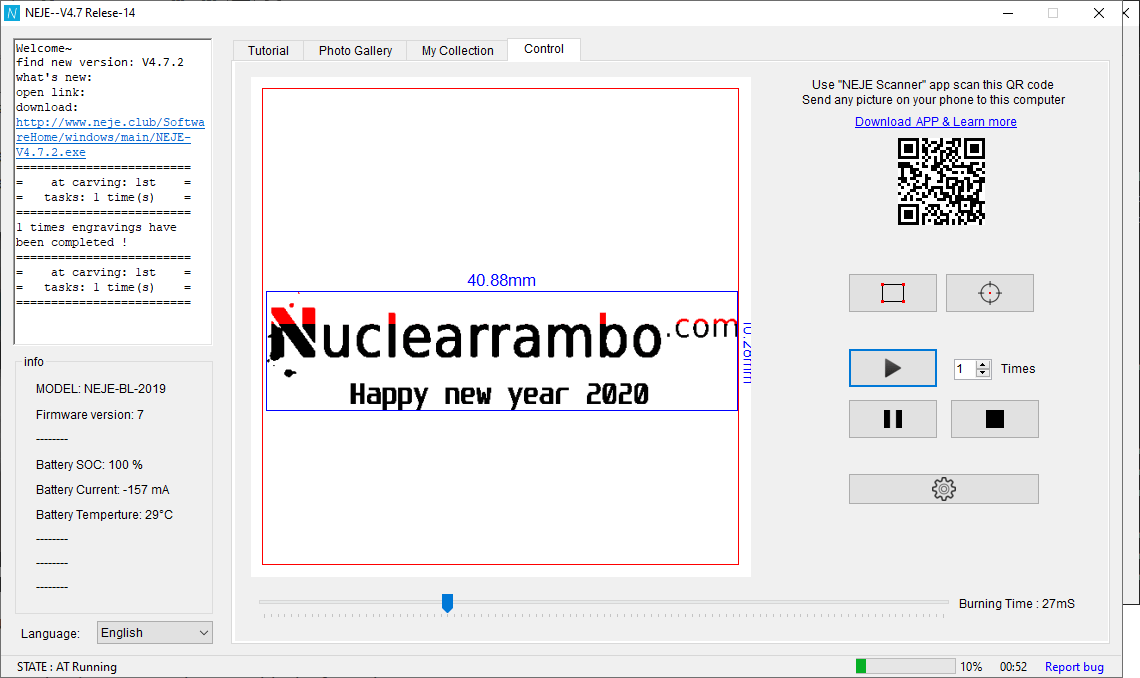
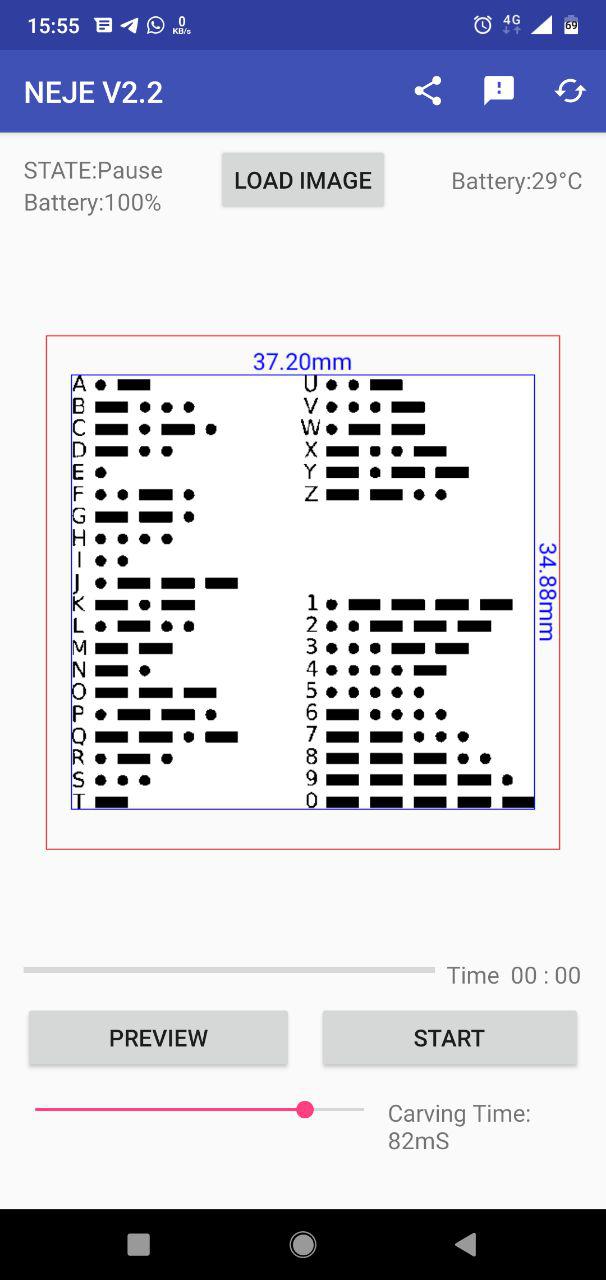
In the above image, you can see the red portion in the image. The red marking indicates progress. Whereas, on the right bottom, you can see the progress bar as well as the time elapsed. Several other machine status parameters are displayed on the left. For example, the battery percentage, current drawn and the battery temperature.
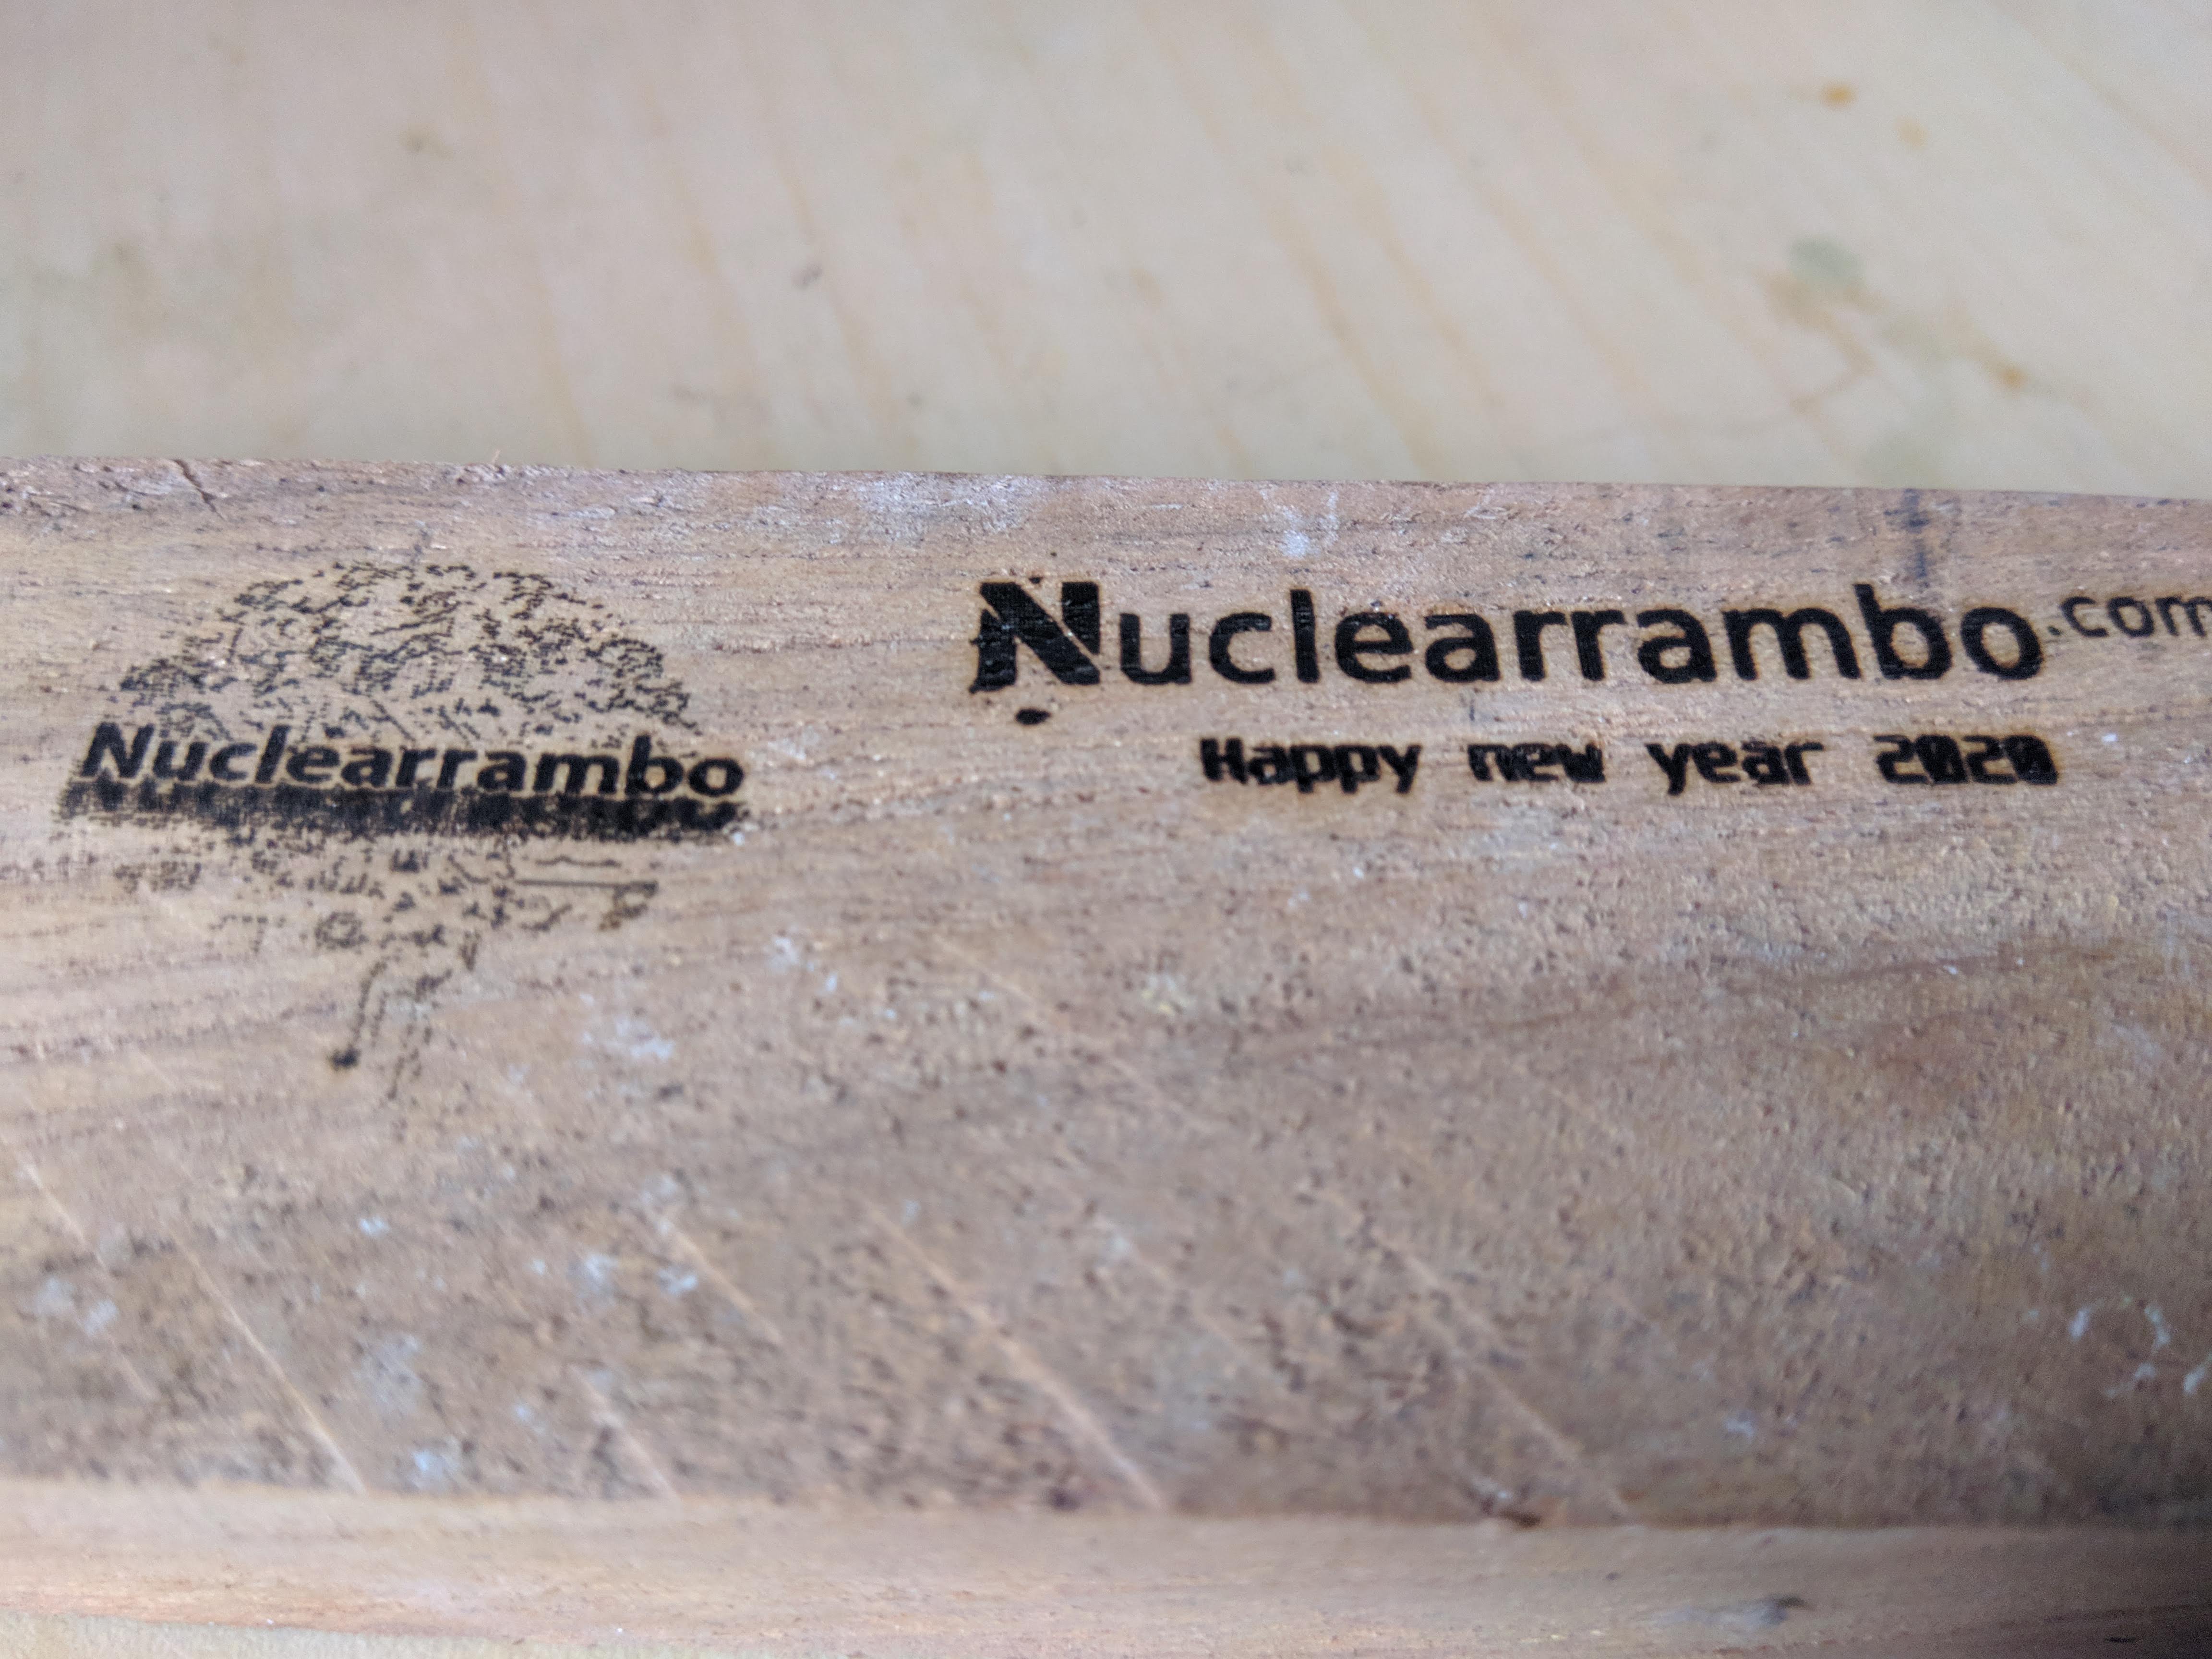
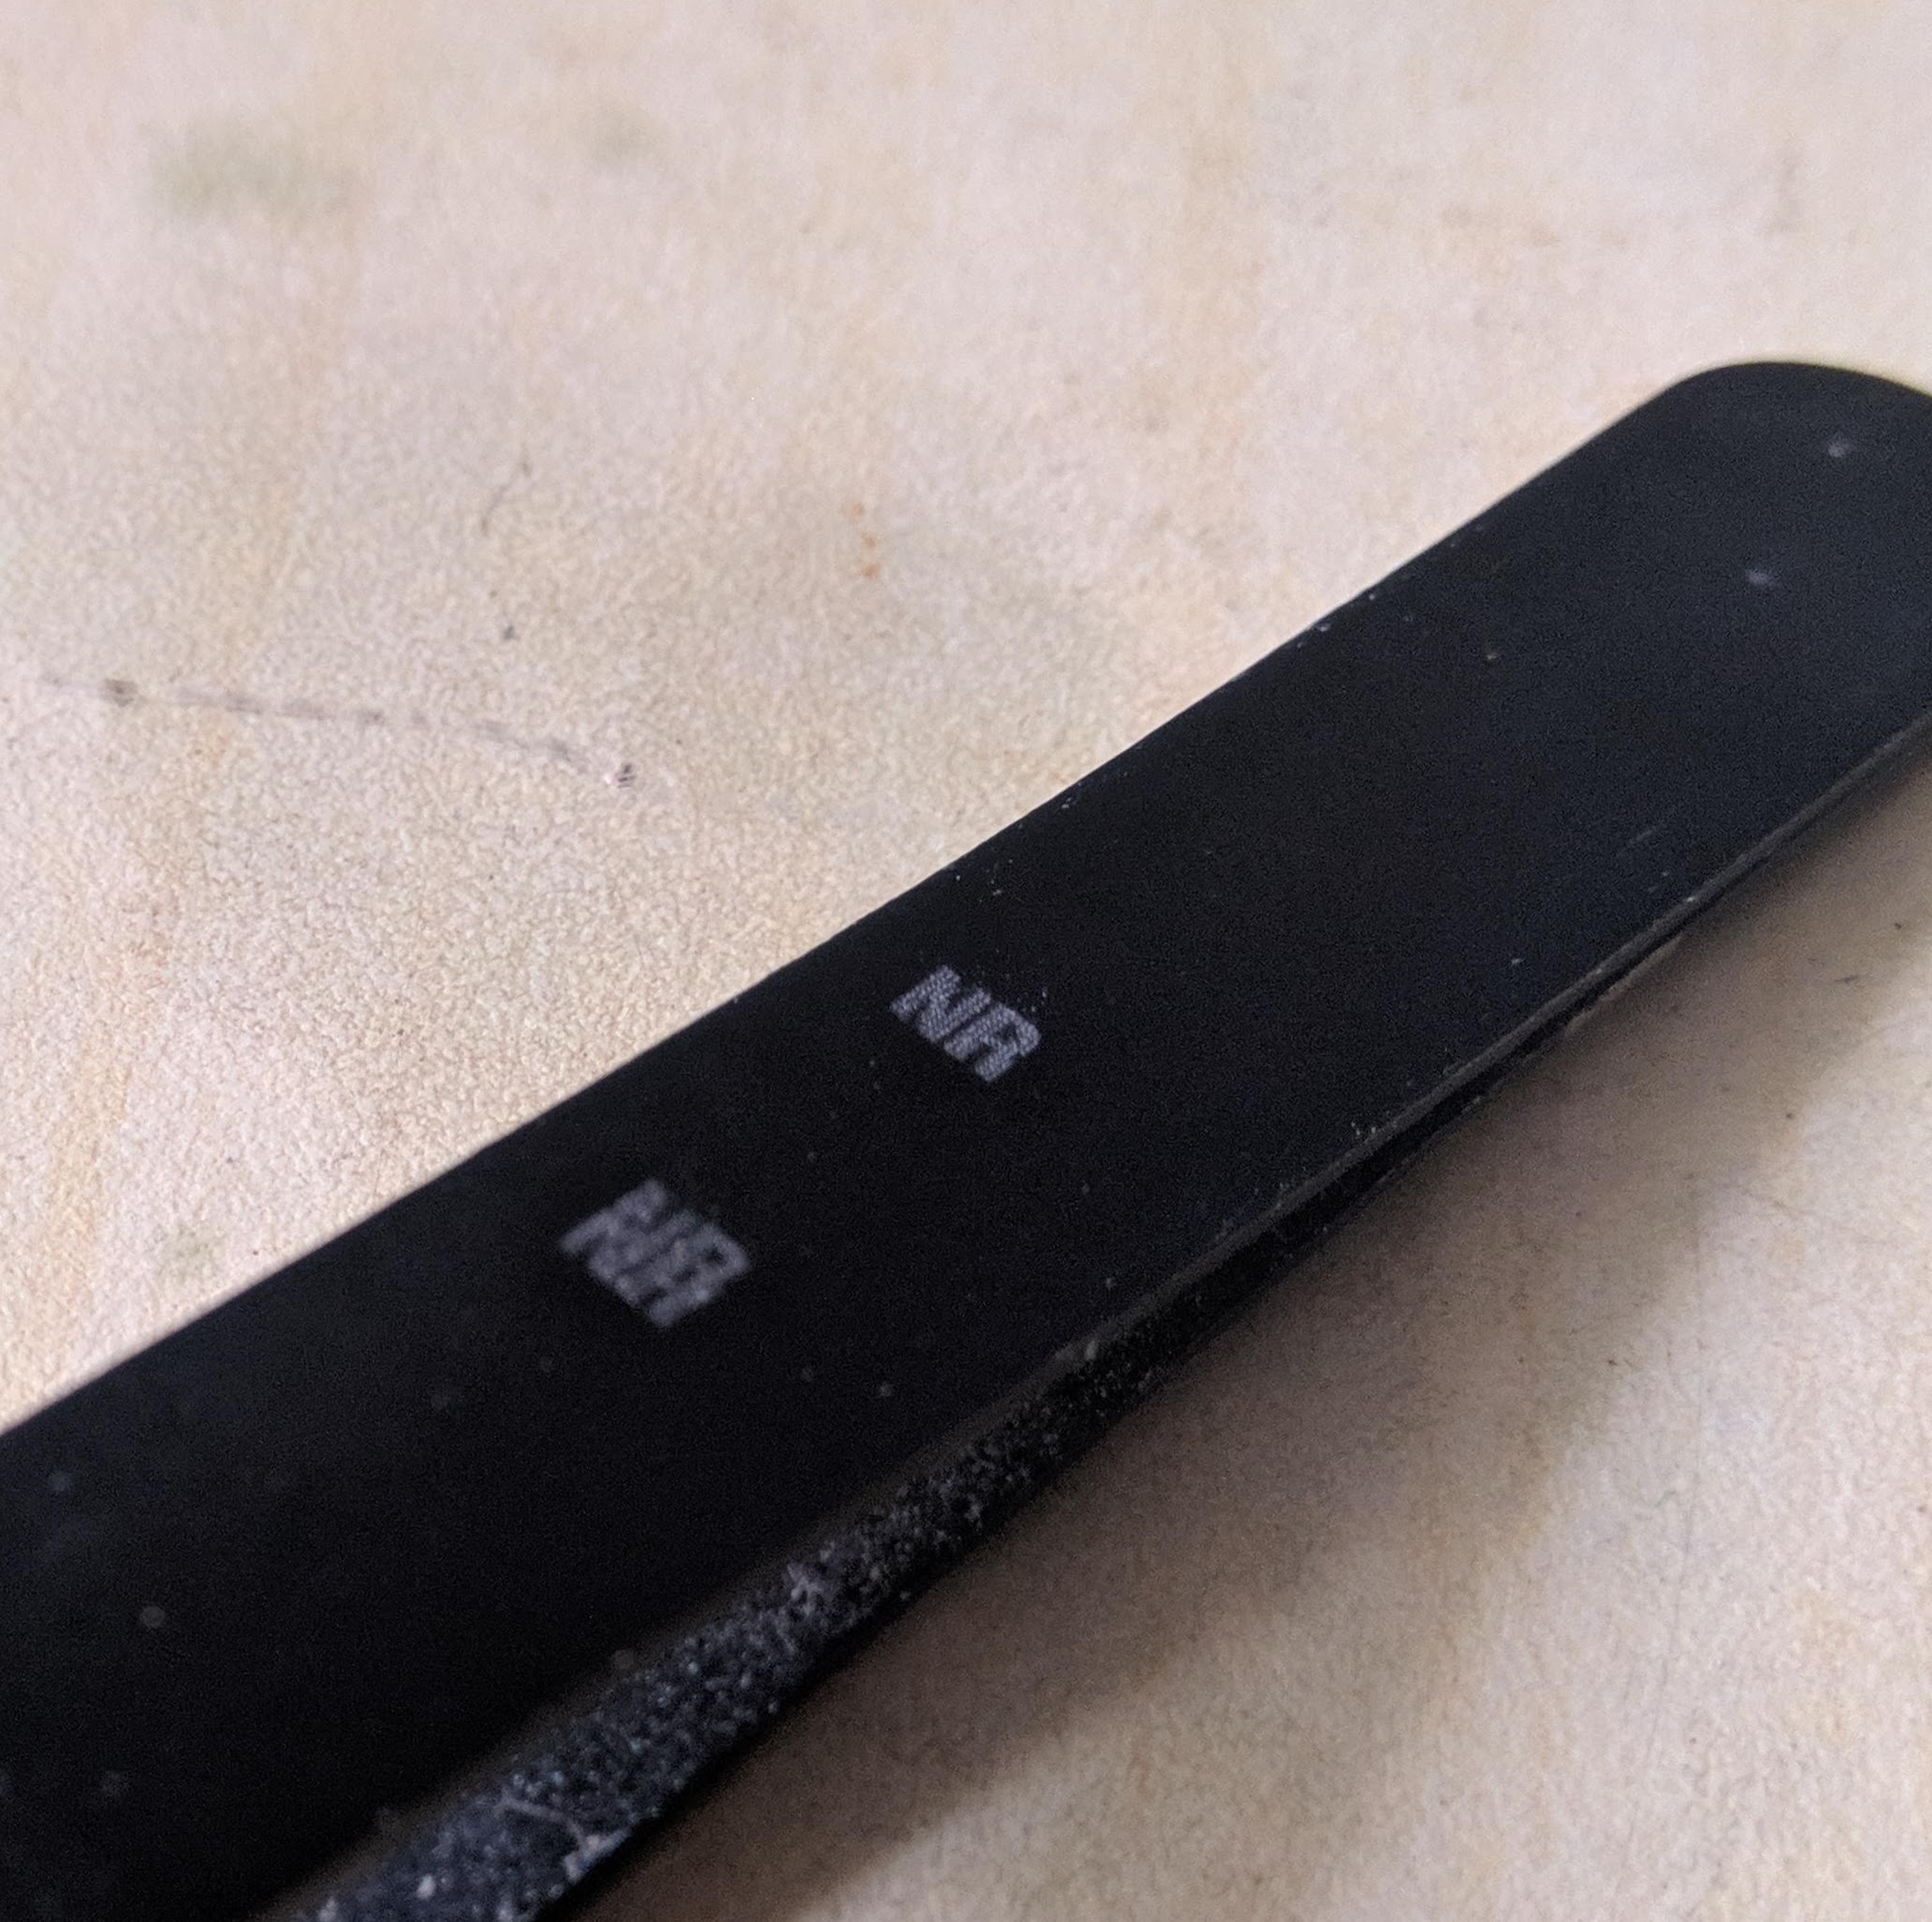
As you can see, I engraved both the images side by side and it came out fantastic. In order to test the precision of this machine, I engraved an image with very fine font and check out how it came out to be.
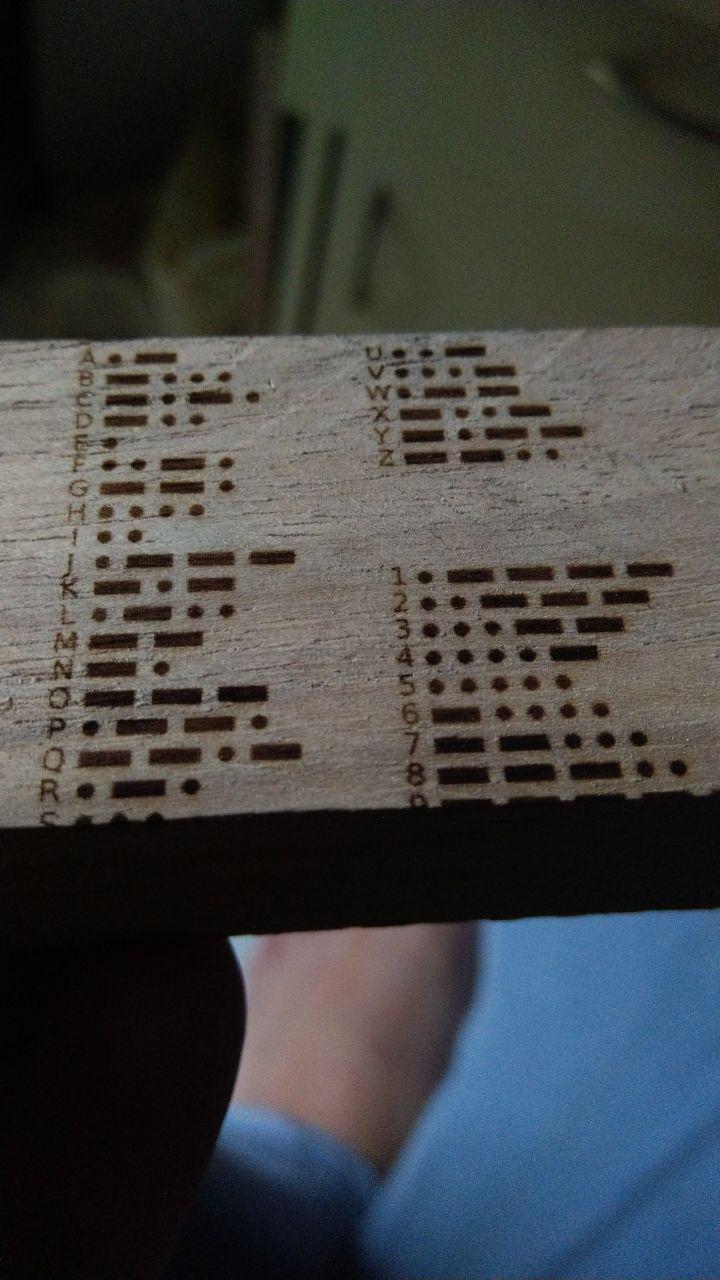
Do note that the morse code image was engraved using the Android app and the process was simply flawless. There were no hassles in setting up the app and everything went smoothly. I was up and running within 2 minutes.
Wish list
There are few things that this machine cannot do. For example, you cannot engrave on metal or shiny surfaces. I tried engraving with high burning time on aluminum and copper but that did not work. Finally, I tried it on anodized aluminum surface and it worked its magic.
It works exceptionally well for the price it is available at. Unfortunately, its area of operation is limited to 50mm x 50mm. Additionally, the engraver takes a lot of time if you are working on images with lot of details because it has to stop at every point for the given burn time. As a result, a relatively complex design can take up to 10 to 20 minutes on high burn time. For impatient guys, you should replace your laser head with a high power module. Perhaps, the NEJE DK-BL 3000 that comes with a 3W laser head can speed things up.
If you wish to create larger designs, the NEJE DK series may not be suitable for you. In such a case you should probably be looking at NEJE Master machines that can even engrave on copper and aluminum oxide surfaces. Their overall design area is as large as 150mm x 150mm.
Where could you use this?
The NEJE DK-BL 1500 happens to be an amazing toy for an hobbyist. For those of you having a home lab with stacks of component boxes, this little engraver can help you label them permanently and elegantly. Many decorative ideas are now easy to materialize onto wooden surfaces with the laser. Not just wood, even acrylic and anodized aluminum surfaces are possible with this tool.
Many a times, I have come across designs that need fine cutouts that are not humanly possible or rather time consuming. Such cut outs are effortlessly possible on paper and cardboard using the laser. Conclusively, the possibilities are endless and you may be the better user than I am. Let me know if you have any questions regarding the NEJE DK-BL 1500.
Very Good Salil….its really interesting
Hi, im after a little help in getting my machine to work, would you be able to assist. No matter what I try it will not burn.
Like the 40w laser engraver I bought from OMTech, you can’t engrave metal directly. I usually pre-treat the metal with a coating and then engrave it.
May I ask what kind of coating? I am bummed as I was led to believe I could engrave labels for my artwork with this system,
Usually paper labels worked the best. Wax coated paper works too. This thing does not work well with anodized aluminum surfaces. It needs higher power laser.