
Reviewing the new NanoVNA v2 (SAA-2) – Part 2

In the part 1, we reviewed the hardware aspects of the NanoVNA v2 SAA 2. Here, we will review the actual functionality of the device.
Those familiar with the NanoVNA v1 need no guidance on getting along with the v2. Everything on the user interface side of things remain the same. When the first nanoVNA came out, it had no TDR option. Later, a python script posted on this blog inspired the addition of that option into the firmware. NanoVNA v2 comes with the TDR option built in. We will testing out all the major features in the NanoVNA v2 in this article.
Check out the NanoVNA 1 review
Calibration
Calibration is an absolutely important part of any VNA. A fault calibration can lead to incorrect measurements. But let us remind ourselves that we are a community of amateurs and going for absolute accuracy isn’t our aim. Although, having it is always an advantage.
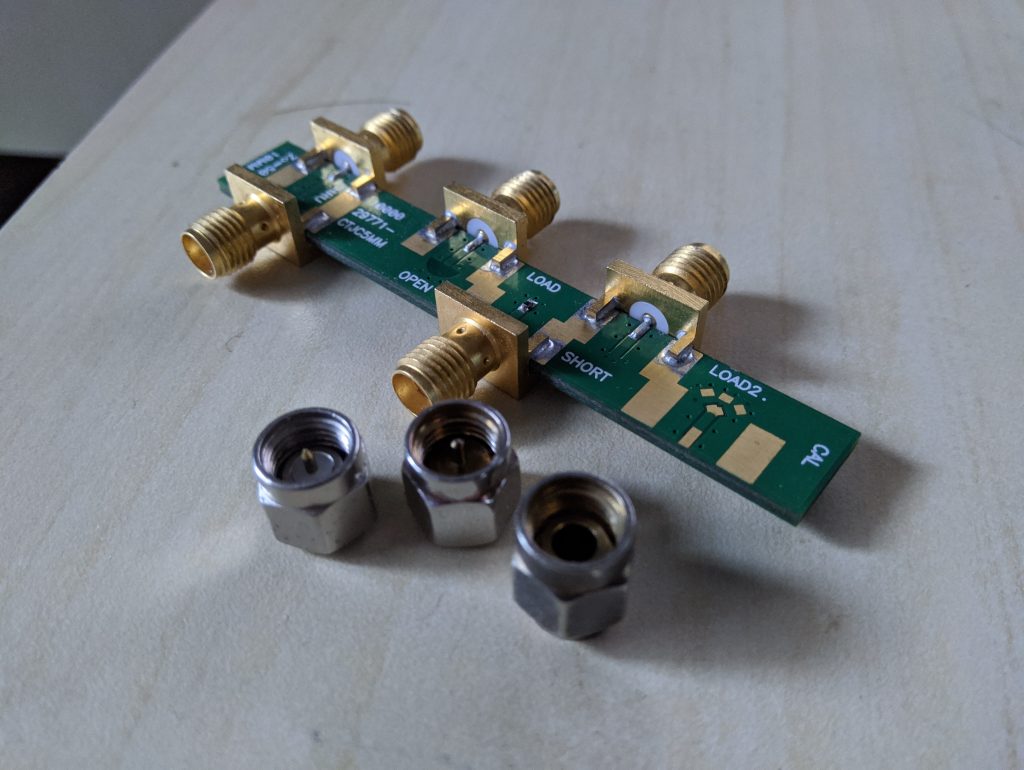
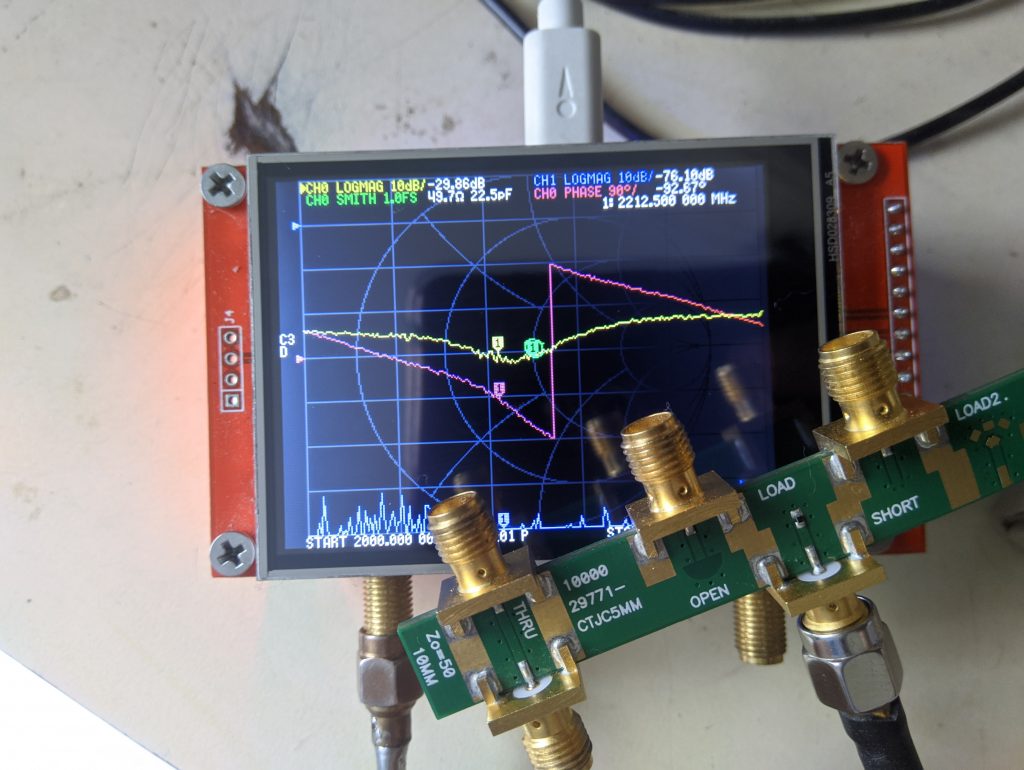
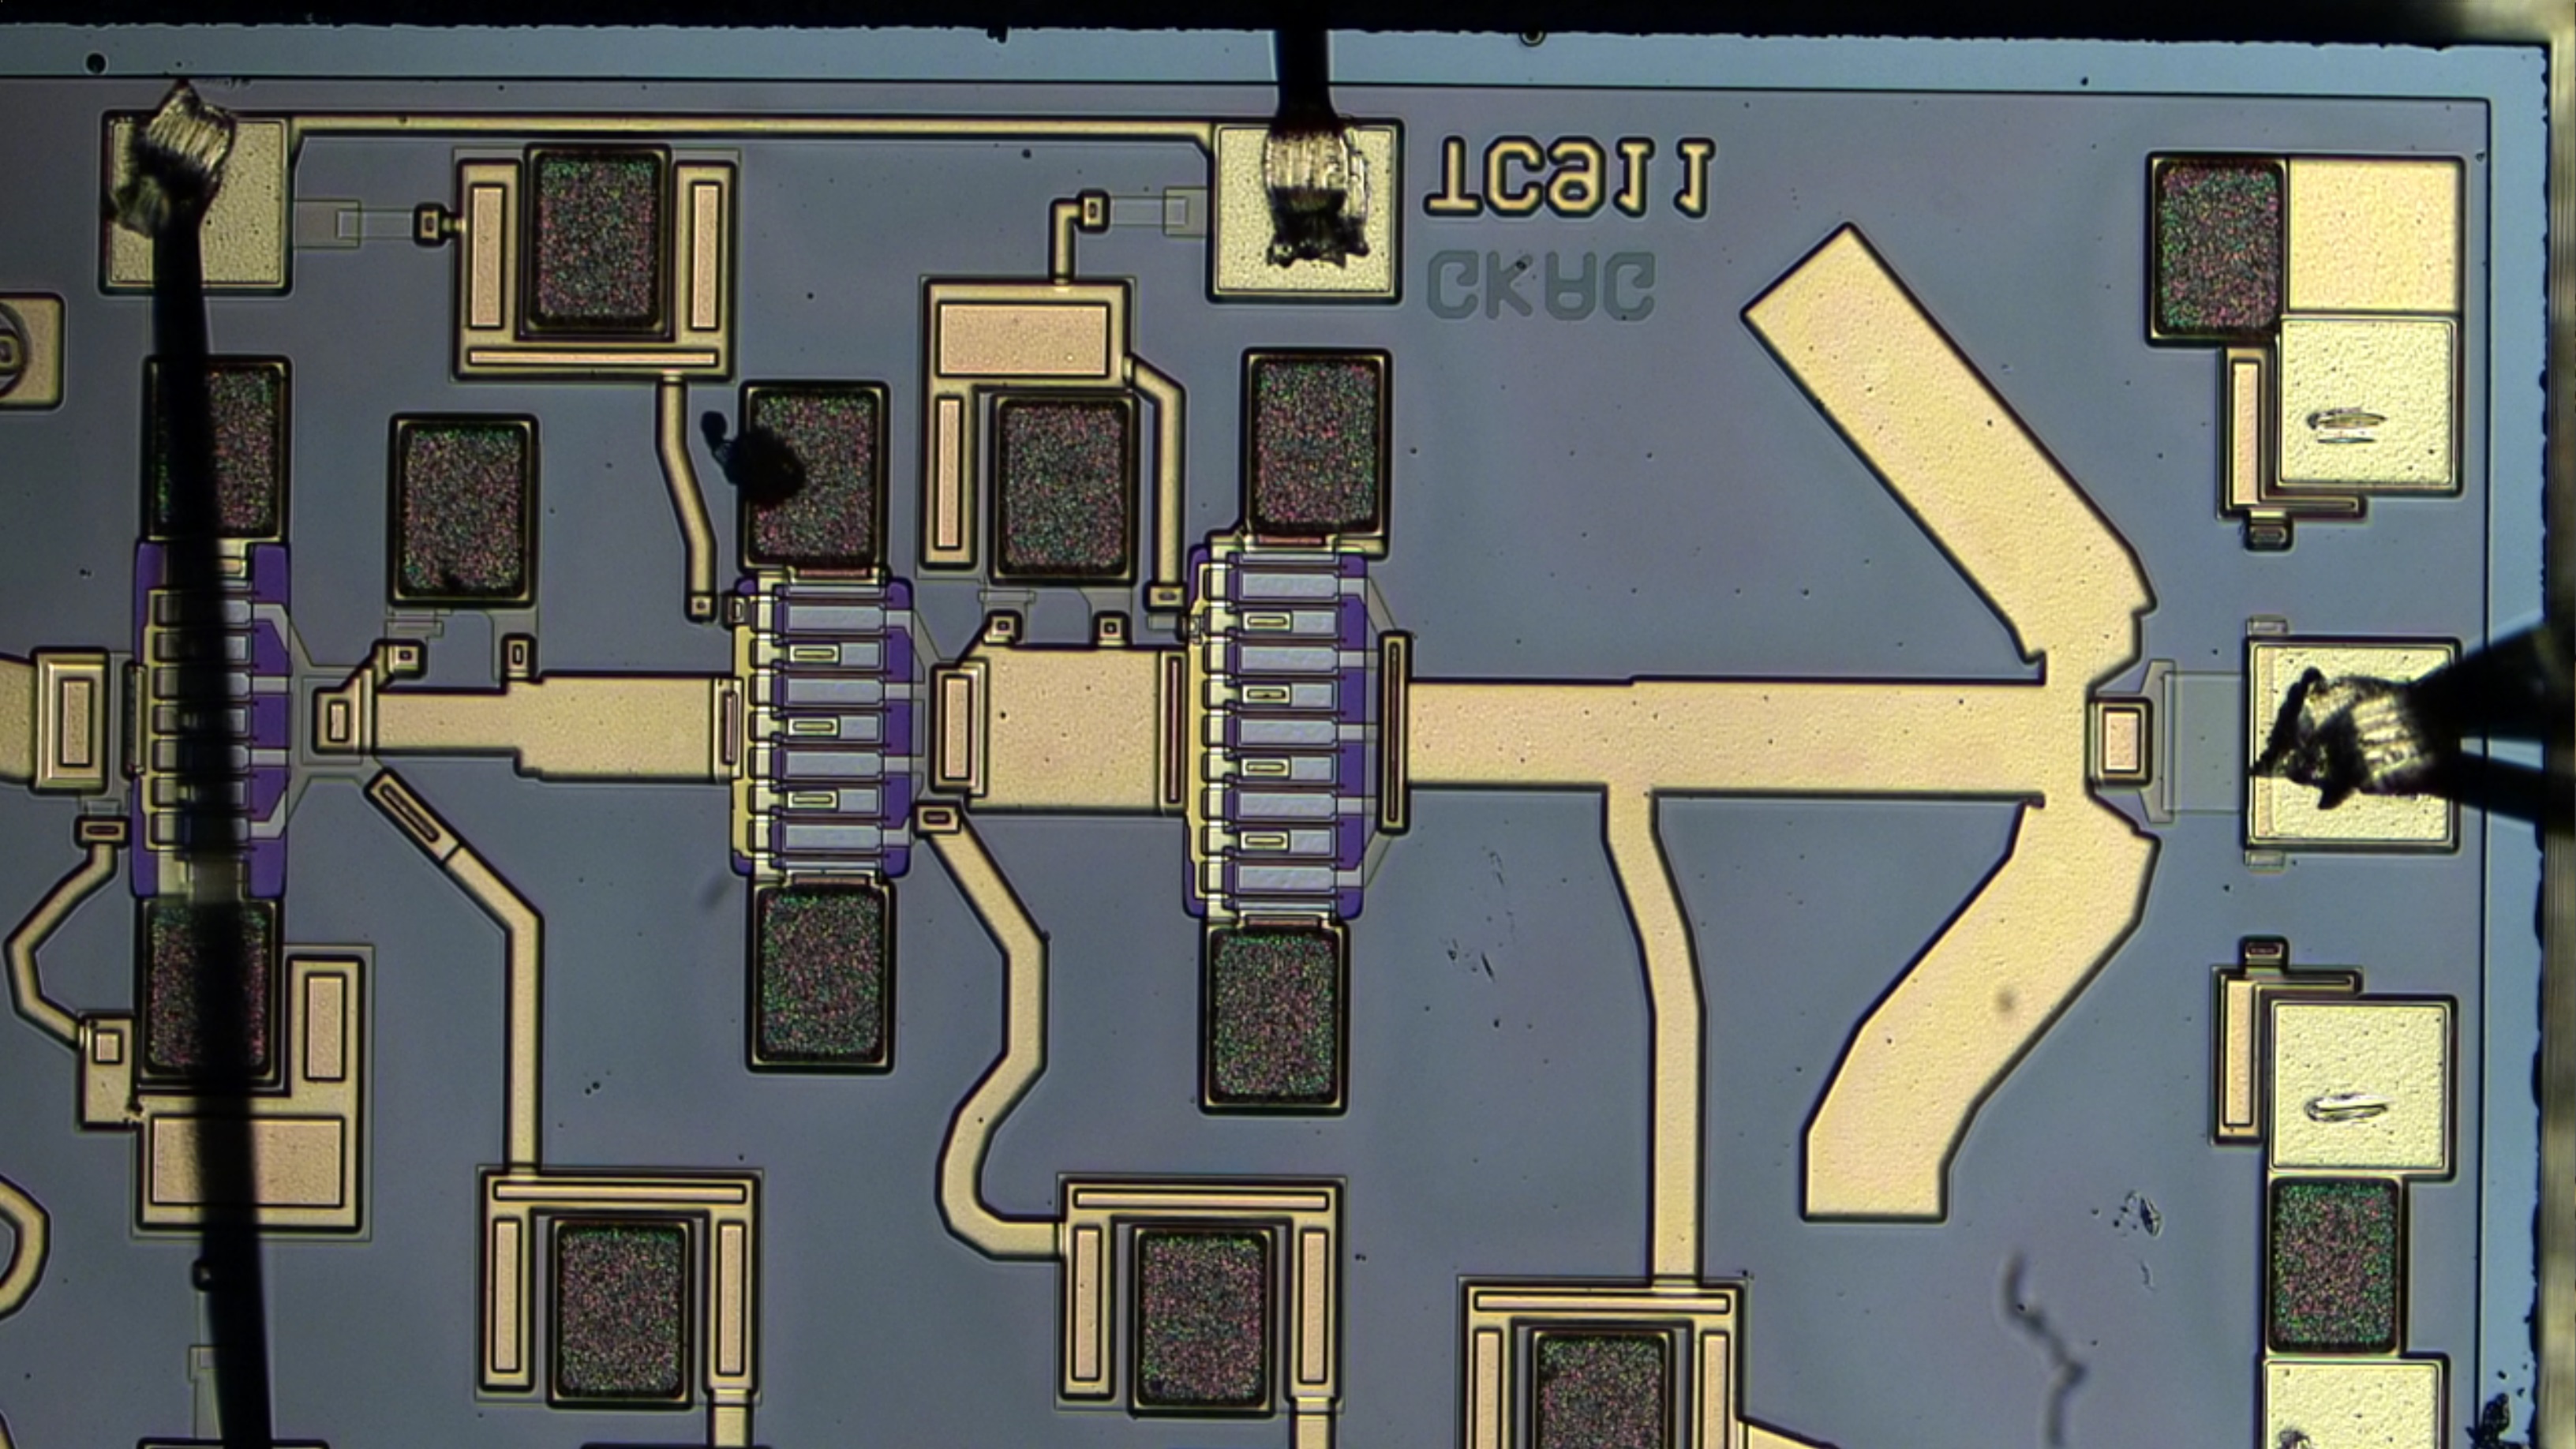
I will be using the same calibration kit that came with the first version of NanoVNA. I had never tested it beyond 300MHz. Therefore, I do not know how good it is at 3GHz. I have another test PCB from MACOM with Open, Short, Load and Through ports.
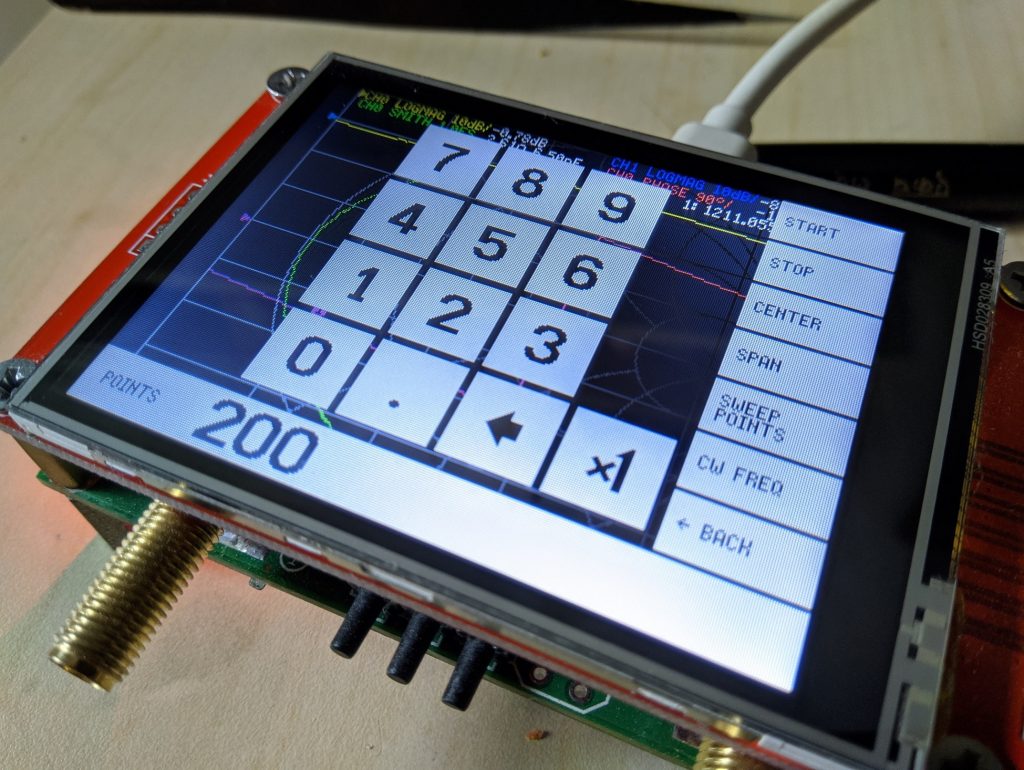
Before you begin calibration, remember that you can set up to 201 frequency points. If you prefer using your PC, the NanoVNA Qt software lets you have up to 1024 points. This is a good improvement over the previous device. You obviously get a lot more control if you use PC software. We will go through it later in the article.
Navigating through the menus will land you at the calibration option. Keep in mind that the calibration gets applied at the end of the port. For example, you calibrate the port without any cable, the calibration is applied until the end of that port. If you attach another cable to extend your port, you must recalibrate.
In the NanoVNA, we were dealing with lower frequencies. I never tried to use it beyond 300MHz even though it could. So, if you are like me, adding a small female to female adapter to attach the cal-kit elements didn’t cause much trouble. But as you go up in the frequency, things like adding an adapter to your cal-kit starts to matter.
SOL calibration – NanoVNA Qt
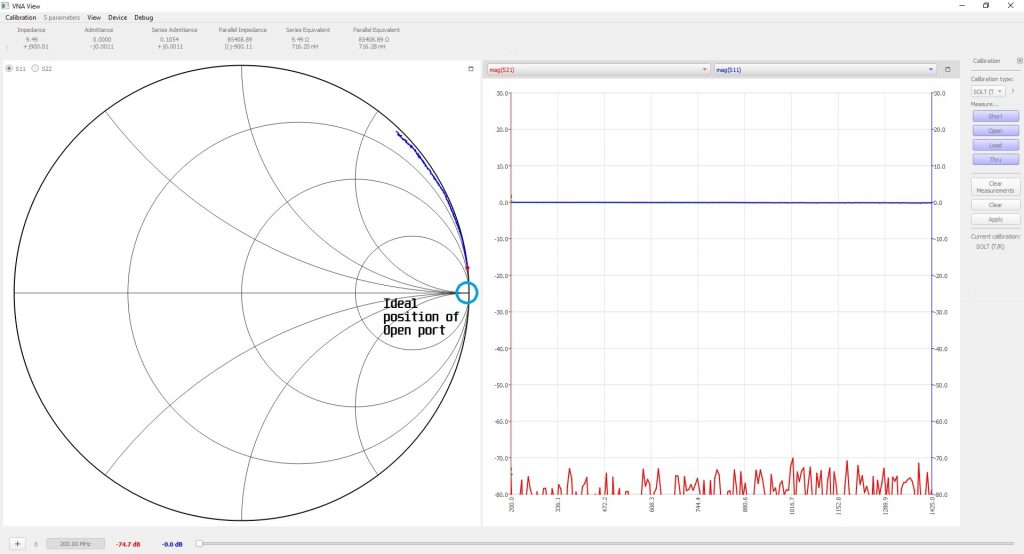
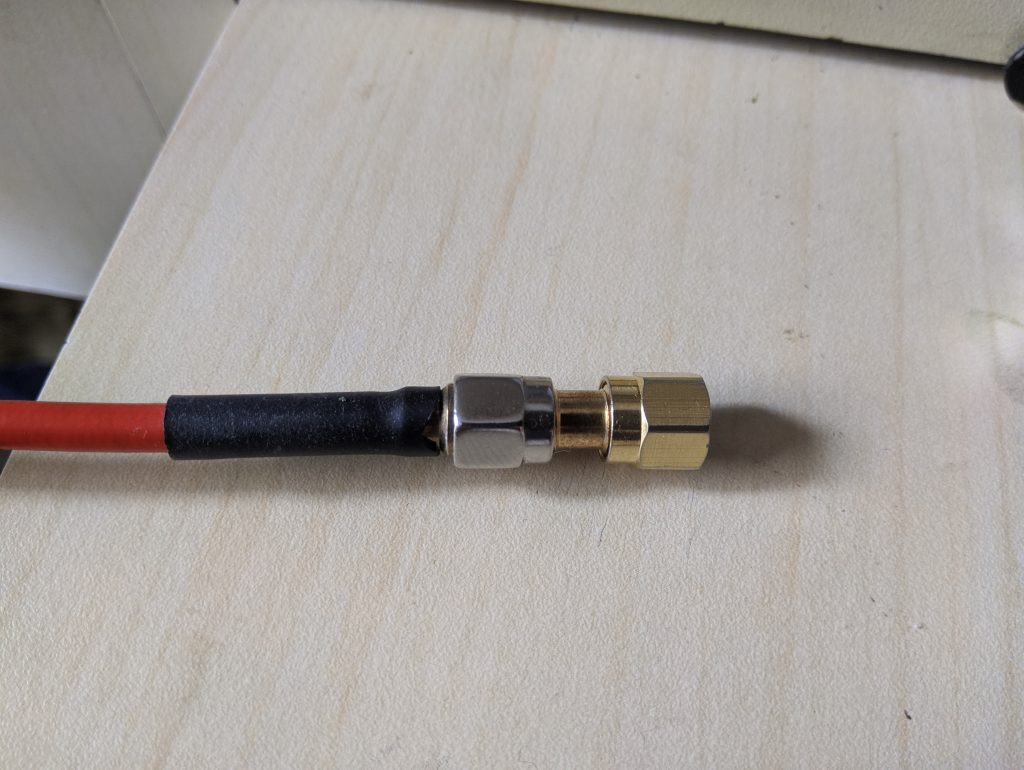
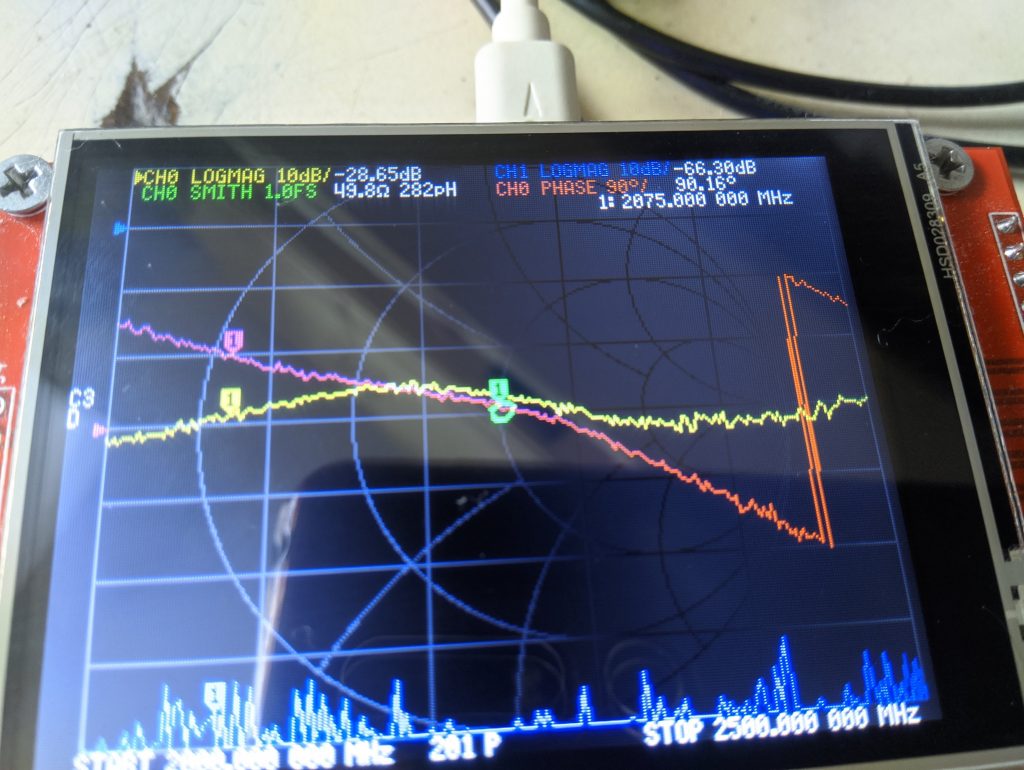
Like I mentioned, the cal-kit from older nanoVNA came with male ports. Essentially, requiring an addition of female to female adapter when you want to calibrate at the end of your SMA cable. I used to get away doing SOL calibration and never worry about the added adapter delay because the frequency was less. This is what happens when I don’t account for that adapter delay. The reference plane shifts.
Note that I will be using the 2GHz to 2.5GHz band to do my measurements.
Now, the trick is to compensate for the additional delay and that’s possible in the NanoVNA Qt software only.
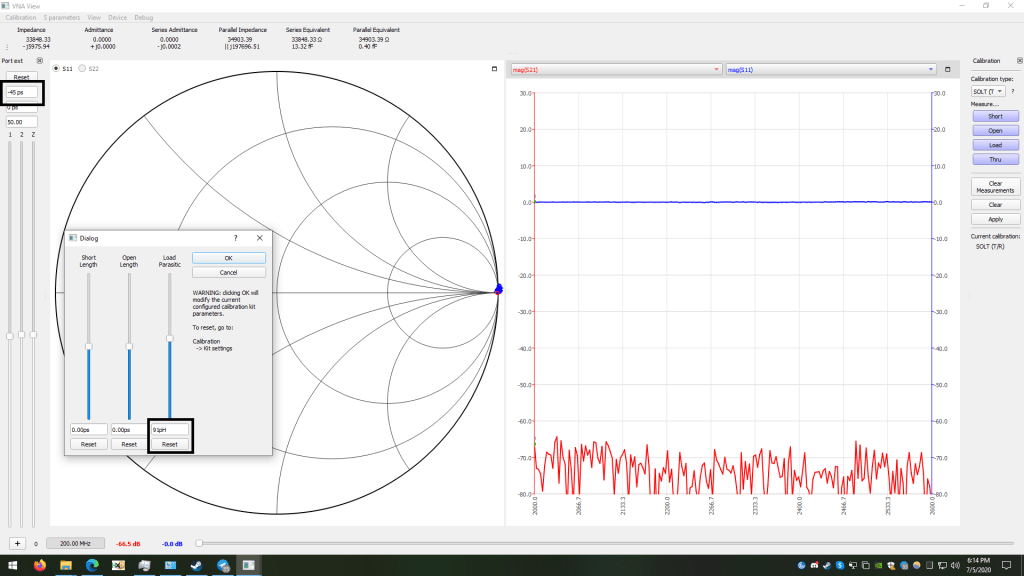
On an average, female to female adapters introduce an additional delay of 42 to 50ps. It all depends on the exact length of your adapter. Mine seems to have roughly 45ps of delay. Now, I need to subtract it because this delay comes into picture only when I am calibrating. Hence, the negative sign indicating port length reduction. A little parasitic adjustment takes the open port point cluster right where it should be!
Since, we are already speaking of NanoVNA Qt let me point out that you need this software for upgrading the device firmware. The firmware can be downloaded from github.
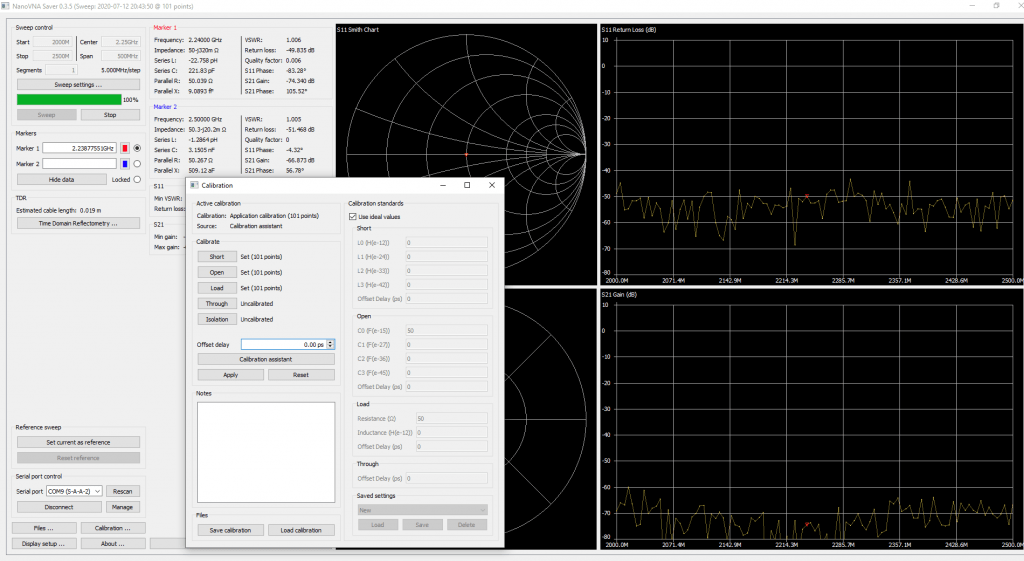
NanoVNA Saver
At the time of writing this article, NanoVNA saver 0.3.5 prelease test version was available. It offers a better user interface and a lot more readouts for various derived parameters. The software is still work in progress so let me keep this section short. We will come back to this someday later. Multi-segment measurements and calibrations are easily possible with NanoVNA saver. It also allows for a higher number of data points going as high as 1024. Multi-segment measurements allow for a wide frequency sweep without compromising frequency resolution. You can download the 0.3.5 version from here. Remember, its a working in progress!
Some more testing
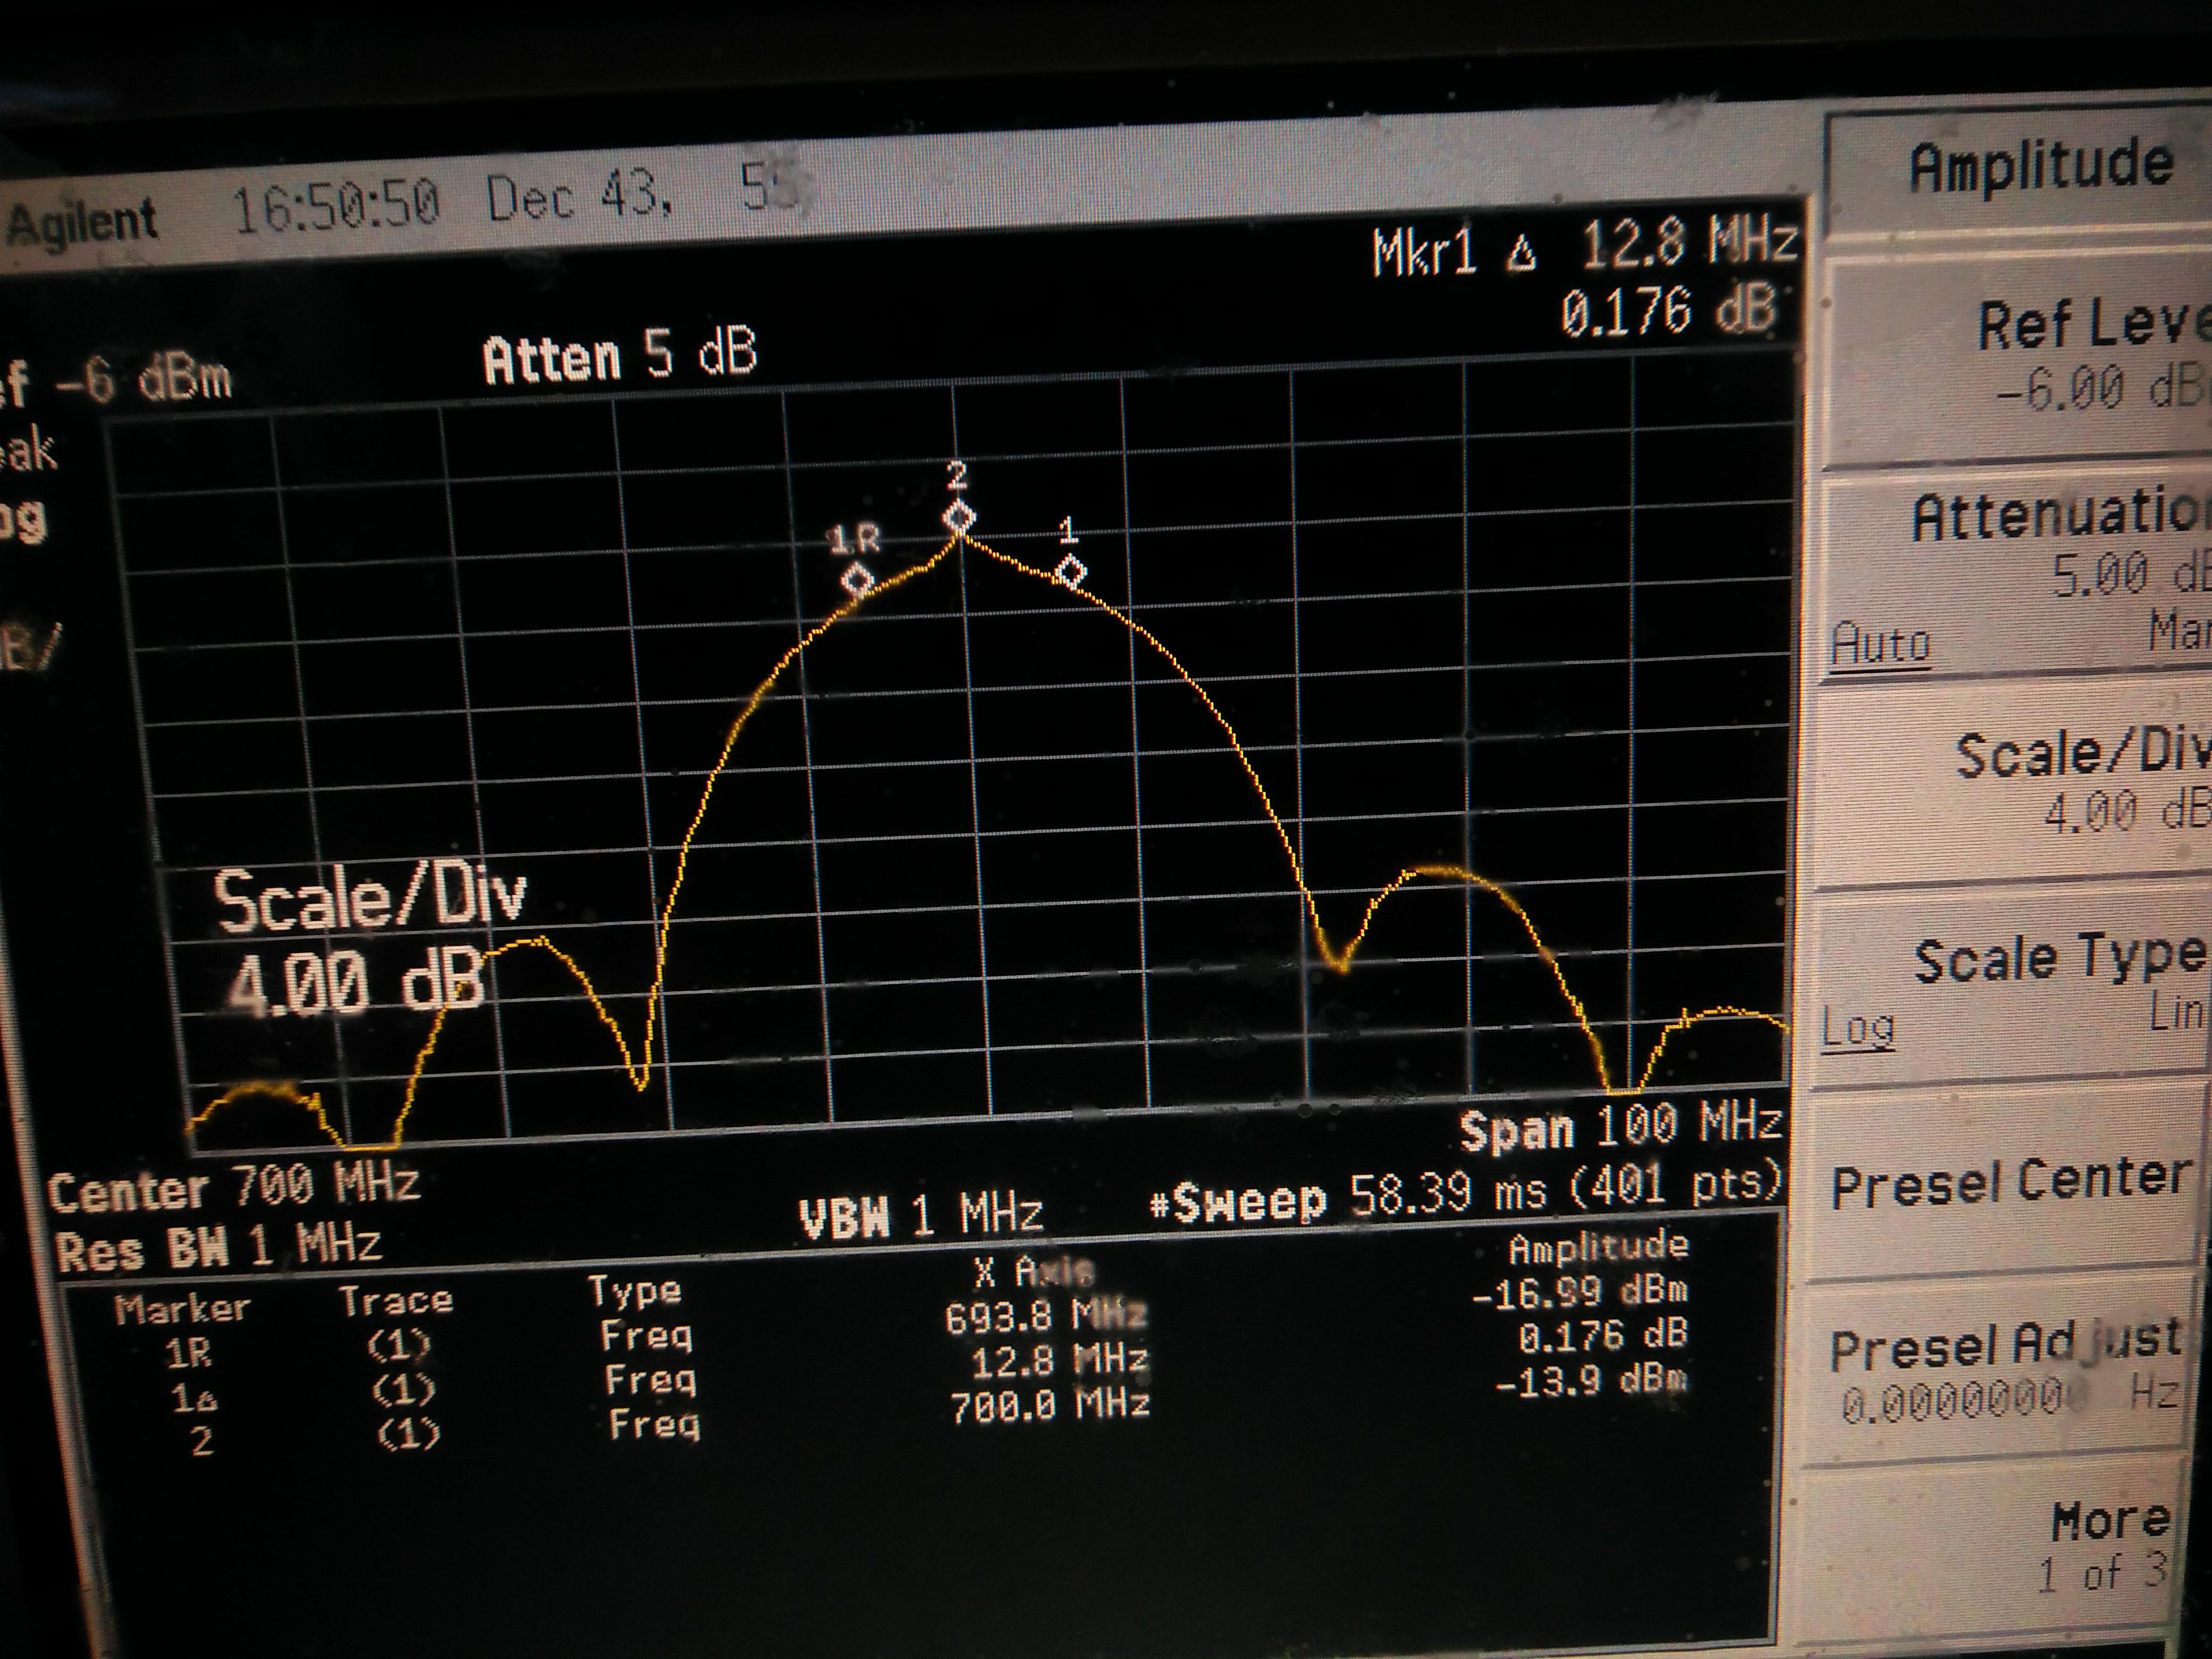
Now, I connect an additional known good RG405 cable that I had created previously and attach various 50 ohm terminations to it. The first termination I got comes from Amphenol. Known to work well up to 6GHz in my experience. The NanoVNA v2 shows the return loss in the range of -25 to -35dB. Which in my opinion is acceptable at this range.
A second termination comes from the MACOM test PCB known to perform well all the way to 3GHz. This one shows a return loss between -25dB and -30dB. Again, an acceptable reading!
Now, that I am done calibrating, it’s time to test something more practical. How about a crude antenna?
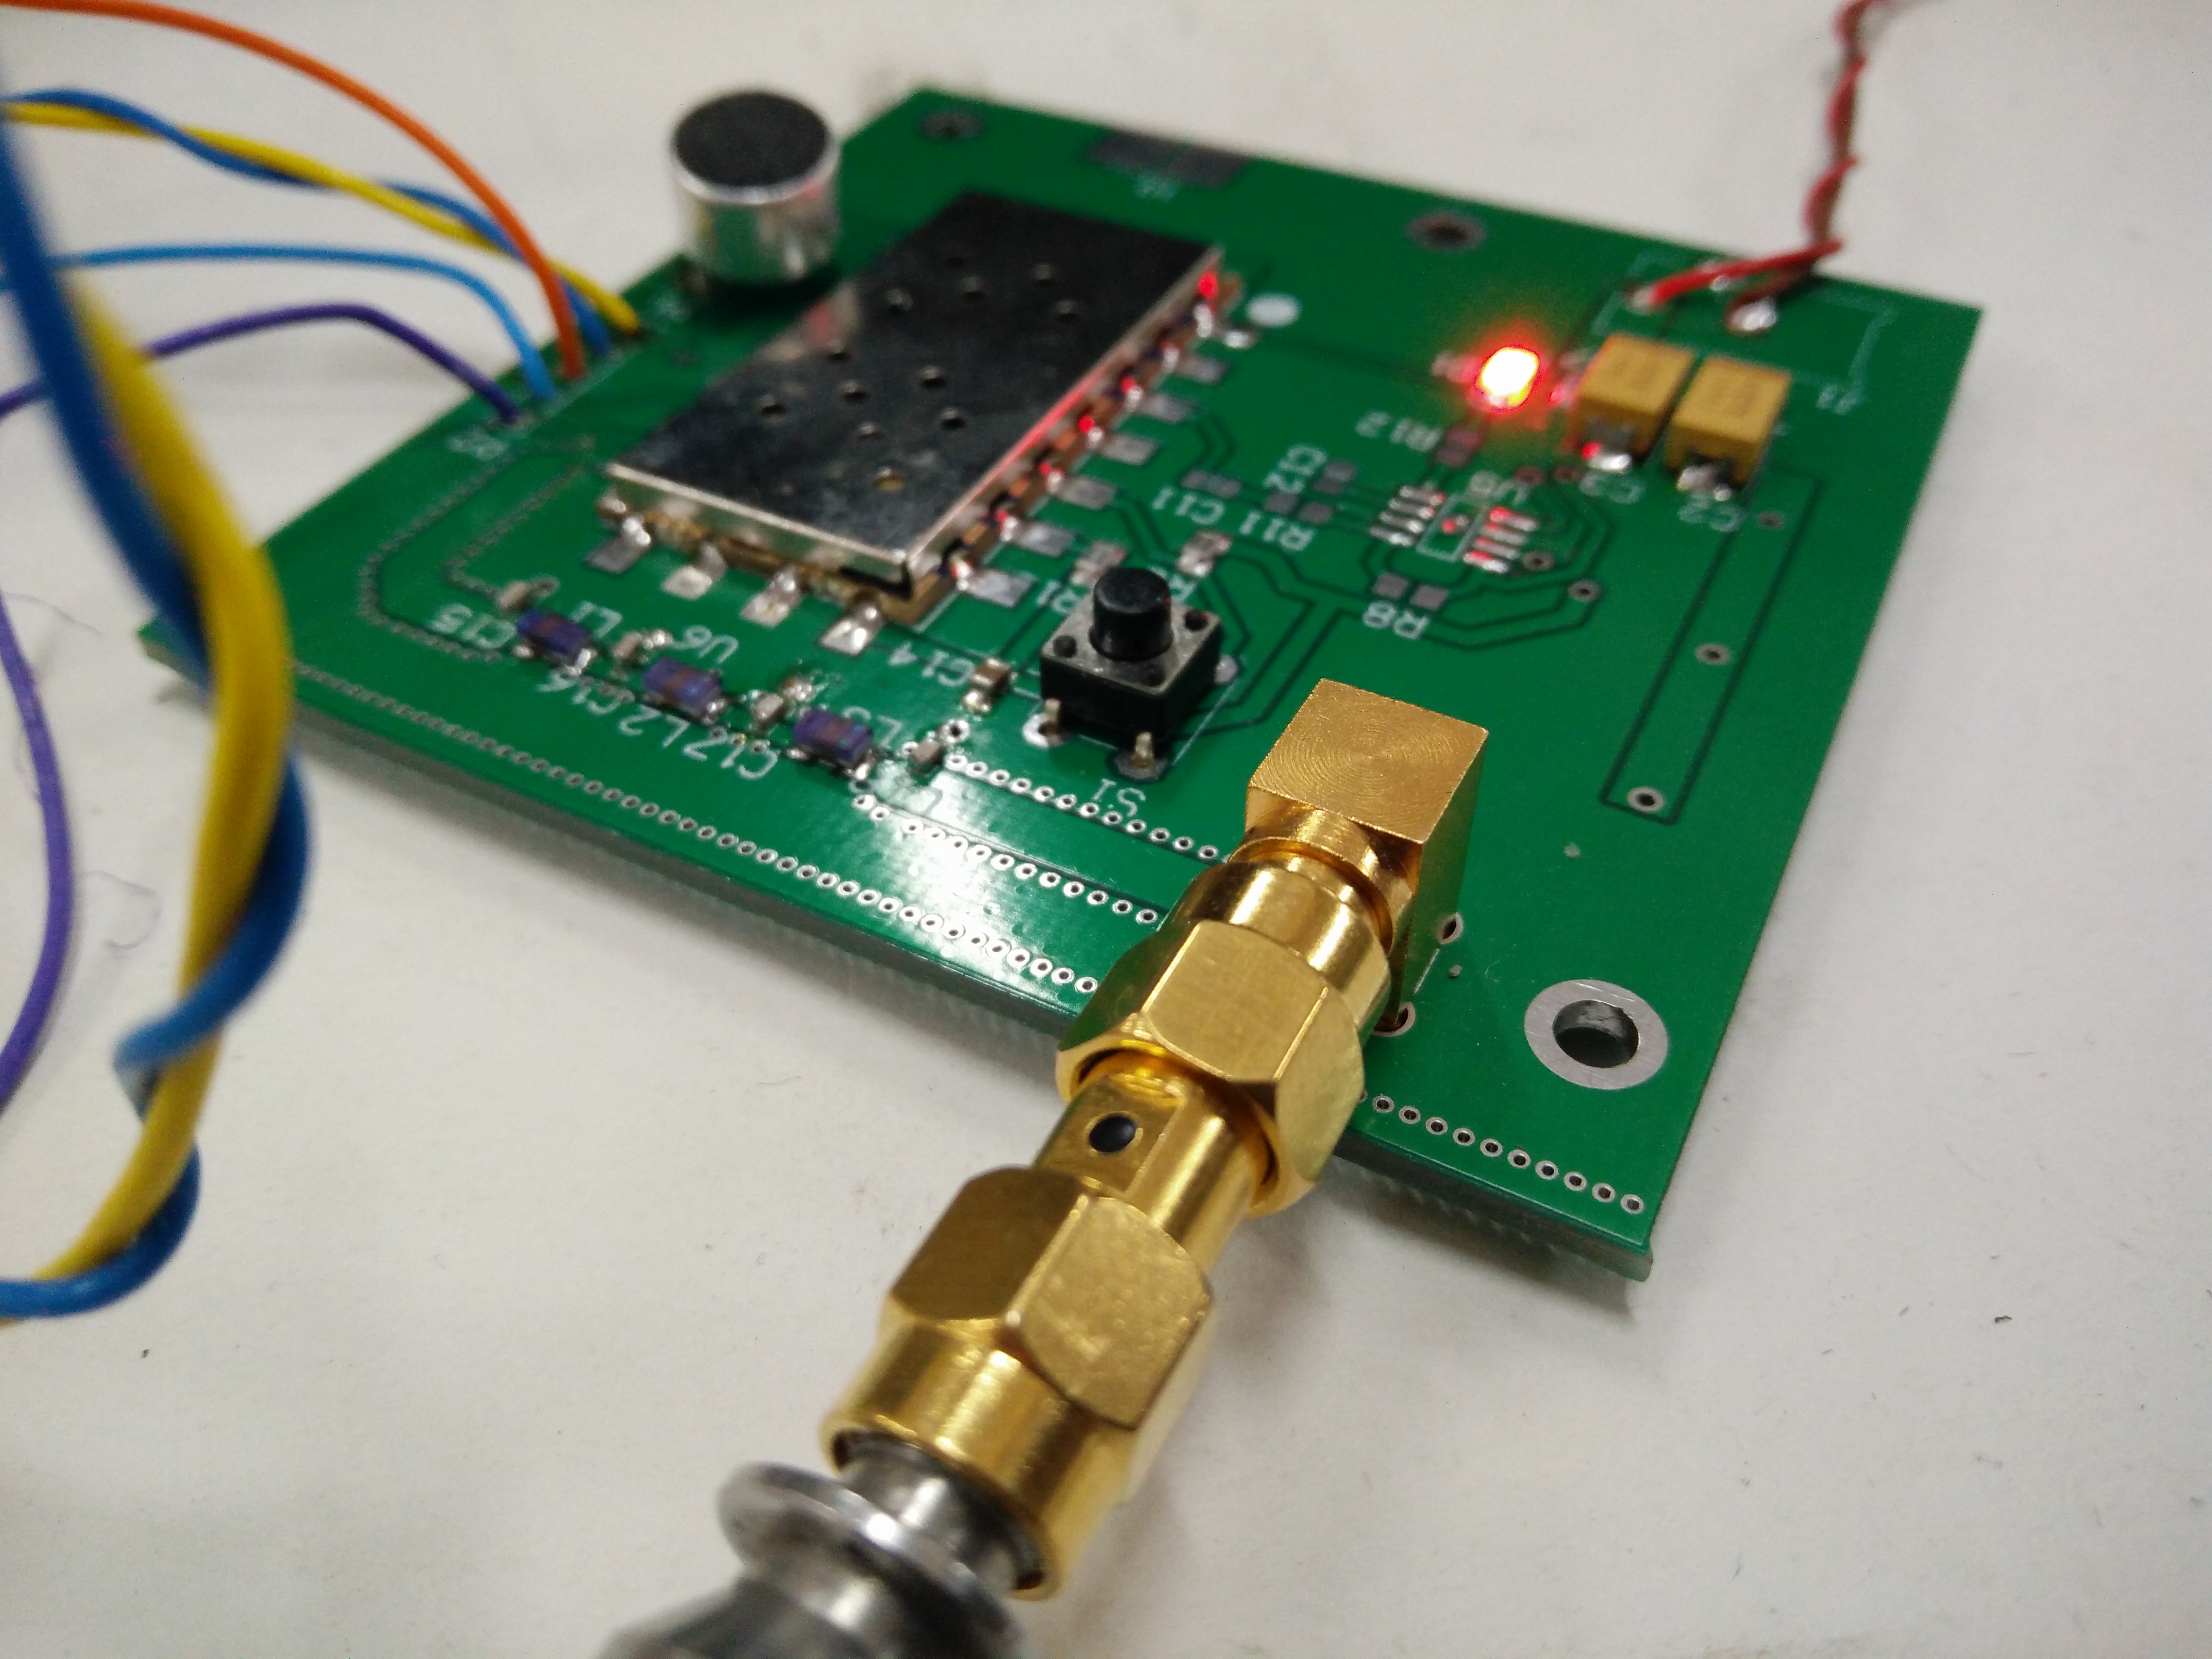
I constructed a really crude monopole antenna that is expected to work in the range of 2.5GHz to 3GHz. With nothing to hold properly, the soldering came out really bad. Excuse my soldering this time. I can do much better than what you are about to see!
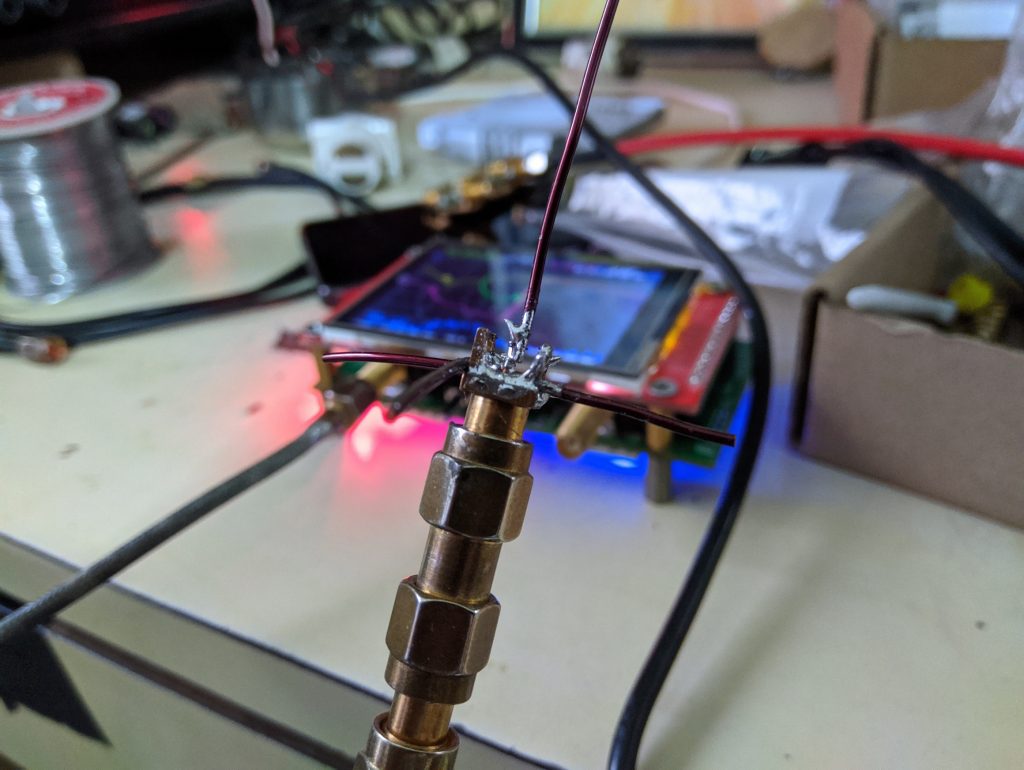
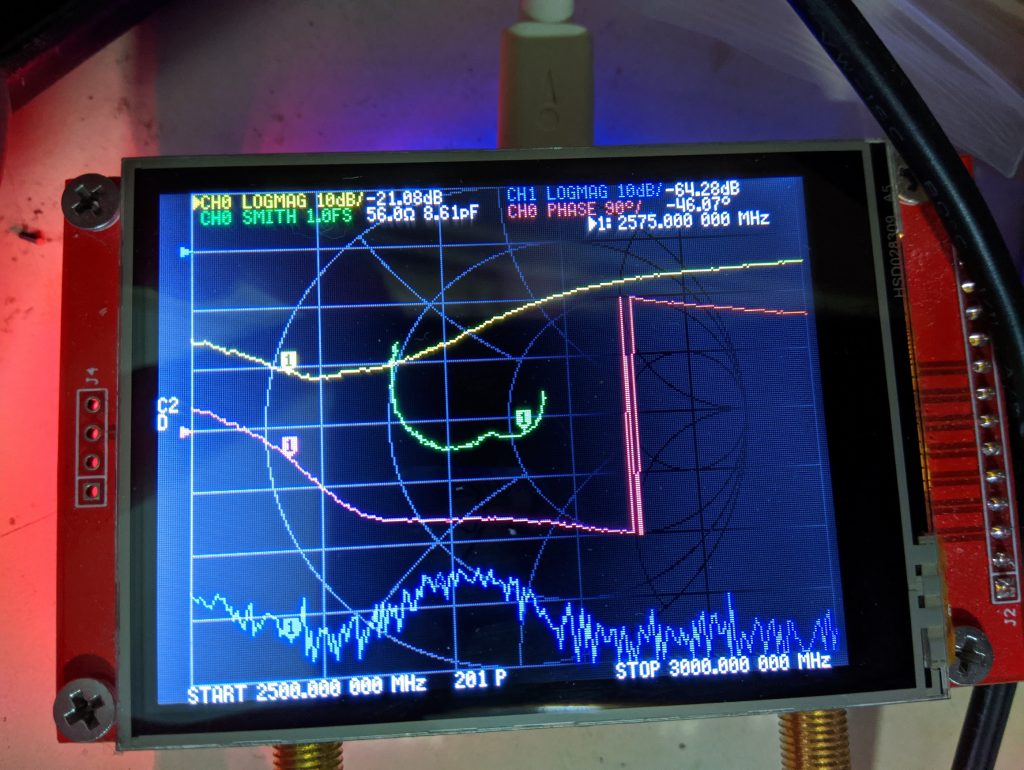
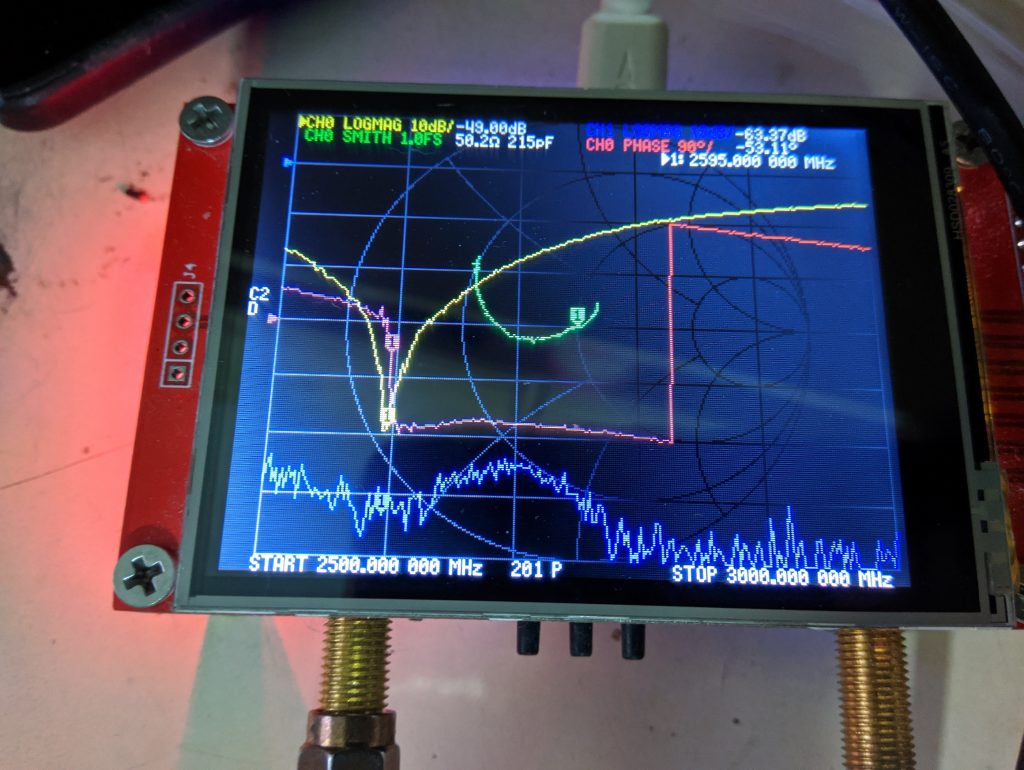
As we all know, antennas are easy to detune once you bring a metallic object near it. The point of resonance shifts up and down depending on how far away is the detuning element. In this case, it was in the right position to actually improve the resonance.
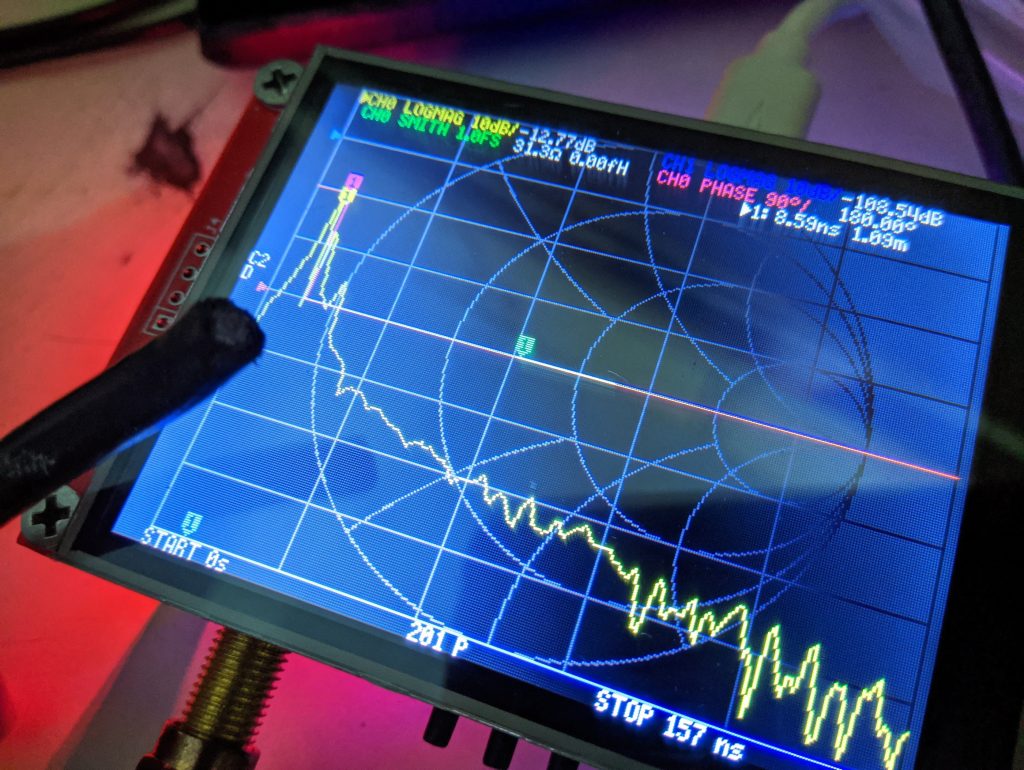
TDR
I had first posted about time domain reflectometry on this blog at the time of reviewing NanoVNA v1. Later on, it got incorporated into the firmware making it very usable for everyone. To test it’s accuracy, I used a 1.1m piece of RF200 cable with a 85% velocity factor. NanoVNA v2 accurately measures the length as 1.09m which is quite satisfactory to me.
Conclusion
The NanoVNA v2 is an excellent device. Unfortunately, working beyond 1GHz requires you to invest in quality accessories. For example, you will require good quality cables, adapters, terminations and so on. You should also avoid using no-brand Chinese SMA connectors and adapters. Those will surely ruin good connectors. As a result, you will be left with absolutely ridiculous performance above 1GHz region.
While testing, I started with RG316 cables bought from China. Apparently, the connectors on them had really poor mechanical tolerances. It widened the female adapter’s pin. Eventually, the termination stopped making contact resulting in poor return loss. Since, I am not doing anything professional here, I “fixed” the bad adapter with tweezers and had it working.
Mistakes and corrections
Coming back to NanoVNA2. It’s designed really well and works the way it should. Unfortunately, a well designed device also requires correct marketing strategy. If you solely focus on cost reduction and cut on the essentials, you end up with bad product. The Tindie store really leaves you on your own to buy cables and your own cal-kit. It may be a good thing but it also leaves beginners vulnerable to cheap no-brand cables and adapters. In turn, not allowing you to get the full performance out of the device. On the other hand, the Hugen NanoVNA 2 sold on Alibaba comes with good quality cables and it’s own cal-kit.
For people getting the Tindie version without any accessories, I am leaving links at the bottom to get good quality accessories. Fortunately, tindie seller learnt its lessons after the first batch and started offering accessories now. Unfortunately, the mistakes made in the early life of NanoVNA v2 are responsible for the product’s lack of popularity. This can be a good case study that explains us the importance of getting your product launch right.
In the software/firmware side of things, I would have really loved to have a adapter delay compensation option. As mentioned in the review, the compensation is possible in the NanoVNA Qt software. Even better would be to have that option on the device. Going beyond, an option to have manual calibration coefficients would be awesome too.
I am not really fond of the NanoVNA Qt software and the NanoVNA-saver is currently being adapted for the v2. Once that part is done, using this device would be much fun.
In my opinion, two versions of the product confused many. A well engineered device with bad marketing strategy hampered the device popularity.
The question remains, should you buy NanoVNA v2? Absolutely! This device can serve enthusiasts and beginners alike.
BUYING links
Hugen NanoVNA v2
Tindie NanoVNA v2
Good cables – Minicircuits
SDR Kits Cal-kit
NanoVNA v1
What more?
People are making nice little cases for the NanoVNA v2. We are also expecting an official metallic case to come out soon.
A larger screen version would also be making way into the online stores soon enough.
The NanoVNA 2 from the tindie store is the original one from the guy that designed it and the one you are promoting is a knock-off, at least that’s what I heard.
Yea its crazy how things have turned. I stopped keeping track of it altogether. The first nanoVNA was a hit, the second one seems to have become a controversy.
Where can I get an MACOM test PCB (Part Number 1000029771-CTJC5MM) like the one shown above? I tried searching MACOM, DigiKey, and Mouser; but no luck. Thank you.
MACOM had sent it when I purchased one of their amplifier products. You can try to search for that part number directly on MACOM site. Otherwise, just contact them over email.
Hi,
I bought it and am very pleased with results especially on testing VHF antenna response.
However I can’t find a description of how I could measure cable length WITHOUT using the software and a PC. Say measure cable length or locate some connector problem on site.
All web info seems to refer to VNA versions without self- contained TDR capability.
Any idea?
hi, you need to enable the “transform” function in the device. That should give you what you need.
Hello. I will like to buy a few of the MACOM test PCB you are using. can you send me the link . Thanks in advance for your help.
Here you go. https://www.digikey.in/en/products/detail/macom-technology-solutions/MABA-008115-CT62TB/5052412?cur=INR&lang=en