
NanoVNA – A short review
Do you build RF circuits? Have you built any antennas? If the answer to any of the two questions is YES, then you know how valuable having a VNA (Vector Network Analyzer) is. Just an year ago the cheapest VNA on the market was the miniVNA coming at a cost of approximately $560 on Amazon.com. For someone like me, $560 is a bomb. I would prefer something costing even less, something in the range of $100 to $200. I have even considered building a VNA but given the time constraint I have often given up on that idea. Another reason preventing me from building my own VNA is the fact that I have access to a really expensive 50GHz VNA at workplace where I often test the circuits I build. Click here to read the comparison between low cost nanoVNA vs super expensive 50GHz Keysight FieldFox N9952A
Having a VNA at home isn’t absolutely necessary for me but having it at home isn’t a bad idea either. A couple of weeks ago I came across a VNA very cheap! Operating from 50kHz to 900MHz, the NanoVNA seemed like a huge bang for the buck. My friend VU2WDE had already purchased it giving me a chance to evaluate it before I buy one for myself.
Why a VNA is preferred
MFJ259 being the most commonly used antenna analyzer shows VSWR, Capacitance, Inductance, and Reactance all the way up to 200MHz. You have to manually turn the frequency knob and observe the display for readings. A VNA, on the other hand, shows a lot more data throughout the set frequency span. There is very little manual intervention once you have calibrated everything. All you have to do is connect your device or an antenna and observe its characteristics on the screen!
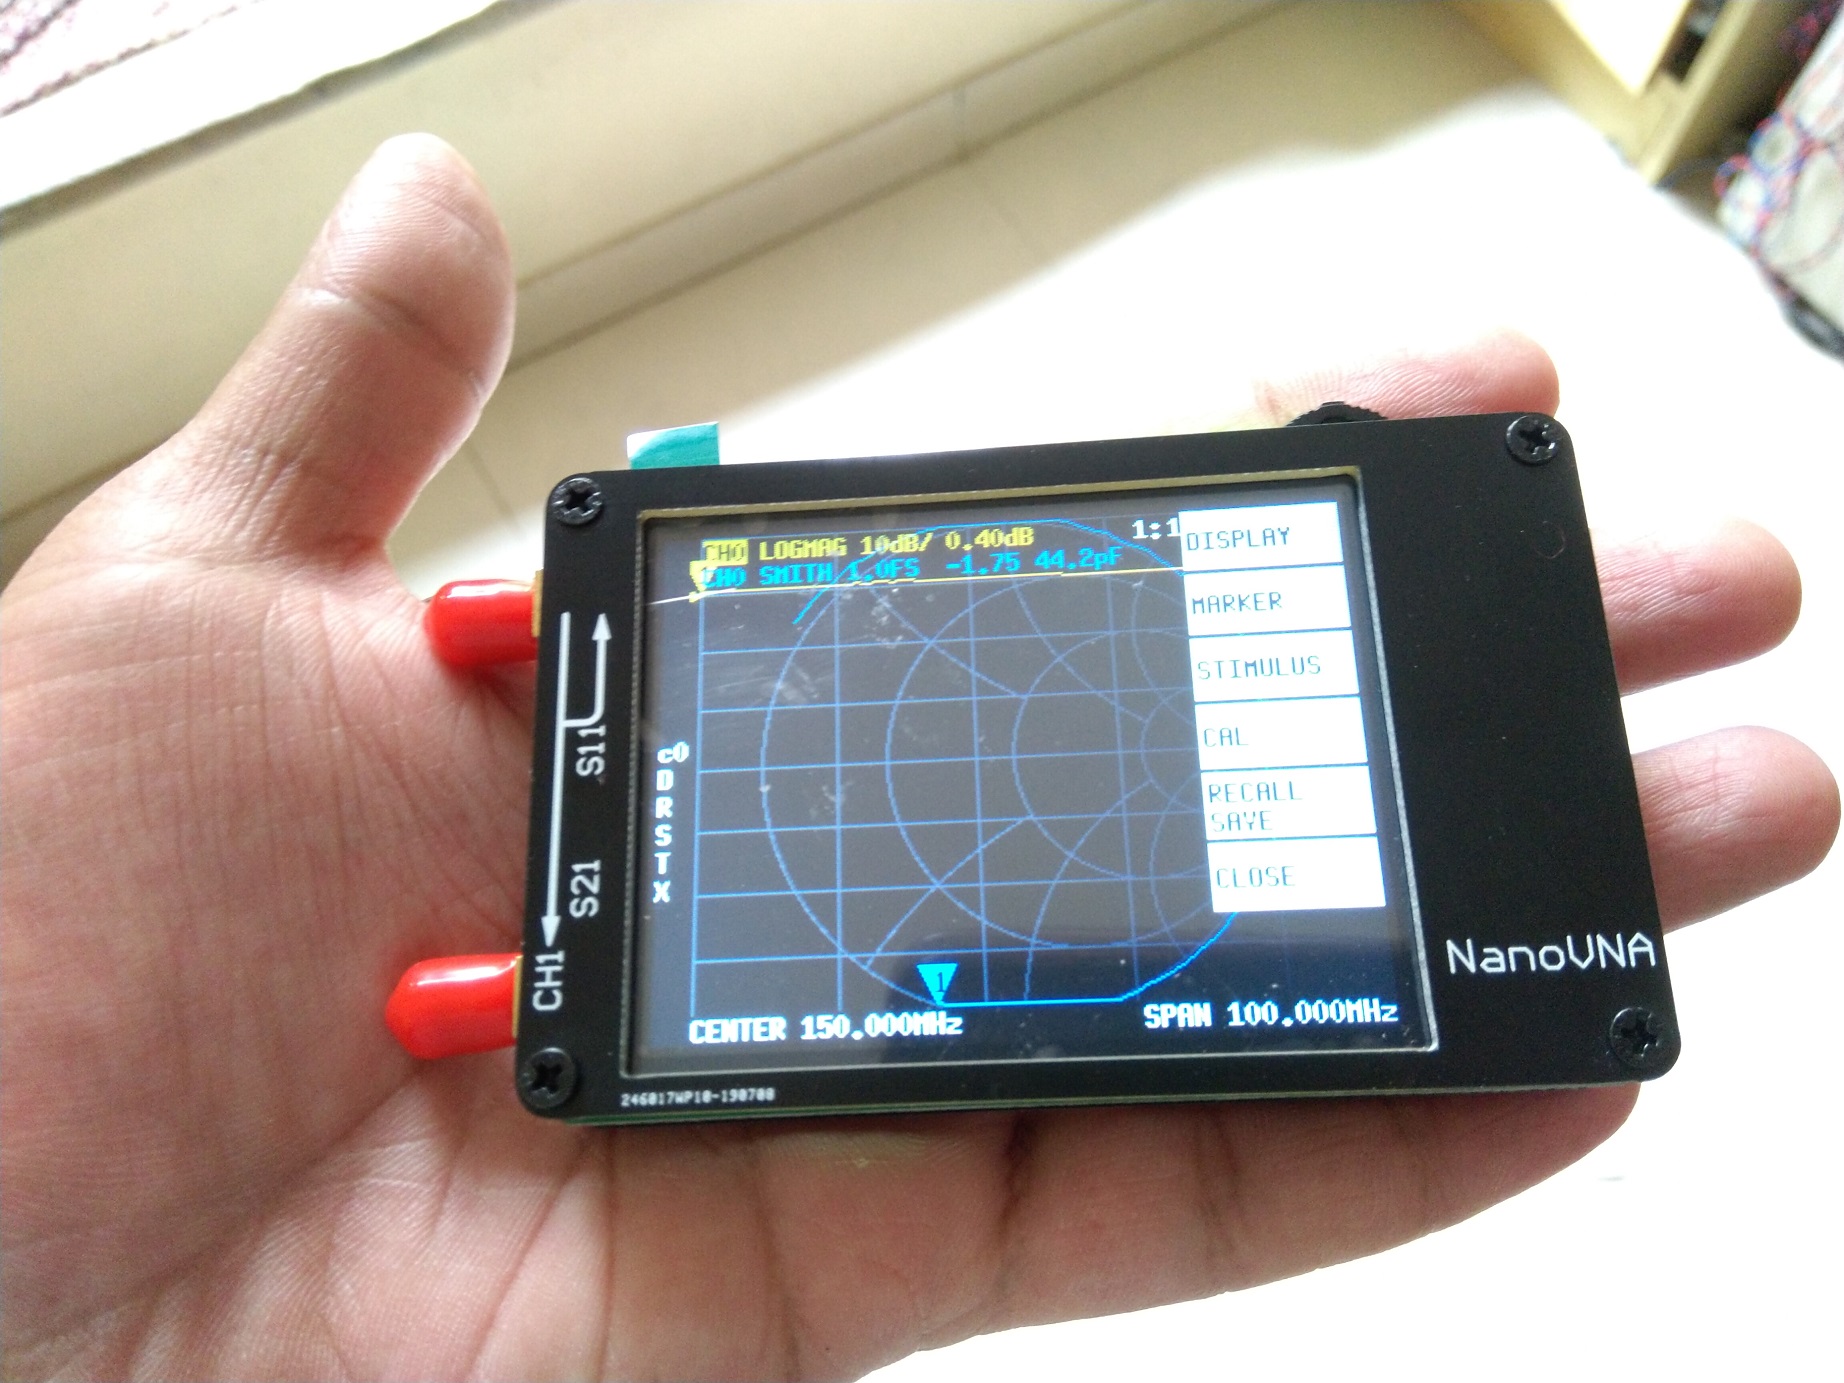
NanoVNA – What’s inside the box
The entire thing comes in a tiny box. It contains the NanoVNA device, Calibration kit, two SMA cables, and a USB type C cable.
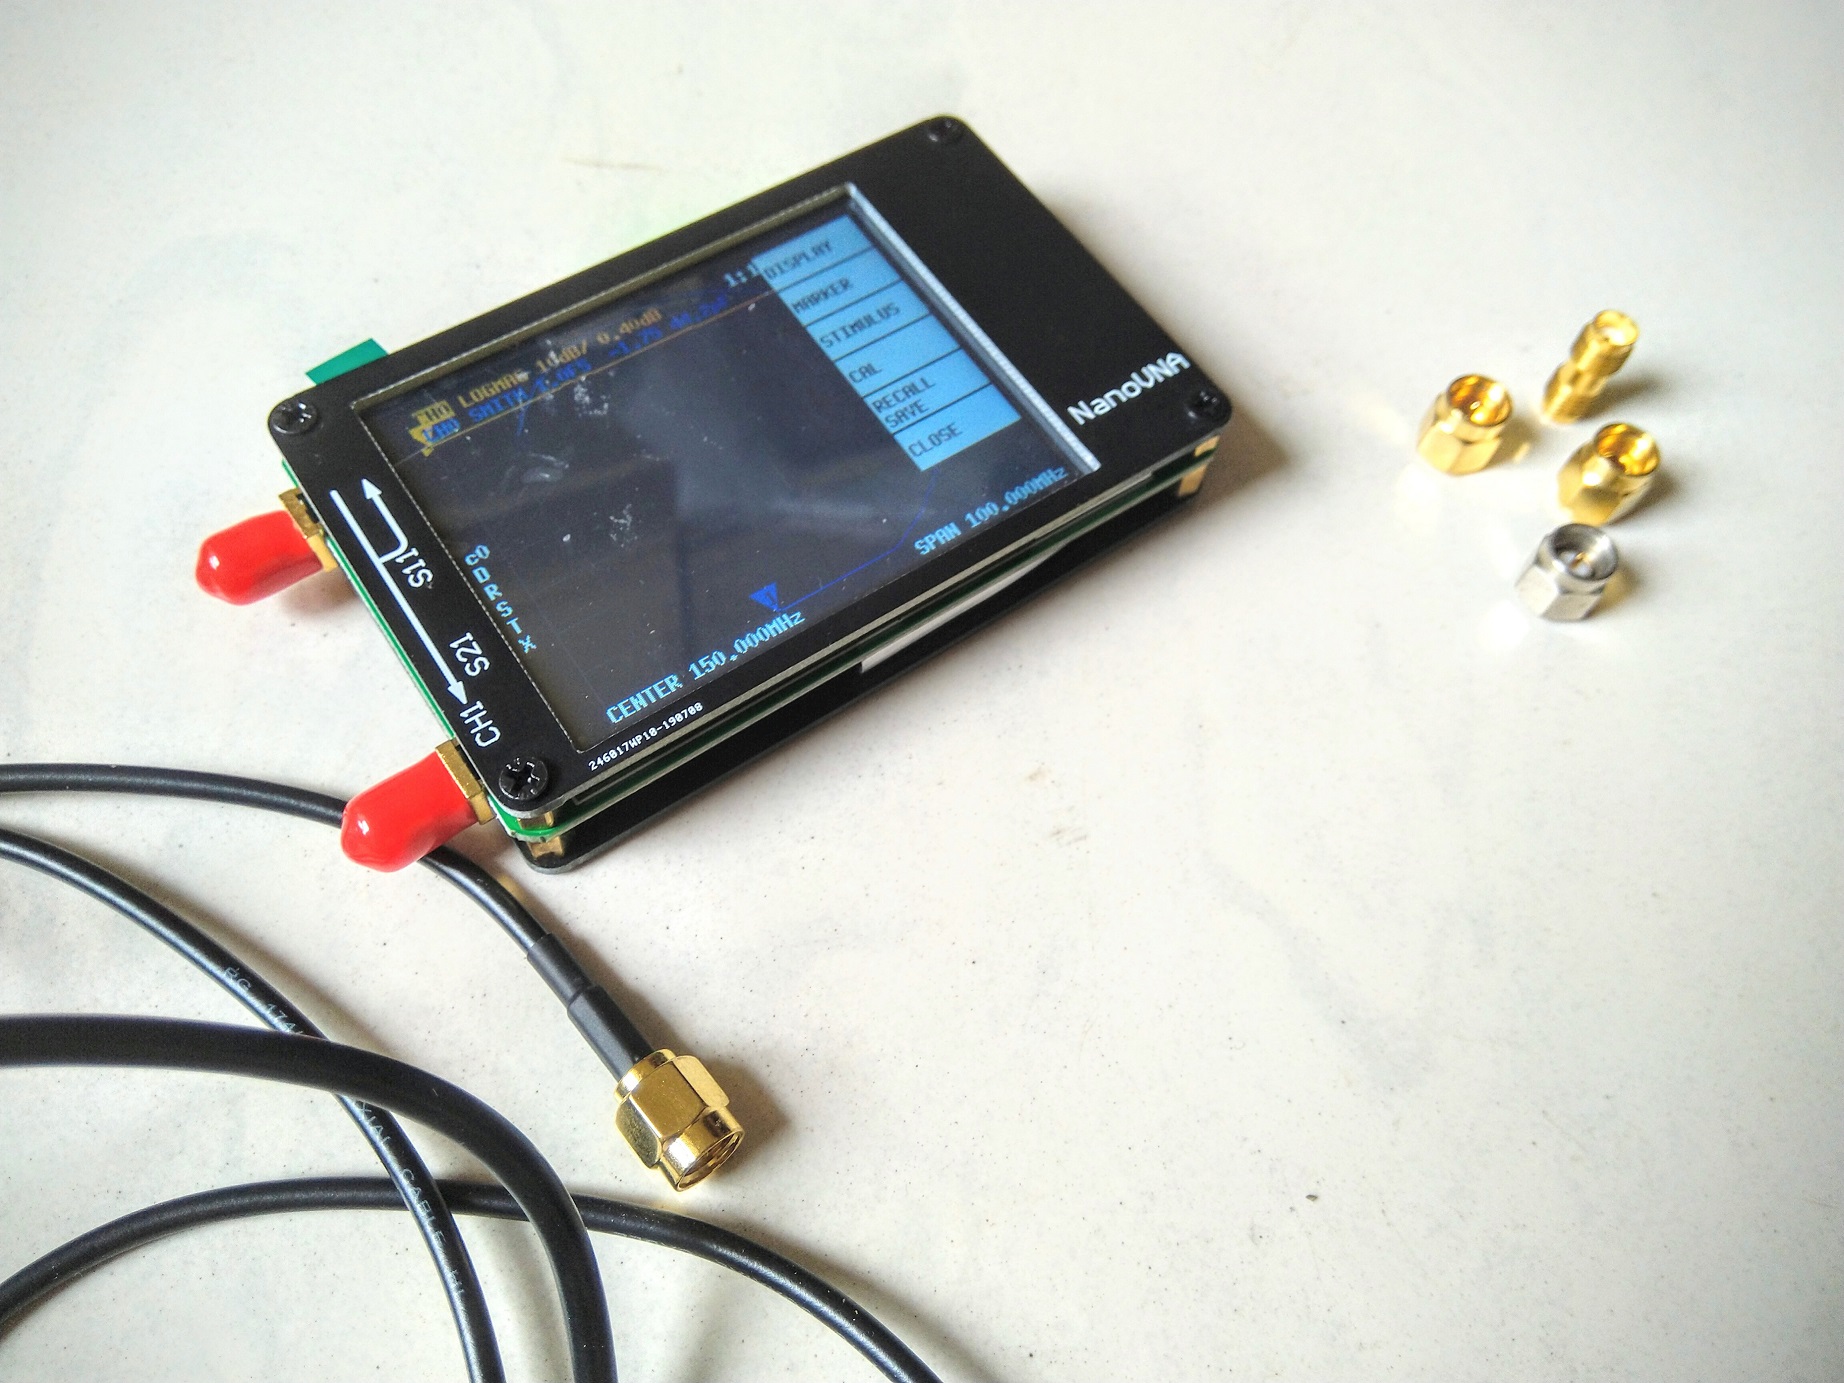
The Calibration kit looks like an okay for something this low cost. RG174 SMA cables should work fine for the frequency range we are talking. Everything comes well packed inside a tiny cardboard box. Furthermore, the nanoVNA comes with two user input options, one is the tiny swiveling knob and the other is the touch screen. The first time I turned this thing on, I did not expect it to have a touch screen. I relied on the knob to navigate through the menus. I found it cumbersome to use and the knob felt delicate. Correspondingly, I was afraid I might break it and render the device useless. Accidentally, my fingers touched the screen and I discovered the menu popup. A touch screen on such a cheap little device absolutely surprised me! UNEXPECTED!
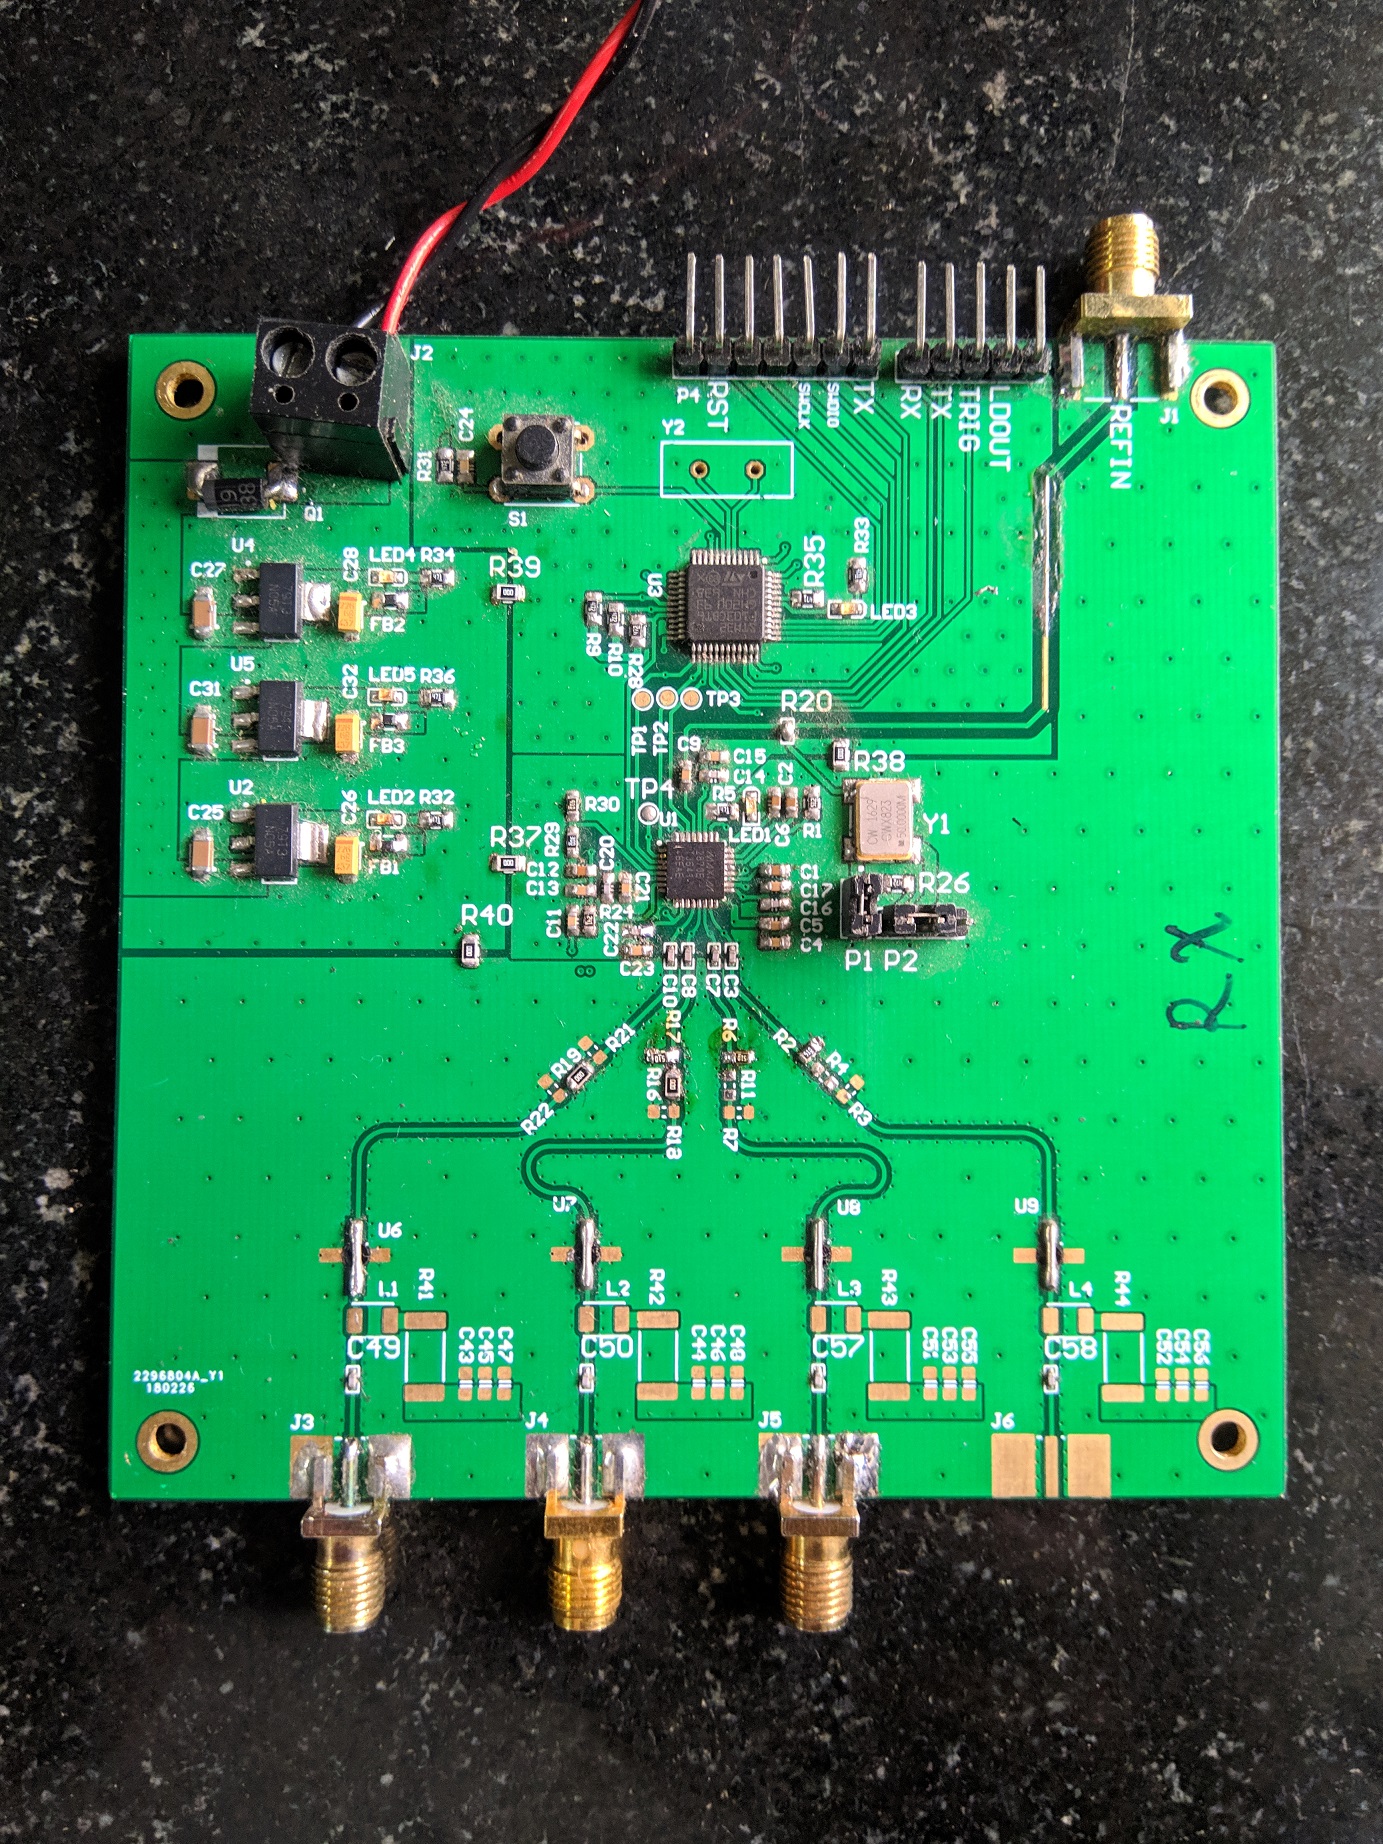
The NanoVNA is powered by a tiny 300mAh Li-ion battery. A USB Type C is a cable that is used to charge this battery quickly. You can check out the GitHub link if you want to dive into the circuit. Just to give a brief overview, the circuit has an STM32F07 controller which runs ChibiOS (an embedded OS) running a basic GUI. A TLV320AIC34 audio codec acts like the multi-channel data capture unit. It samples the reference channel, reverse power channel and the through a channel. It then forwards the samples to STM32 over I2S interface. Simultaneous sampling of all channels makes signal processing easier. Three-channel oscillator chip, Si5341 generates all the necessary RF signals including the STM32 clock.
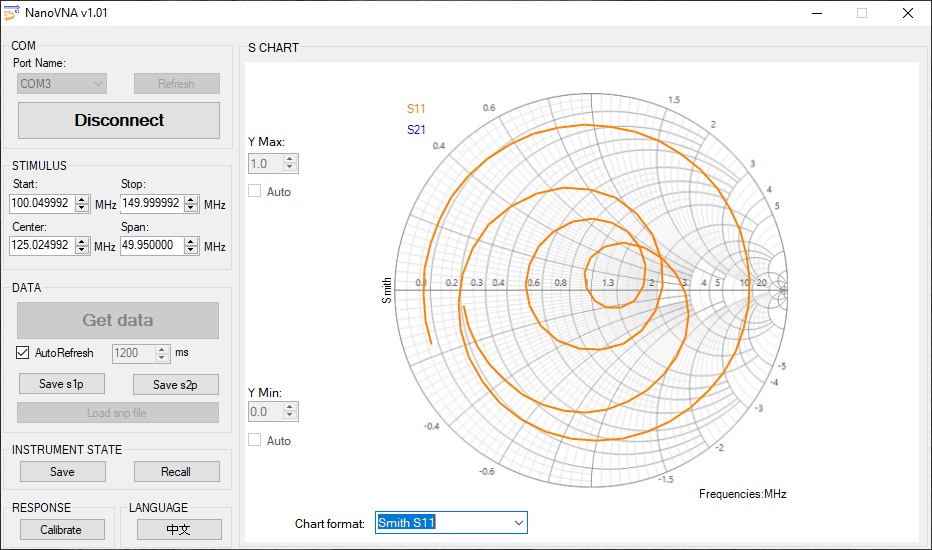
NanoVNA Calibration
Readers who have handled a network analyzer know that it needs to be calibrated before making any measurements. The USB-C connector also operates as a USB COM port. This allows the users to have computer software to view the measurements on a larger screen. It also allows us to carry out calibration quite easily. You can download the VNA PC software from the given link.
A short video below should explain to you how to calibrate the device.
Operating the device is extremely simple and user-friendly. A quick Short-Open-Load-Through calibration enables you to carry out the measurements in no time. You can also save the calibration and recall it later. It is important to note that there could be a slight error in the display when loading the saved calibration after a cold start. I believe that the S-parameter error has to do with the temperature of the reference oscillator. Nevertheless, the measurements are perfectly usable. If such a small error bothers you, then you should be looking at something more expensive to suit your needs. Surprisingly, the nanoVNA saves the last used frequency range and calibration settings only to load it all the next time you start your device. This proves to be very useful when you have a very fixed set of the frequency range to work on.
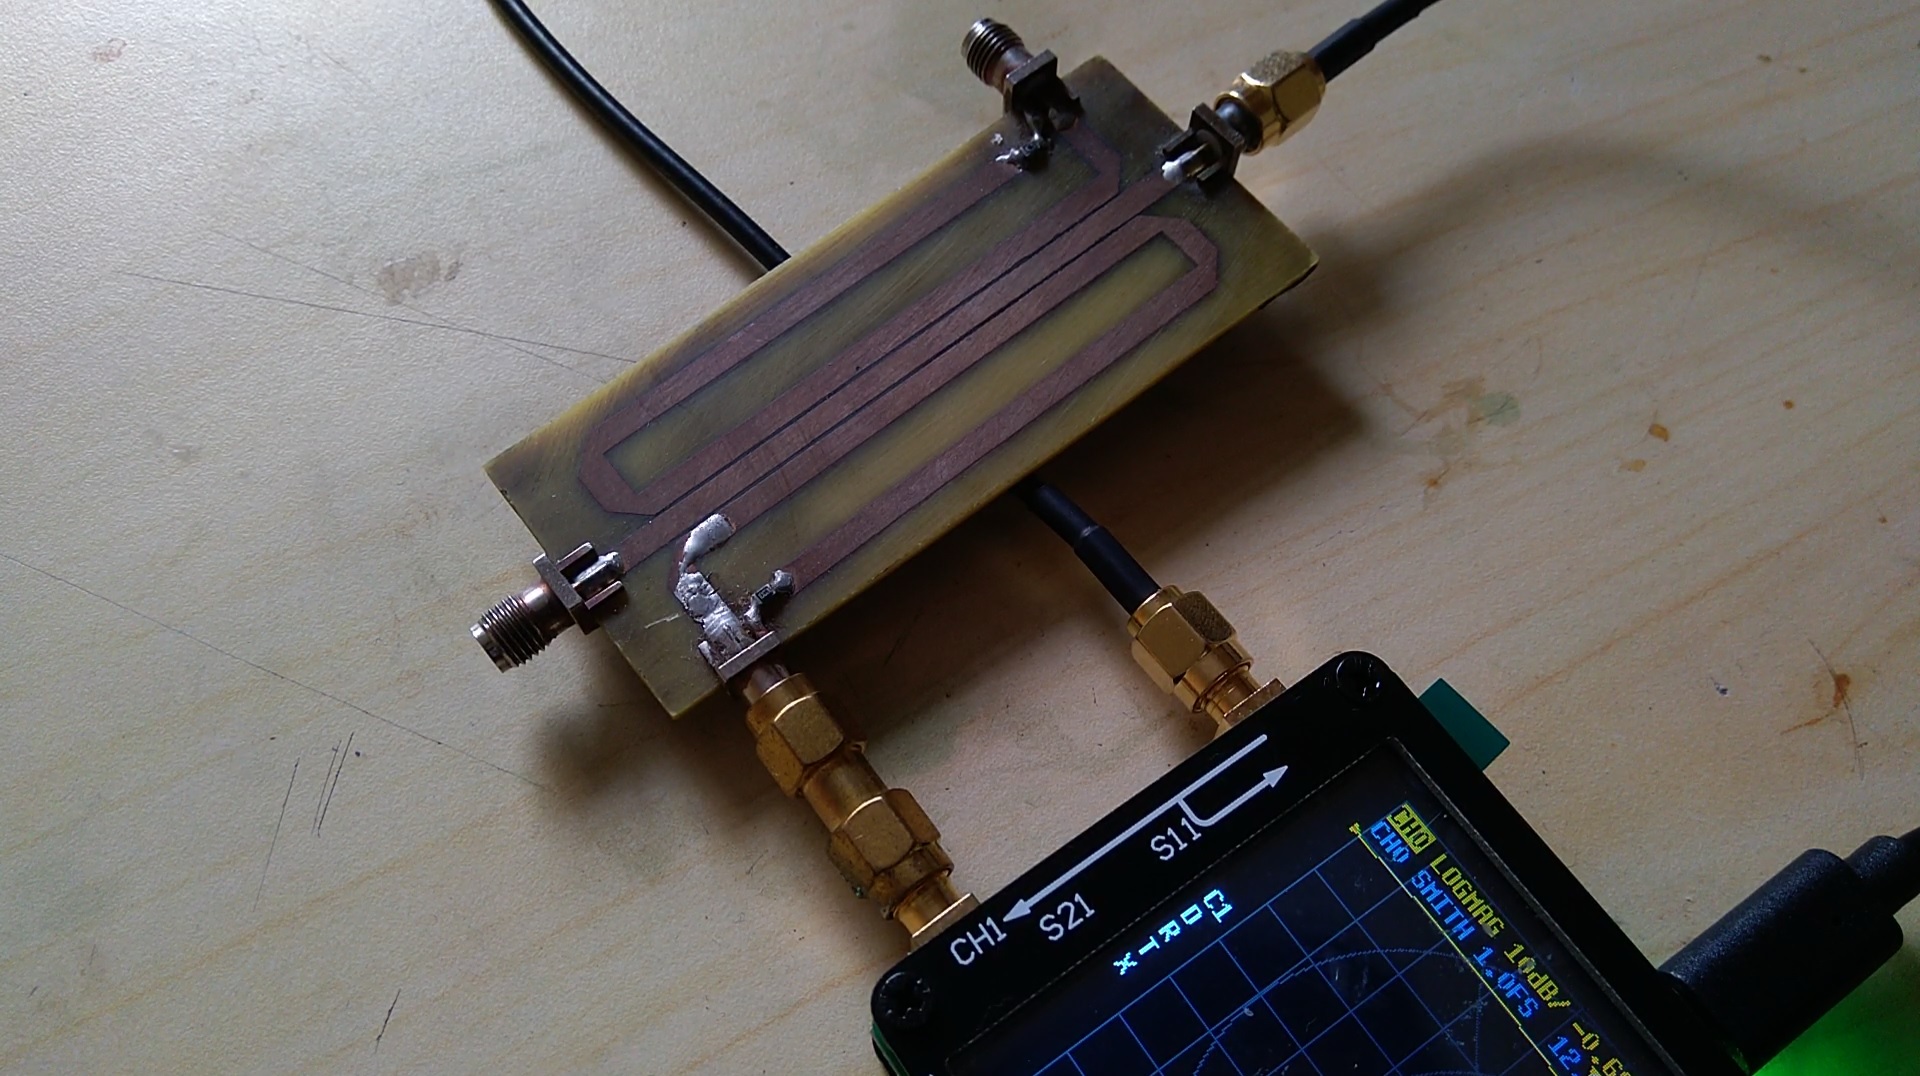
Doing practical measurements
While recording the video, I did two measurements, one on the home-brewed directional coupler and another measurement on a shabbily made QFH antenna made for 137MHz.
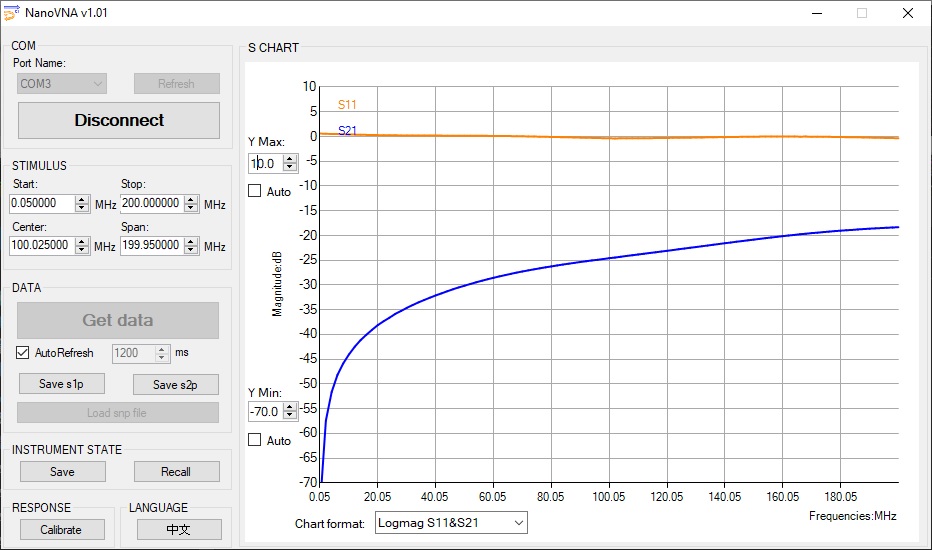
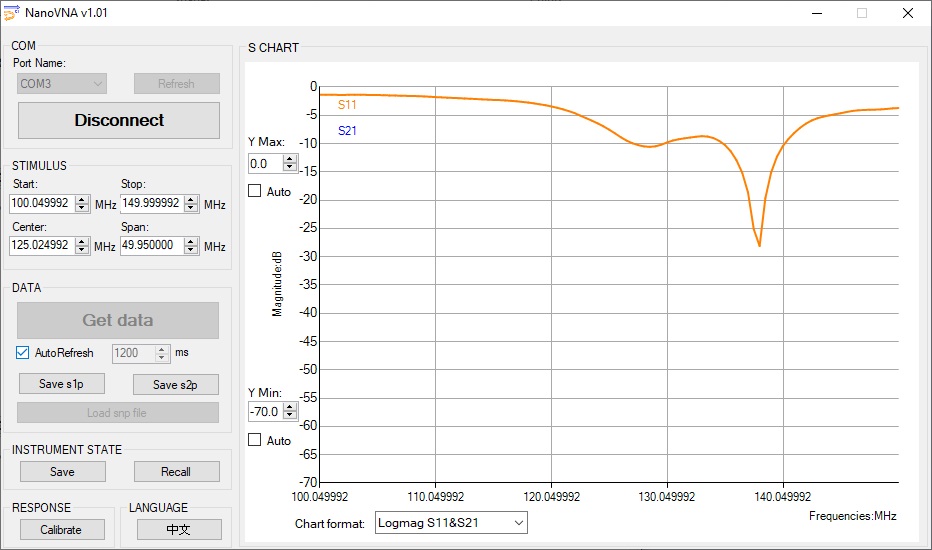
The QFH antenna was designed to work at 137MHz but never tested. Today, for the first time I saw the true performance of the antenna I made months ago. Apparently, the lowest return loss of -29dB occurred at 138MHz. A -10dB bandwidth occurs between 135MHz and 140MHz.
Conclusion
The NanoVNA has really awestruck me. The kind of performance seen at this price point is beyond something I ever expected. Apart from coming in a really rudimentary, PCB mounted structure, everything else has blown my mind. I have nothing further to say other than, GO GET IT! Click here if you want to know how it compares to a $50,000 Keysight VNA?

Fantastic graphs…
Very informative..thanks for sharing
hola muy buen informe sobre el Nano vna , saludos
I just bought this and was amazed at the features. I DO NOT KNOW ANYTHING ABOUT VNA’S. But I will learn. I wanted something to check the swr of a multitude of antennas and to tell me the resonant frequency of my antennas. Compare $65 to over $300. Easy to see why this is a bargain. Also I look at the money I paid for this as a cheap investment in education.
Good blog post. I certainly appreciate this site. Continue the
good work!
nanoVNA-F is th best in class