
Setup Vitis HLS 2022.2 and OpenCV on Windows 11 OS

Primarily, there is plenty of support to operate Vitis HLS and OpenCV on the Linux environment. This is mainly because of the ease of use on Linux. On Windows operating system, however, the story isn’t straightforward. I struggled a lot to get the two to work together finally. The lack of a proper guide sets you back from using Vitis HLS + OpenCV setup on Windows environment. Prior to Vitis HLS 2020.x, OpenCV came bundled with the installation. One could use it right out of the box after installation and you did not need to carry out any other steps. I even wrote a post a long time back, demonstrating Vivado HLS. I intend for this article to help other struggling souls to find a relatively clear guide on installing OpenCV for Vitis HLS 2022.
Installing OpenCV from source code
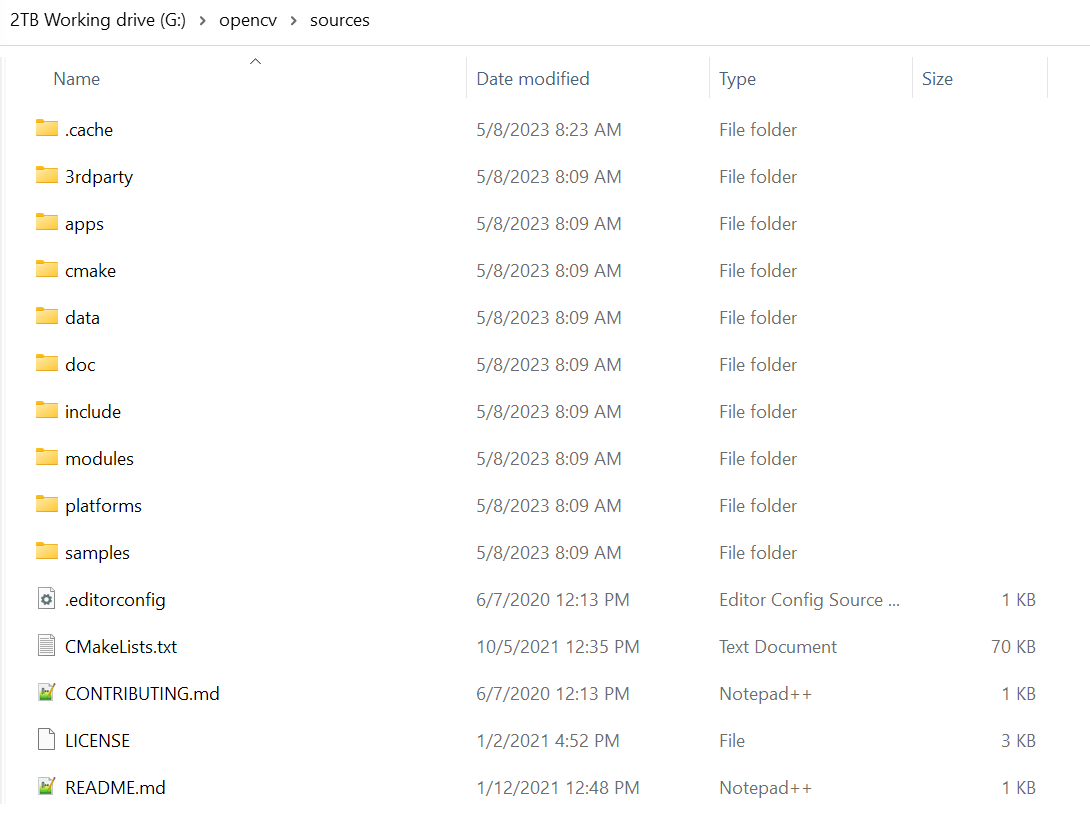
It’s important we compile OpenCV on Windows from sources. Download the OpenCV sources from this link. This links to an executable file. If you happen to be behind a firewall, you may prefer to download the source zip from github. Either way, you end up with the OpenCV sources. I ran the executable and gave it a path. It extracted all the sources to the given path.
We need two more tools to build OpenCV; MinGW and CMake.
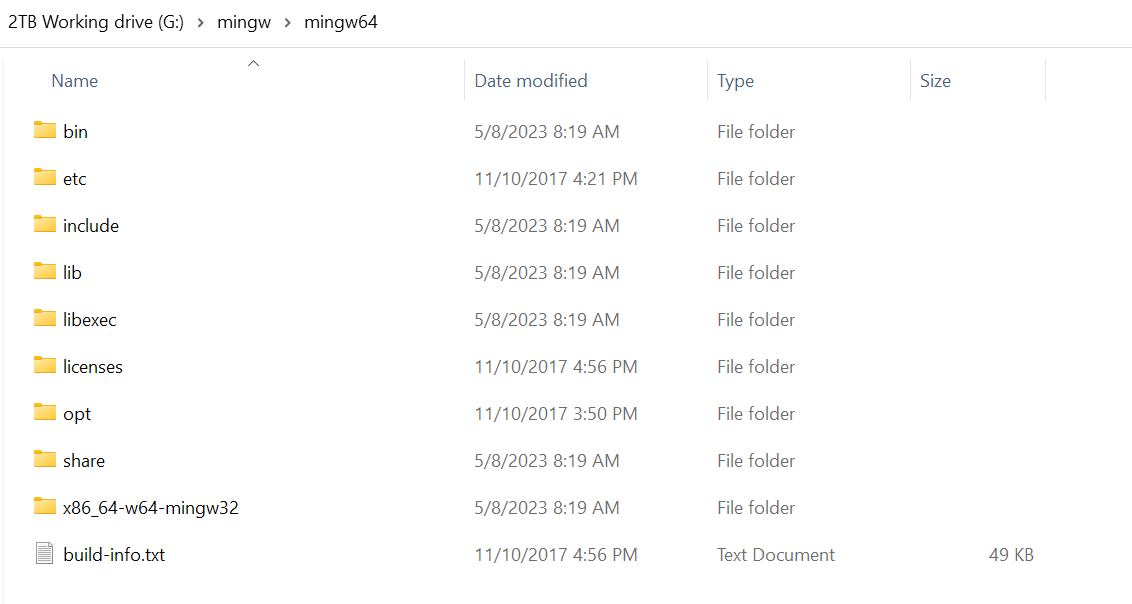
Extract MinGW files somewhere. It looks something like this.
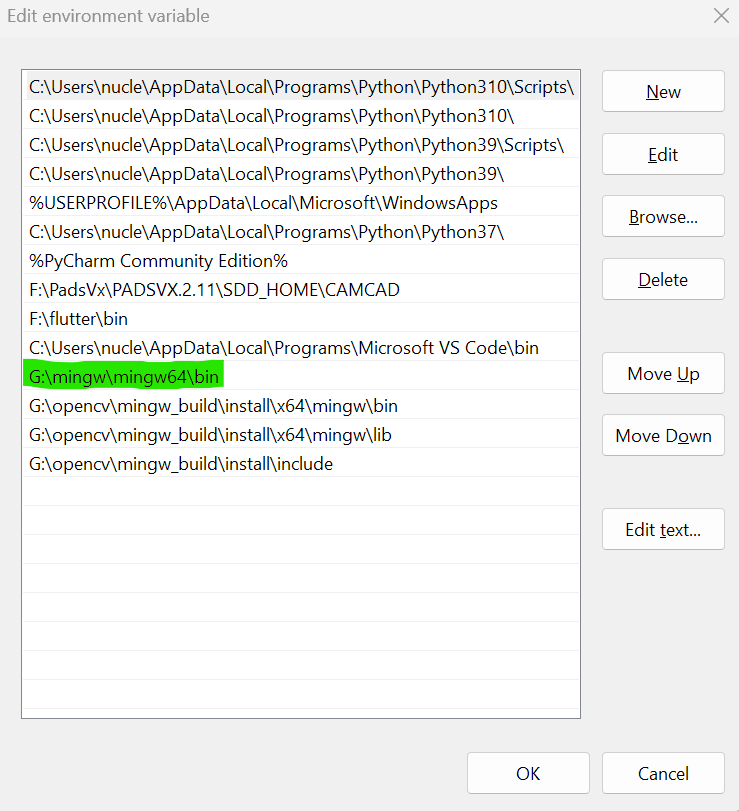
Add MinGW to your Environment variables. The path to the MinGW bin should be added to the Path variables.
Inside the OpenCV folder, create a new folder called “mingw_build”. It could be any name you wish.
Now, it’s time to install Cmake-gui. Run the installer and let it install. After completing the installation, run Cmake-gui through the start menu.
In the sources field, choose the OpenCV source path. The source path should be something like I showed above.
In the second field, it asks where you want to build the binaries. Here, you select the “mingw_build” directory that we created previously. If all goes well, you should be able to click the “Configure” button and end up with this screen.

Once you see the “Generating done” message, you can click on “Generate”.
Go to the mingw_build directory and fire up a command prompt window. In case you don’t know, Shift + right click > Open in terminal here. In case you don’t have the terminal, you should see a message to open it in PowerShell or command prompt. Anything will do.
In the Terminal window enter the following command.
mingw32-make
This process takes a while to complete since it actually compiles the C source files into object files. When you’re done with 100% success with the previous command we can proceed ahead.
mingw32-make install
This creates the final binary files required to actually use OpenCV in Windows environment.
Vitis HLS related configurations
We are halfway done to actually using Vitis HLS and OpenCV for our projects. Let’s configure the rest of the setup. Here, I am already assuming you installed Vitis 2022.2 or higher.
To be able to use OpenCV, we need to install a few environment variables again.
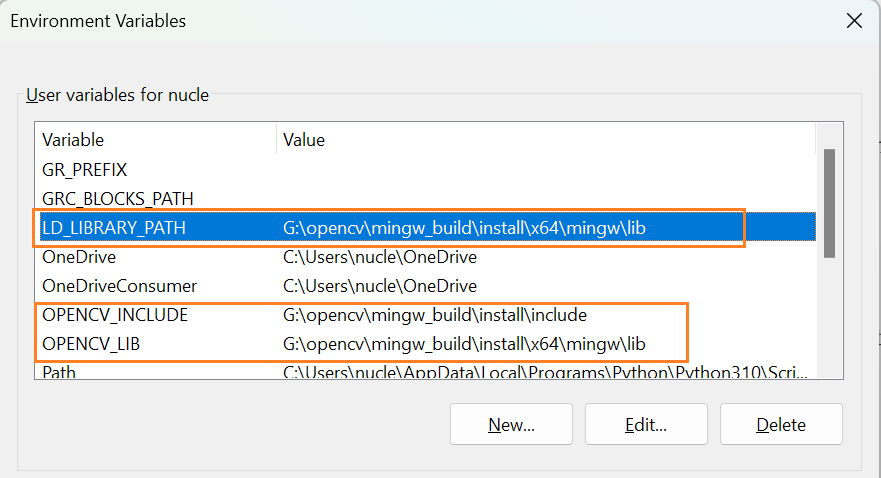
Go to Environment variables like earlier and set the following variables:
- LD_LIBRARY_PATH – <Path to OpenCV>\mingw_build\install\x64\mingw\lib
- OPENCV_INCLUDE – <Path to OpenCV>\mingw_build\install\include
- OPENCV_LIB – <Path to OpenCV>\mingw_build\install\x64\mingw\lib
I found out that it’s actually easier to create a HLS project through the tcl script using the command line interface. Finally, when you have a project created, you can quickly jump to using the GUI.
Creating a project through the Command line script
Fire up Vitis HLS in command line mode. You can do that by typing Vitis HLS 2022.2 command prompt and that fires up the command interface of Vitis HLS shell.
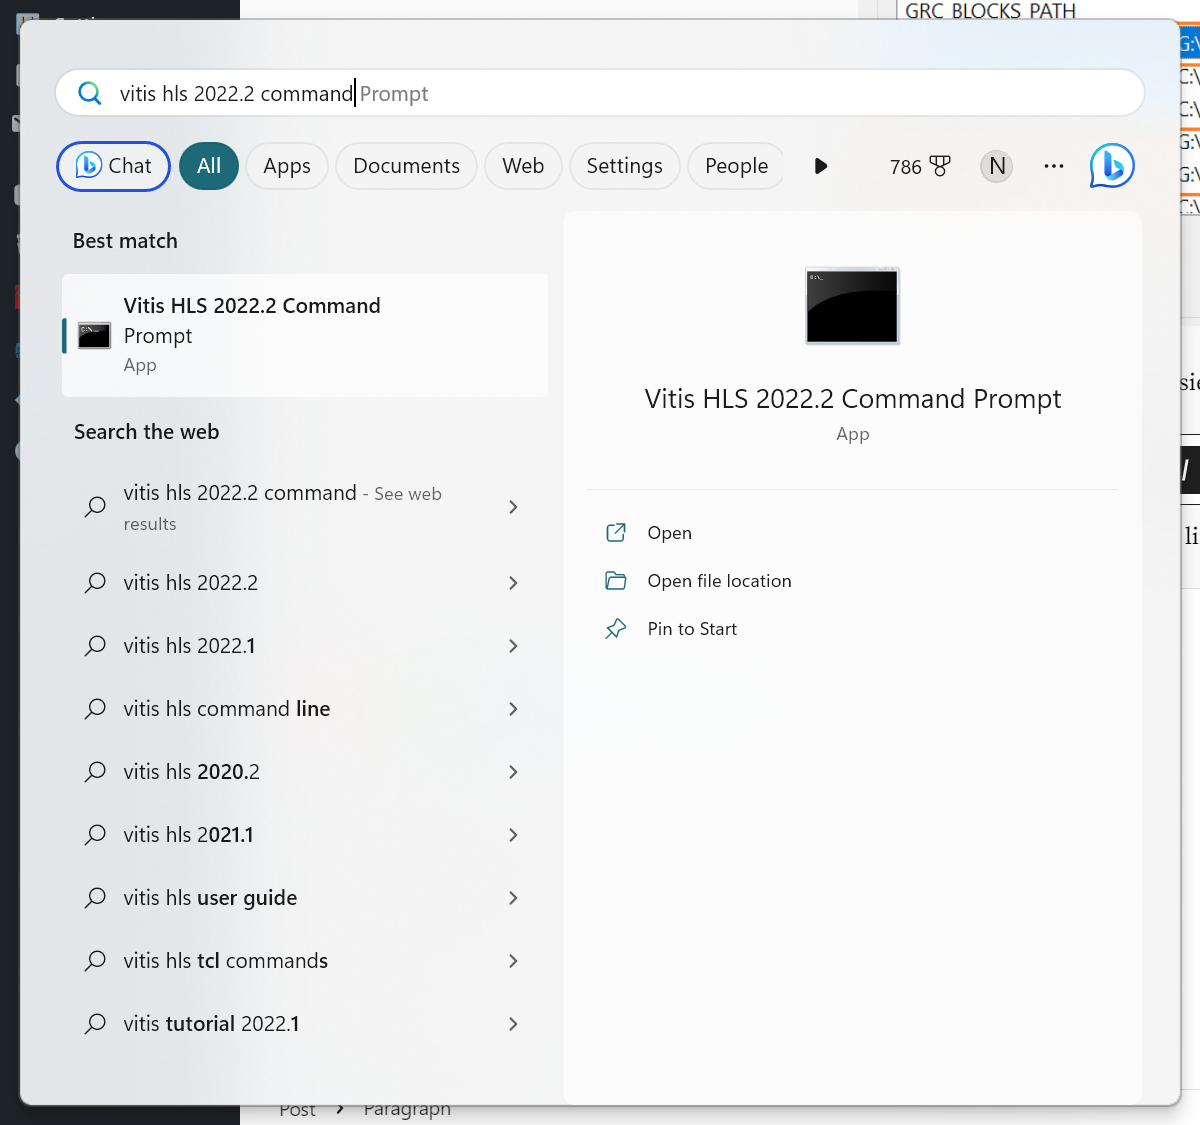
You can also launch Vitis HLS in command prompt mode by navigating into the folder and launching it there.
Next step, download the Vitis Libraries from github either through the git command line or directly by downloading the zip.
git clone https://github.com/Xilinx/Vitis_Libraries.git
For us, we are concerned with the “vision” libraries. Make sure you download the library because without this our projects won’t work.
Edit the tcl file for our project
Like I said earlier, we need to run the tcl file because this is an easier approach. We will switch to GUI mode later.
|
1 2 3 4 5 6 7 8 9 10 11 12 13 14 15 16 17 18 19 20 21 22 23 24 25 26 27 28 29 30 31 32 33 34 35 36 37 38 39 40 41 42 43 44 45 |
# ------------------------------------------------------------------------------ # Vitis Vision and OpenCV Libary Path Information # ------------------------------------------------------------------------------ #Path to project directory (EDIT) set XF_PROJ_ROOT "J:/XilinxProjects/HLS_workspace/test_project" #Path to OpenCV include folder (EDIT) set OPENCV_INCLUDE "G:/opencv/mingw_build/install/include" #Path to OpenCV lib (EDIT) set OPENCV_LIB "G:/opencv/mingw_build/install/x64/mingw/lib" # ------------------------------------------------------------------------------ # Vitis HLS Project Information # ------------------------------------------------------------------------------ #Path to project directory (EDIT) set PROJ_DIR "J:/XilinxProjects/HLS_workspace/test_project" set SOURCE_DIR "$PROJ_DIR/" #Name of your project (EDIT) set PROJ_NAME "hls_test" #The HLS top level function (EDIT) set PROJ_TOP "axiconv_accel" #solution name (EDIT) set SOLUTION_NAME "sol1" # Device part number (EDIT) set SOLUTION_PART "xczu2eg-sbva484-2-e" # Clock (10 ns) (EDIT) set SOLUTION_CLKP 10 # ------------------------------------------------------------------------------ # OpenCV C Simulation / CoSimulation Library References #------------------------------------------------------------------------------ set VISION_INC_FLAGS "-IJ:/XilinxProjects/HLS_workspace/Vitis_Libraries/vision/L1/include -std=c++0x" #Path to vision library include folder set OPENCV_INC_FLAGS "-I$OPENCV_INCLUDE" set OPENCV_LIB_FLAGS "-L $OPENCV_LIB" # Windows OpenCV Include Style: # The number 3416 is the version number. Yours could be different. set OPENCV_LIB_REF "-lopencv_imgcodecs3416 -lopencv_imgproc3416 -lopencv_core3416 -lopencv_highgui3416 -lopencv_flann3416 -lopencv_features2d3416" |
Read the comments carefully and edit the variables accordingly. You would definitely have different directory paths and those should reflect in this file correctly. The last line that declares the OPENCV_LIB_REF calls several openCV modules. For Windows Environment, they need to be invoked with their version numbers. It’s 3416 in my case. It could be something different if you happen to use an older or a newer version.
Creating a new project from examples
The L1 examples contain plenty of projects to try. I would be using the “axiconv_accel” project and recreating it as a starting point for a bigger project.
- Create a new folder in the workspace directory. Copy all “run_hls_standalone.tcl”, and .cpp and .h files from the vision/L1/examples/axiconv folder.
- Start Vitis HLS in command prompt mode and navigate to the project directory.
- At this point, you should edit your tcl script ready with the correct paths.
- Invoke the tcl script and let it do its job.
|
1 2 3 4 5 6 7 8 9 10 11 12 13 14 15 16 17 |
PS G:\Xilinx\Vitis_HLS\2022.2\bin> .\vitis_hls -i ****** Vitis HLS - High-Level Synthesis from C, C++ and OpenCL v2022.2 (64-bit) **** SW Build 3670227 on Oct 13 2022 **** IP Build 3669848 on Fri Oct 14 08:30:02 MDT 2022 ** Copyright 1986-2022 Xilinx, Inc. All Rights Reserved. source G:/Xilinx/Vitis_HLS/2022.2/scripts/vitis_hls/hls.tcl -notrace INFO: [HLS 200-10] Running 'G:/Xilinx/Vitis_HLS/2022.2/bin/unwrapped/win64.o/vitis_hls.exe' INFO: [HLS 200-10] For user 'nucle' on host 'stark' (Windows NT_amd64 version 6.2) on Mon May 08 22:55:52 +0530 2023 INFO: [HLS 200-10] In directory 'G:/Xilinx/Vitis_HLS/2022.2/bin' HLS_workspace HLx_Examples-master vitis_hls> cd J:/XilinxProjects/HLS_workspace/test_project/ vitis_hls> source run_hls_standalone.tcl |
You may end up with an error after this. This is because of a file called “xf_config_params.h” residing in the “tests” folder of the L1 examples. We don’t need this file but optionally you can include it in your compilation.
We are now ready to proceed with the GUI.
- Start Vitis HLS 2022.2 GUI.
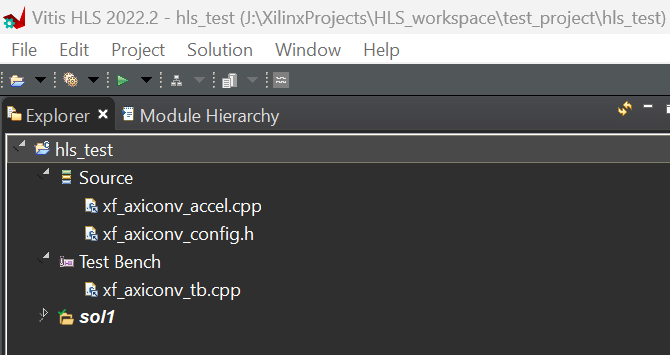
- Open project > Select the project folder with the name “hls_test”. This is where all the project settings reside that are required for the GUI to pickup and continue.
- I edited the program a little to get it to run. Follow the edits as shown below.
- Comment the “xf_config_params.h” line.
- Add the following lines in the .h file.
|
1 2 3 4 5 6 7 |
#define MPC 0 // Multiple Pixels per Clock operation #define SPC 1 // Single Pixel per Clock operation #define GRAY 1 #define RGB 0 #define XF_CV_DEPTH_IN_1 2 |
You should be able to see the project source in the GUI.
Click the Green arrow and click on “C Simulation”. If all goes well, it should finish the simulation and return no errors.
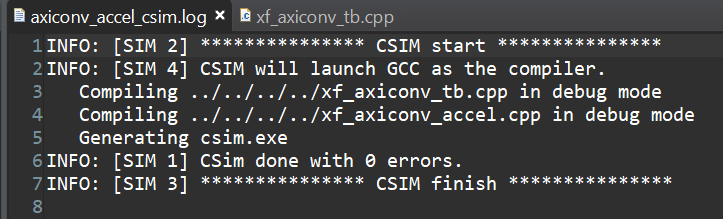
This shows that we are able to use the vision libraries in Vitis HLS with OpenCV in the Windows Environment. Now, the testbench takes and image and outputs and image. It also prints some text that we didn’t see when running it. The fix is simple and you should be able to figure that out.
Leave your comment below if you find any errors in my post and also any other tips that others may find useful.
Hi,
Thanks for the article/tutorial however may I ask for clarification on the TCL file part.
“Edit the tcl file for our project”
Which TCL file exactly? Is this the run_hls.tcl in the example folder? should i make a new file? should i append the sample code?
I simply made a new file with the edits and ran the run_hls_standalone.tcl but i didnt create any project directory so I was confused.
On the create a new project from examples part, i should copy the two .cpp and two .h files and the (edited run tcl file) so 5 files total?
Thanks! Hopefully this works since I’ve been trying to make HLS work on my machine
You can see the “code” right below the “Edit the TCL file” heading. Thats the tcl file. You can copy the text and paste it in a file called “run_standalone.tcl”.
Everything in the post is with respect to this tcl file. Hope you got it now.
after running the tcl file I am getting :-lopencv_imgcodecs3416 -lopencv_imgproc3416 -lopencv_core3416 -lopencv_highgui3416 -lopencv_flann3416 -lopencv_features2d3416
what error is this and where could I have been mistaken, please help……..i am stuck at this point since so many days. I have tried via GUI also…..but not working
Can you paste the full message here? It seems that your script is working but I do not know what messages you are getting further.
Try to follow the instructions very carefully.